The bootloader area of a XIAO is not write-protected when it is shipped from Seeed. If this area is overwritten for any reason, a XIAO will lose its COM port, will not respond to “double reset”, and will be bricked. A bricked XIAO can be repaired by re-writing the bootloader.
All I needed was a XIAO uploading “simple_daplink_xiao.uf2”, OpenOCD that comes with Arduino IDE, and some script files that I attached. Connect a bricked XIAO and a DAPLink_XIAO with four wires, and double-click “flash.bat” to re-write the bootloader, I was able to repair a bricked XIAO. After re-write, the bootloader area will be set to protect so that it will not be overwritten at least. If I don’t want to protect the bootloader area, I can use “flash_unprotect.bat”.
I have tried it with 6 XIAOs and have been able to use it without any problems so far. You can use the attached “SAMD21_BootloaderProtectCheck.ino” to see if the bootloader area is protected.
Unzip “XIAO_BootloaderRescueTool_DAPLink.zip” to an appropriate location.
Open the “flash.bat” with an editor and modify it to suit your PC.
This file is written to match the standard Arduino IDE installation location, so you will need to change
Modify the directory containing “openocd.exe” and “cmsis-dap.cfg” as necessary.
Modify the “XXXXXXXX” username part.
Installing DAPLink
Connect a XIAO used as DAPLink to your PC and double-reset it.
An explorer window of Arduino drive will open.
Drop “simple_daplink_xiao.uf2” in this window.
Now, a XIAO can be used as DAPLink.
Re-write the bootloader
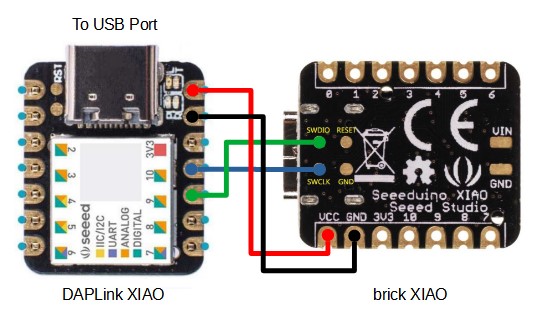
Connect a DAPLink_XIAO and a bricked XIAO with 4 wires.
Connect a DAPLink_XIAO to your PC and double-click “flash.bat”.
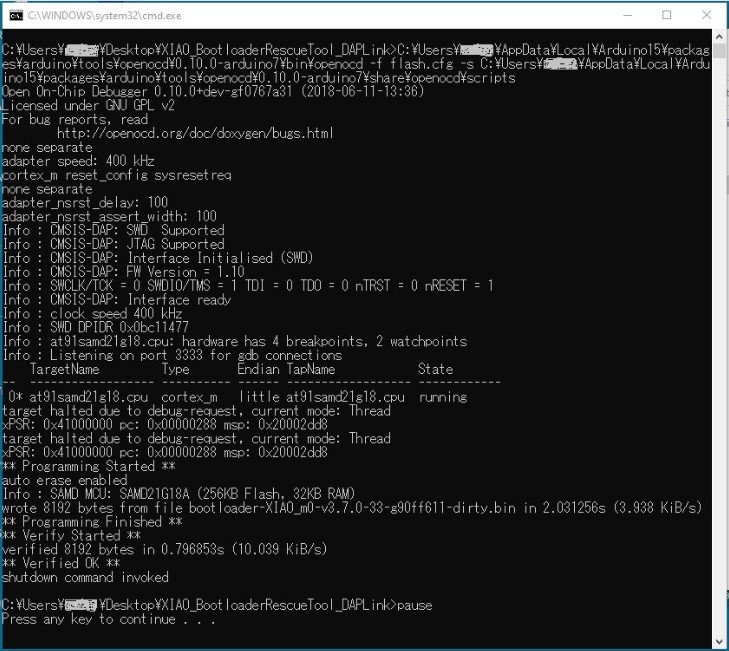
A command prompt will open and the bootloader will be written.
If success, the following will be displayed.
[IMPORTANT] Connect a repaired XIAO to your PC and double-reset to make your PC recognize a XIAO again.
An explorer window of Arduino drive will open.
[IMPORTANT] In Arduino IDE, tools–Port menu, mark COM port that says “Seeeduino XIAO”.
Compile and upload your sketch, and make sure a XIAO is working as expected.
If an error occurs, check Tools–Port menu. It may be unmarked, or the port number may have changed.
Greetings, thanks for the info. I don’t get the feedback you show in the console above. I edited the flash.bat to include my username, but the image below is what I get. Looks like the init fails; looks like the XIAO I am using for DAP is ok, but not communicating with the dead XIAO (I have wired leads to the SWDIO and SWCLK. Any ideas?
Yes I have wired to 5V and GND on the DAPLink KIAO just like the image above. The DAPLink XIAO has two blue lights (plugged into USB), the bricked XIAO just has one amber LED lit. I can’t put that device into bootloader mode and a COM port doesn’t show up when plugged in.
I too have confirmed the problem of not being able to write. It seems that my confirmation was insufficient.
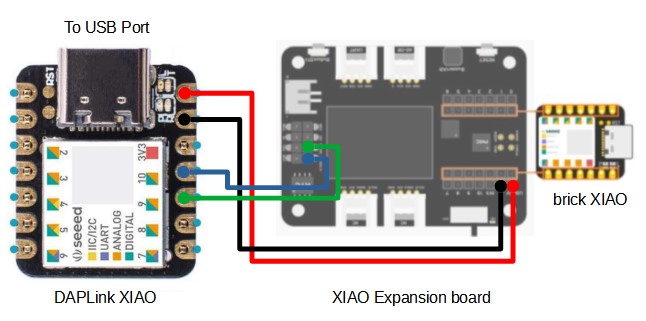
It seems that this problem occurs when connecting DAPLink_XIAO and brick_XIAO directly with wires. However, when brick_XIAO is put on the XIAO expansion board and connected to DAPLink_XIAO, it can write without any problem. The cause is still unknown at this point.
By the way, if you use ST-Link instead of DAPLink_XIAO, even if you connect directly to brick_XIAO You can write without any problem.
After a few tries, the problem no longer occurs even when wiring DAPLink_XIAO and brick_XIAO directly.
Now I can write without any problem no matter how many times I try. I think it may be a clitical timing issue.
You are right, this happen to me today for hours I couldn’t figure it out, then loader over the code and realize that my pins was set to valid pin number. I recommend to everyone facing this challenge to check your pins numbers in your code before any process.
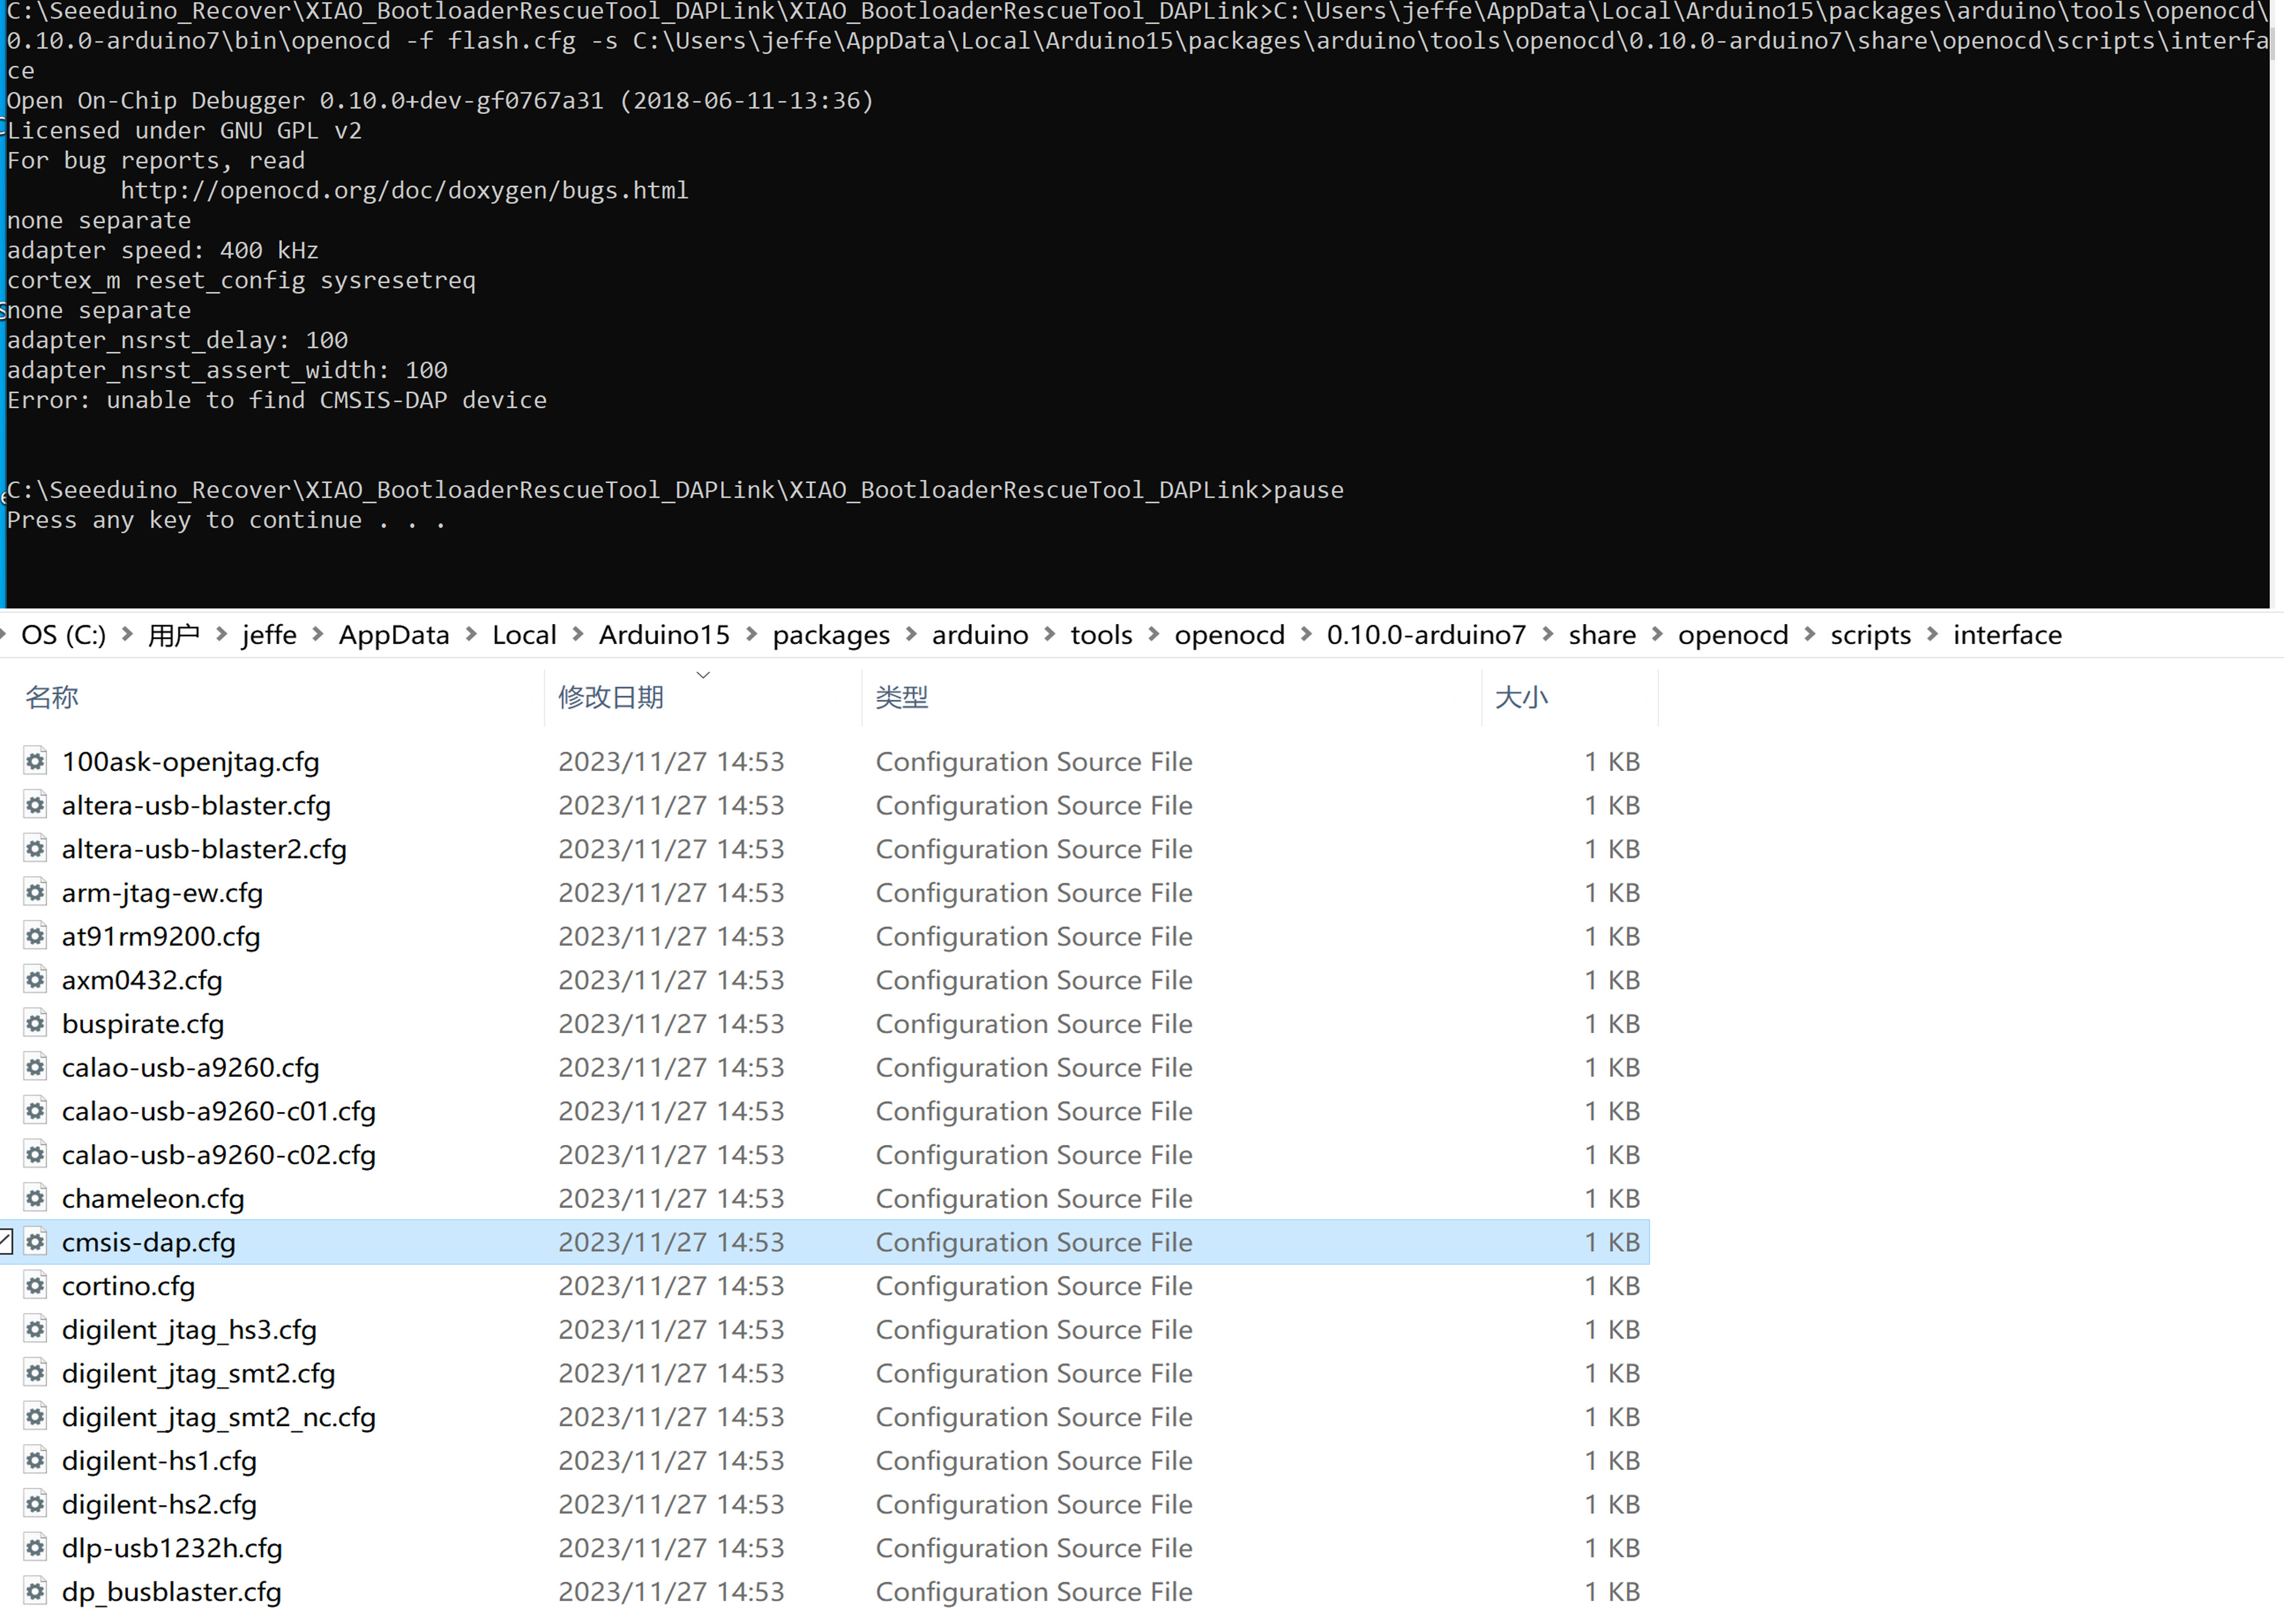
Hi, I am undergoing issues with “flash.bat”. I have modified the directory accordingly.
“cmsis-dap.cfg” file is now under “C:\Users\XXXXXXXX\AppData\Local\Arduino15\packages\arduino\tools\openocd\0.10.0-arduino7\share\openocd\scripts\interface” and I have also changed that
But it keeps giving me “Error: unable to find CMSIS-DAP device”…
“unable to find CMSIS-DAP device” is displayed when there is no DAPLink_XIAO.
Is the “simple_daplink_xiao.uf2” correctly installed on the XIAO_samd21 to be used as DAPLink?
Is the connection between Brick XIAO and DAPLink_XIAO correct?
What happens if use “0.11.0-arduino2” instead of “0.10.0-arduino7”?
Can someone help me out here, I frequently use Arduino, but have never made any modifications such as recommended here.
“Modify the directory containing “openocd.exe” and “cmsis-dap.cfg” as necessary.
Modify the “XXXXXXXX” username part.
modify it to suit your PC.”
After looking in the flash file, I found no such text. A literal step by step would be great.
I don’t know the directory structure of your PC, but in general you should only need to open flash.bat in an editor and change the two bolded parts xxxxxxxx to match your PC.
Thank you for writing this guide! This worked for me! Managed to un-brick my SAMD21. Would like to add some more notes:
On my Windows 10 machine, dragging and dropping the “simple_daplink_xiao.uf2” file causes Windows Explorer to lock up and crash the PC if the XIAO is not unplugged.
The DAPLink upload is correct when the XIAO flashes blue on 2 of its LEDs.
For PlatformIO users, download OpenOCD from here if needed, then modify the .bat file to point to the tool’s folders in “username/.platformio/packages” instead of the Arduino IDE.