How does one report a problem with the Arduino IDE and the Xiao esp32C6? The contact sensor example doesn’t work and gives an error, but I can’t seem to find any place to report it.
This is probably as good a place as any. What seems to be the problem?
I took the ‘contact sensor’ example and tried to use it. It WILL join a zigbee network, but when opening or closing contacts, it does not send any update to the controller.
I’m using Zigbee2mqtt with Home Assistant, and watching the log Z2M log and nothing shows up there after the device joins the network. I compiled the code with debug turned on in the Arduino IDE and got the following error:
→ Contact is FALSE
19:56:13.578 → [ 75885][V][ZigbeeContactSwitch.cpp:49] setOpen(): Setting Contact switch to open
19:56:13.578 → [ 75885][E][ZigbeeContactSwitch.cpp:83] report(): Fa[ 75886][V][ZigbeeCore.cpp:447] esp_zb_app_signal_handler(): ZDO signal: ZDO Device Unavailable (0x3c), status: ESP_OK
19:56:13.615 → iled to send IAS Zone status changed notification: 0x2: ERROR
The line “Contact is FALSE” is a Serial.println that I stuck in the code to keep track of what was going on.
I HAVE compiled other examples and gotten them to work, but the contact sensor elude me.
My project is simple, I want to monitor a float sensor in a tank. That’s about as basic as one can get. There is no window door sensor example, and all I want is a contact sensor for now.
On Home Assistant what converter did you use?
I think the issue may be with the fact the the Contact “Sensor” (did you mean “Switch”?) is an IAS Zone Device and as such may need to be armed by an IAS CIE device before it can be used?
It is quite straightforward to create a “Binary Sensor” and use one of the Binary Inputs to report state of a simple binary signal (eg On/Off).
You’ll need to create a suitable “extension” if using Z2M. Fortunately that’s easy now ![]()
No, I don’t think I mean ‘switch’, but it’s hard to tell what various protocols call things. It’s truly a set of contacts inside a float that close when the water rises. It’s somewhat analogous to a door sensor which is called a reed switch. So, I don’t really know what to call it, but one would think that a contact sensor would sense contacts.
If you’re correct, then the code called a ‘contact sensor’ is pretty much useless without other supporting stuff of some kind because it doesn’t send anything at all to Z2M; it throws and error instead. That part just doesn’t seem correct.
And, what do you mean by ‘converter’ ? Z2M doesn’t see anything from the contact sensor code.
Grobasoz, you got me to thinking though, maybe a binary switch would be a better approach, so I loaded up that example.
It failed also, but it was even more spectacular. When I pushed the button to change states, it rebooted. That behaviour was totally repeatable. The debug log showed:
[ 56694][D][ZigbeeBinary.cpp:70] setBinaryInput(): Setting binary input to 1
[ 56694][D][ZigbeeBinary.cpp:70] setBinaryInput(): Setting binary input to 1
Zigbee stack assertion failed /builds/thread_zigbee/esp-zboss/components/esp_
abort() was called at PC 0x42016e3d on core 0
It’s beginning to look like these examples are not ready for prime-time use. The light switch seems to work and the light bulb as well. The things I need don’t.
The binary switch worked ok for me. I did a few changes and created a simple on/off state sensor that reports to Home Assistant.
I will post the code when I get back to my office.
I have posted the code here.
Button is for Leaving network.
binaryPin is for Sensor state.
I work with the premise that the examples are just a means to get one using the tools and not meant to be “perfect” examples.
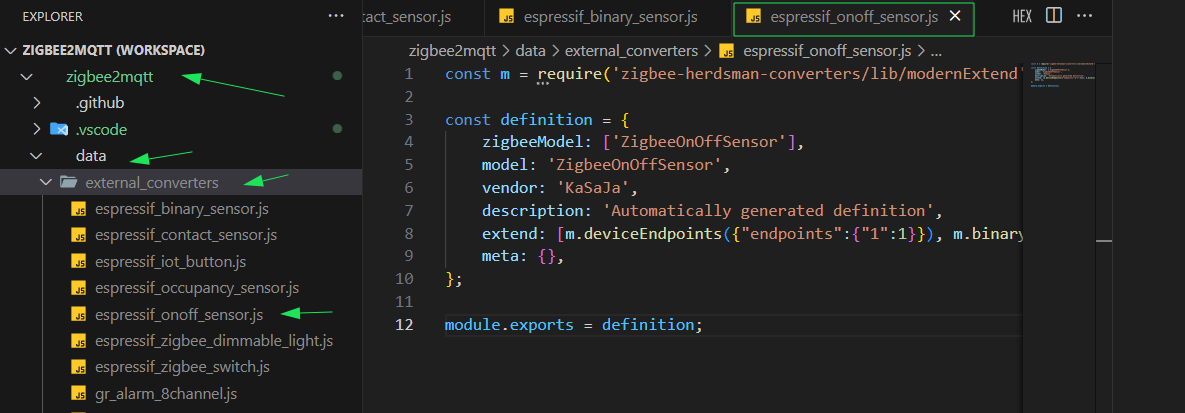
This is the external converter I used for the code.
const m = require('zigbee-herdsman-converters/lib/modernExtend');

const definition = {
    zigbeeModel: ['ZigbeeOnOffSensor'],
    model: 'ZigbeeOnOffSensor',
    vendor: 'KaSaJa',
    description: 'Automatically generated definition',
    extend: [m.deviceEndpoints({"endpoints":{"1":1}}), m.binary({"name":"Binary Sensor","cluster":"genBinaryInput","attribute":"presentValue","reporting":{"attribute":"presentValue","min":"MIN","max":"MAX","change":1},"valueOn":["ON",1],"valueOff":["OFF",0],"description":"binary_input_1","access":"STATE_GET","endpointName":"1"})],
    meta: {},
};

module.exports = definition;
Yours is very different from the example. I’m going to grab it and give it a try, but I have a question. I have no current clue what the convertor is for and what to do with it.
Where does it go, what does it do, etc. You got this to work, and I want the same kind of thing. HELP
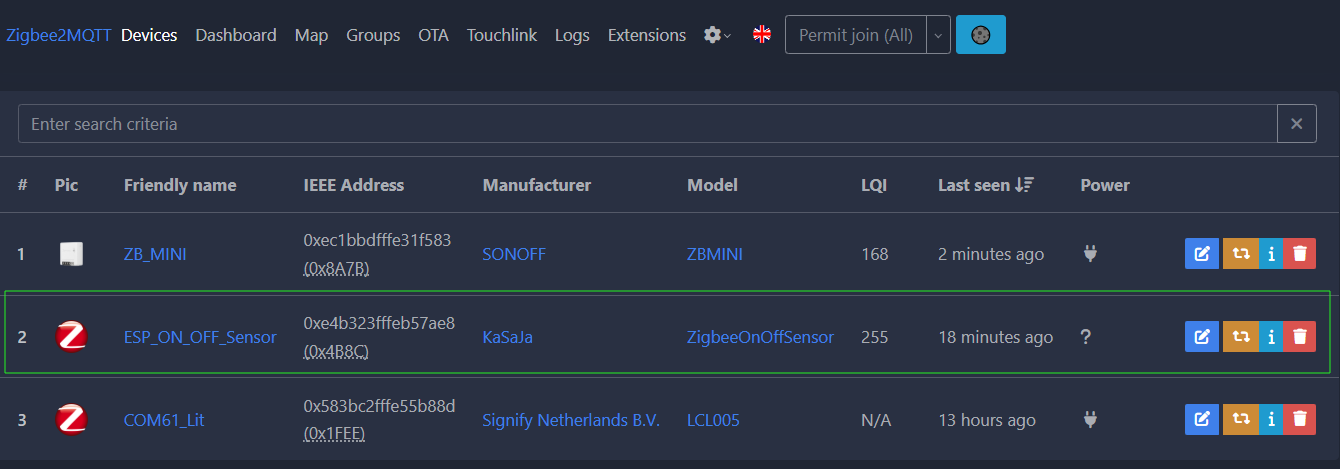
If you don’t add an “external converter” then you will probably get the “unsupported device” error.
Zigbee2MQTT supports additional devices through the “external converter” option.
These javascript based files are placed in the Zigbee2MQTT data/external_converters folder…
Zigbee2MQTT will use that to “decode” messages from the device.
Thank you !
I grabbed your code, and of course, it compiled first time. Then I modified your buttons and sensor definitions to fit my case and recompiled it. It died the first time because I had trash left over from other tests, So I cleared it and reloaded and it worked right away … except for what you just described above about the converter.
Then, I went looking for the data directory. I can’t find that thing anywhere. I have HAOS, and I did find the config file, but it didn’t have an entry for the data directory. Sigh … I’ve encountered this problem before; none of the directories are where they are supposed to be and each description of where they are seems to be different.
I’ll report back here after I play a bit more… and Thanks Again for the help so far.
In the Zigbee2MQTT config file look for the “data_path” setting…
You may need to add the external_converters folder to that.
I got it, and it seems to work just fine. I’ve only played a few minutes after I got all the things done for it, but I can actually SEE the binary change when I short the wires that simulate the float.
It was a mess to figure out and I prowled the web significantly before I found enough information to get it going. In HAOS, there is no data directory at all. I had to create the correct directory external_converters under homeassistant/zigbee2mqtt/ and then put a file in there that had the name ZigbeeOnOffSensor.js with the converter code in it. It appears (haven’t tested it yet) that it’s one file with a unique name for each converter. You have to restart Z2M to get it to read the new file each time you muck with it.
I can handle that just fine now that I know that’s what needs to be done. Plus, looking over your code and the tiny bit of experimenting I’ve done so far that building a custom Zigbee device like this is much simpler than the “examples” show. Your code doesn’t have that security zone stuff in it that causes more confusion than it’s worth.
Your help was superlative in getting me past the problems I got myself into. I really, really hope people that try this happen to see this thread and short circuit their frustration.
Now I have a float sensor to finish building and install. Thanks again for your help.
Excellent - glad you got it working ![]()
Update: The device I’m building worked fine and sent zigbee messages to Z2M, then it was displayed correctly and everything. However, the entity Binary Sensor 1 wouldn’t show up in Home Assistant (HA). I tried about a thousand things and restarted the MQTT ,2M, HA enough times that I even had to restore from backup.
I finally solved the problem a half-hour ago. It seems the code in HA that receives the configuration message for the new device DOES NOT LIKE SPACES IN THE ENTITY NAME!! Yes, the thing that made it work was to change this item:
“name”:“Binary Sensor”
to:
“name”:“Binary_Sensor”
Notice the underscore I added? That little thing was NOT reported in any log anywhere, and is incredibly hard to notice in all the text that travels around between zigbee, Z2M, mqtt (the actual one), MQTT under HA, etc. I found it by looking at the configuration message using mqttExplorer and comparing it with other configuration messages. Some of them I created for other devices, but most of them were created by Z2M.
It wasn’t luck, it was pure stubbornness and unwillingness to give up.
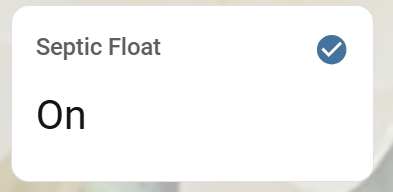
So, check your converter that sends the config message to HA; you may have trouble that is very hard to find. I’m extremely proud of this little entity:
And, thanks again for your help.
are you doing a septic float?
Yes, I got tired of having to pull the lid off to check the level.
Excellent - you could have asked me earlier, may have saved you a bit of time. I hope my examples didn’t steer you wrong?
I tend to use CamelCase in converter yamls and Underccores in HA/Z2M.
But on the bright side, you gained heaps more experience ![]()
camelCase is the boss as far as I’m concerned. My fingers can’t seem to find that darn underscore character. Plus, it seems to disappear a LOT when dealing with text that has those “helpers” appearing all over the place. IDEs love to put those things up to distract my thoughts.
Man, you’re right, I know more about that communication path than I really want to know now. Heck, I may add a temperature sensor to the device just for fun. I have several of the waterproof ones that I can play with.
Like anyone would like to know the temperature of their septic tank…