Hi. Just getting started with the Xiao expansion board with Xiao RP2040. I’ve got a Grove rotary encoder, Grove solid-state relay, and Grove DS18B20 (one-wire bus) temperature sensor, with the plan to make a PID temperature controller. I think I’ve found a limitation though. Can someone confirm that the two Grove connectors on the top side of the PCB cannot be used for GPIO, if the OLED display is also used? It seems that the OLED display, and the two aforementioned connectors, are all connected to the same I2C bus? If this is true, is there a workaround, such as using a different bus for the display, or SPI (which it seems is supported by the display at least)? I do like the neatness of all Grove peripherals so am trying not to hack into the pin headers or do bodge wires.
Thanks for any insight.
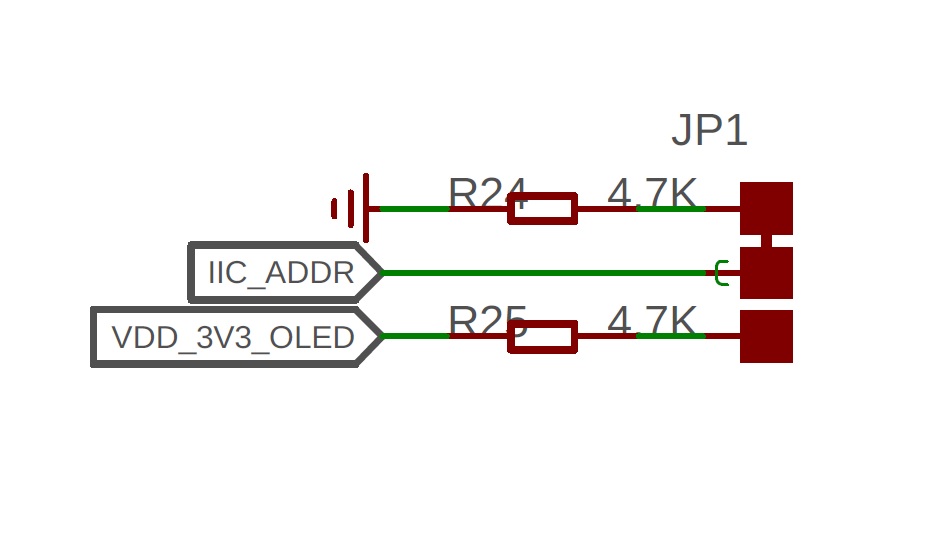
the I2C slave address will be 0x7a
It would change the address of the OLED peripheral, but it would still be on the same I2C bus (only one I2C bus is exposed by the Xiao?), so if my theory is correct the contention would still be there.
Hmm , not sure what you mean . AFAIK
Can I2C have multiple slaves?
“You have a 7-bit address. That means you can address up to 127 slaves.” “The number of devices connected to the bus is only limited by the total allowed bus capacitance of 400 pF.”
More is better …LOL :-p
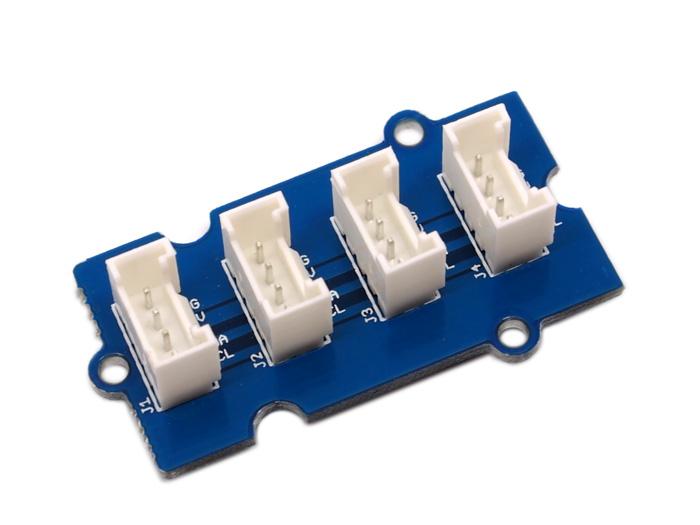
[https://files.seeedstudio.com/wiki/Grove-I2C_Hub/img/I2C_hub.jpg]
HTH
GL
Haha. More buses would be better in this case ![]()
To clarify, I’m asking the question because I don’t think changing the I2C addresses will allow concurrent use of GPIO on the same pins. That’s what I think anyway. Just asking for clarification or if anyone has come up with a workaround. If so, I can probably chop up a harness and share two peripherals with one GPIO Grove connector. I guess that wouldn’t look too bad.
Thanks.
I have 2 I2C Grove devices and the display working. You do have to specify the correct address for all 3 or they won’t work. I’ve got a temperature/humidity sensor hooked up to one and a barometric pressure sensor hooked up to the other with output to the OLED display using Home Assistant and ESPHome. You should be able to find the correct addresses on ESPHomes documentation although I noticed the default addresses were listed on the sensor packages but I can confirm it works with a ESP32-C3 XiAO. Below is most of my configuration file is ESPHome and it all works. They are all using the same 2 pins.
i2c:
sda: 6
scl: 7
sensor:
-
platform: wifi_signal
name: seeed-hk47 WiFi signal
update_interval: 10s -
platform: uptime
name: seeed-hk47 uptime -
platform: sht3xd
temperature:
name: “hk47 temperature”
id: temperature_hk47
filters:
- lambda: return x * (9.0/5.0) + 32.0;
unit_of_measurement: “°F”
humidity:
name: “hk47 humidity”
id: humidity_hk47
address: 0x45
update_interval: 30s -
platform: dps310
temperature:
name: “hk47 pressure temp”
id: temp_hk47
pressure:
name: “hk47 pressure”
id: pressure_hk47
address: 0x77
update_interval: 30s
font:
- file: “fonts/arial.ttf”
id: tnr1
size: 12 - file: “fonts/Roboto-Bold.ttf”
id: tnr2
size: 52 - file: “fonts/Insominia.ttf”
id: tnr3
size: 64 - file: “fonts/Times New Roman.ttf”
id: tnr4
size: 51 - file: “fonts/Insominia.ttf”
id: tnr7
size: 60 - file: “fonts/Roboto-Bold.ttf”
id: tnr5
size: 48 - file: “fonts/arial.ttf”
id: tnr6
size: 18 - file: “fonts/Roboto-Bold.ttf”
id: tnr8
size: 28 - file: “fonts/arial.ttf”
id: tnr9
size: 40 - file: “fonts/Roboto-Bold.ttf”
id: tnr10
size: 34 - file: “fonts/arial.ttf”
id: tnr11
size: 28
display:
- platform: ssd1306_i2c
model: “SSD1306 128x64”
id: my_display
address: 0x3C
invert: true
rotation: 0°
pages:- id: page1
lambda: |-
if (id(temperature_hk47).has_state()) {
it.printf(64, 50, id(tnr2), TextAlign::BASELINE_CENTER, “%.1f°”, id(temperature_hk47).state);
} - id: page2
lambda: |-
if (id(humidity_hk47).has_state()) {
it.printf(64, 56, id(tnr3), TextAlign::BASELINE_CENTER, “%.1fH”, id(humidity_hk47).state);
} - id: page3
lambda: |-
if (id(pressure_hk47).has_state()) {
it.printf(6, 40, id(tnr5), TextAlign::BASELINE_LEFT, “%.0f”, id(pressure_hk47).state);
it.print(6, 56, id(tnr1), TextAlign::BASELINE_LEFT, “barometric pressure”);
} - id: page4
lambda: |-
if (id(pir_hk47).state) {
it.print(60, 16, id(tnr6), TextAlign::BASELINE_CENTER, “I SEE”);
it.print(64, 60, id(tnr9), TextAlign::BASELINE_CENTER, “YOU!”);
} else {
it.print(0, 26, id(tnr11), TextAlign::BASELINE_LEFT, “HEY!”);
it.print(72, 58, id(tnr10), TextAlign::BASELINE_CENTER, “LOOK”);
} - id: page5
lambda: |-
if (id(temperature_hk47).has_state()) {
it.strftime(64, 50, id(tnr5), TextAlign::BASELINE_CENTER, “%H:%M”, id(estime).now());
}
- id: page1
For example cycle through pages on a timer
interval:
- interval: 5s
then:- display.page.show_next: my_display
- component.update: my_display