I’m new to Seeed Studio, and looking to set up web enabled DC voltage monitoring for a 48v off grid battery back. Ambient temperature would be a plus as well. If necessary, I can use a Pi computer for the web functionality, as long as the hardware sensors have a way to communicate with the Pi.
Hi there, And welcome
SO I was looking at this and a lot comes up if I search for
You have several approaches you could take on it.
Super simple would be using this
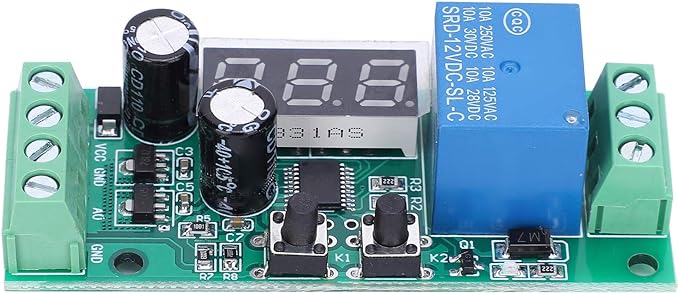
provides a local display as well.
Or more complex with Voltage divider and Zener Diode using the ADC input to get a 0-4096 (assumes 12bit ADC) with arduino code.
Robot guy has some decent tutorials on this also HERE
HTH
GL
1 Like
To set up a web-enabled monitoring system for your 48V off-grid battery and ambient temperature, you can use a combination of Seeed Studio sensors and a Raspberry Pi. Here’s a step-by-step guide to get you started:
Components Needed:
- Raspberry Pi (any model with internet connectivity, e.g., Raspberry Pi 4)
- DC Voltage Sensor (suitable for 48V)
- Seeed Studio offers a range of voltage sensors. Make sure to choose one that can handle 48V.
- Temperature Sensor
- DHT22 or DS18B20 are commonly used temperature sensors.
- Seeed Studio Grove Base Hat for Raspberry Pi (optional, for easier sensor integration)
- Wires and Connectors
Steps to Set Up:
- Set Up the Raspberry Pi:
- Install the latest Raspberry Pi OS.
- Connect the Raspberry Pi to the internet via Ethernet or Wi-Fi.
- Ensure the Pi is updated:
sh
sudo apt update
sudo apt upgrade
- Install Necessary Libraries:
- Install libraries for interfacing with the sensors. For example, for Python:
sh
sudo apt install python3-pip
pip3 install Adafruit_DHT
pip3 install RPi.GPIO
- Connect the Sensors:
- DC Voltage Sensor:
- Connect the voltage sensor to the Raspberry Pi GPIO pins. Refer to the sensor’s datasheet for specific pin connections.
- Temperature Sensor (DHT22):
- Connect the DHT22 sensor: VCC to 3.3V, GND to Ground, and Data to a GPIO pin (e.g., GPIO4).
- Write a Python Script to Read Sensor Data:
- Create a script to read data from the sensors. Here’s an example for a DHT22 sensor:
python
import Adafruit_DHT
import time
import os

DHT_SENSOR = Adafruit_DHT.DHT22
DHT_PIN = 4  # GPIO pin where the data line is connected

while True:
    humidity, temperature = Adafruit_DHT.read_retry(DHT_SENSOR, DHT_PIN)
    if humidity is not None and temperature is not None:
        print(f"Temp={temperature:.1f}C  Humidity={humidity:.1f}%")
    else:
        print("Failed to retrieve data from humidity sensor")
    time.sleep(10)
- Similarly, write code to read data from the DC voltage sensor. This will depend on the specific sensor and its interface (analog/digital).
- Set Up Web Server:
- Install Flask for a simple web server:
sh
pip3 install Flask
- Create a Flask app to display the sensor data:
python
from flask import Flask, render_template
import Adafruit_DHT

app = Flask(__name__)

DHT_SENSOR = Adafruit_DHT.DHT22
DHT_PIN = 4

@app.route('/')
def index():
    humidity, temperature = Adafruit_DHT.read_retry(DHT_SENSOR, DHT_PIN)
    voltage = read_voltage()  # Implement this function based on your voltage sensor
    return render_template('index.html', temperature=temperature, humidity=humidity, voltage=voltage)

if __name__ == '__main__':
    app.run(host='0.0.0.0', port=5000)
- Create HTML Template:
- Create a simple HTML template (
templates/index.html) to display the data:
html
<!DOCTYPE html>
<html>
<head>
    <title>Battery Monitor</title>
</head>
<body>
    <h1>48V Battery Monitoring</h1>
    <p>Temperature: {{ temperature }} °C</p>
    <p>Humidity: {{ humidity }} %</p>
    <p>Voltage: {{ voltage }} V</p>
</body>
</html>
- Run Your Flask App:
- Start the Flask app:
python3 app.py
- Access the web interface by navigating to
http://<Raspberry_Pi_IP>:5000in your web browser.
Man, Looks Great .
You got a screen shot of it?
Thnx
GL ![]() PJ
PJ