FIRST— DO NOT UPGRADE THE FACTORY FIRMWARE ON THIS DEVICE
AT THE TIME OF THIS WRITING, THERE IS NOTHING TO BE GAINED AND ALL TO BE LOST BY UPGRADING THE FACTORY FIRMWARE ON THE DEVICE…. THE FIRMWARE MAY BE A VERSION LOWER, DEPENDING ON PRODUCTION DATE. PLEASE ENJOY YOUR DEVICE AND USE IT BEFORE DISTROYING IT AND PLEASE DO NOT POST OR CALL SUPPORT THAT YOUR DEVICE IS DEFECTIVE… IT IS NOT.
For this post i will use the terms:
DEAD: Unit does not have power, unit is not processing. Green LED is not on, blinking or faintly breathing in any way. If the MCU is processing, some sort of faint blinking light will be observable
BRICKED: Unit does not have control firmware program installed, MCU cannot boot
THE IMPORTANT NOTE IS THAT BOTH A DEAD AND BRICKED UNIT WILL EXHIBIT SIMILAR SYMPTOMS, BUT THE SOLUTIONS ARE DIFFERENT. For the purposes of this post, we will assume the device IS NOT BRICKED, only DEAD.
Also
COMPUTER: Is Windows 10
MESHTASTIC APP: Is iPhone
Sorry if you use other things… I do not have experience with them.
As a great person said many times… the problem is often located between the keyboard and the floor… so make sure to check under the desk to see what you are working with.
Typically, Seeed devices do not have updated firmware because the software and cababilities of the device are limited from the factory. The only example i have found where this is not the case is when switching between LoRa and Meshtastic Firmware on devices which are able to function in both modes. If you are not experimenting with this type of mode switch, there should be no need to update firmware. All of the hardware of the device is fully supported in the factory release.
In most cases, flashing bootloader or erasing or upgrading firmware is not necessary, dispite the information in the wiki… This is for technical information, please do not attempt these “fixes” unless you are very technical person and you have determined the unit is BRICKED.
The only bootloader i needed to upgrade was on the Tracker 1110 device. This is not needed if you take the unit out of the box and have not monkey around with firmware flashing. Please read the rest of this post and you will understand the device better.
The problem is accidental short circuit of the magnetic USB connector cord
Accidental shorting of the magnetic connector can happen at any time and not even be noticed. This is the usual cause of a DEAD unit. It has shutdown due to detecting an electrical fault. This fault is recoverable. It can also cause your computer USB port to malfunction.
consider getting this device to keep the unit and the cord safe from disconnection or short circuit. (the price is way too high, but maybe you can 3d print one)
The magnetic connector allows connection to the sealed device.
This is the only way power and data can pass thru the sealed enclosure. The Tracker a-b-c units only had 2 wire connections, power and ground for charging (white Cable). No wired data or firmware upgrade was possable.
The e model has 4 wires, power, ground, data1 and data2 (Black Cabe). Power and data is passed from the cable to the contacts by micro-pogo pins and the magnets help with connection and alignment.
USB Short on Device
If the magnetic connector disconects at the wrong time or if it disconnects in such a way as the pins are allowed to slide across each other they may be able able to momentarily short, either power to ground or power to data lines the unit brain may scramble. This error is on the unit side. The short will not cause visable sparks. The short is on the order of millivolts and milliamps, but is enough to scramble the brain or cause a fault trip.
USB Short on the Computer Side
Be careful no metallic conductive material near your work station when connecting to the computer USB port. Metal desk parts, chrome strips, jewelry may short the USB pins. When the unit drops from your desk the device will drag the magnetic connector with it for a distance, then the connector will detach and the USB cord will fall toward the floor. The magnet will be attracted to anything metal between the keyboard and the floor. Maybe the desk, maybe the chair. If the magnet attaches to anything metal or conductive all or some of the pins may short on the conductor. Power to ground shorts will draw excessive power and trip the USB internal. Power short thru a data pin may scramble or also trip protection.
Also, listen for windows USB disconnect sound from your computer if and when this happens. Look for message in windows tray stating USB error or device not recognized.
If all is set up correctly you should see “setting up T-1000-e” and “finished setting up T-1000-e”
Computer USB ports have a circuit breaker that is designed to protect in the event of a short circuit or over power draw from the USB port or hub. Once the circuit breaker is tripped the computer must be reboot in order to reset. If this happens, you MUST shutdown the computer and reboot. If you do not reboot, it may appear that the unit is dead… however it is in fact the USB port that has overloaded and shutdown for its protection.
There is a procedure I call “Double Clicking the Magnetic Connector”
this procedure is to connect the magnetic USB to a stable power supply, ensure the battery box is supplying power to the cable. Quickly use your finger to tip over and release the magnetic connector to spring back such that the connection is made and unmade quickly to send a wakeup signal to the device. the movement would be similar to double clicking a mouse button. Click on the image below to watch a small video if the gif does not automaticly play.
The USB must be connected to a stable power supply for the procedure to succed. If the cable is unconnected or power is not being supplied by the battery box, the procedure will not work, as no power signal is being generated and interupted. There is nothing about the magnetic field that is doing the work.
If the unit is still DEAD… no green light, no faint blinking of any kind, if the double click procedure does not wake, also try double click while holding the user button. Also, if this does not work, try rapid presses of the button and double clicking the magnet at the same time, maybe using a S-O-S pattern. The object of the procedure is to send wake signals to the unit. It may sound crazy, but i have seen it work.
No Green LED
Dead
If the unit is DEAD or appears to be dead, long press or rapid press the user button. The unit should wake and play the Ta-Da sound and the Green Led will Light
Solid Green LED
Charging and Not Operating
Green LED Bright and Blinking
Charging and Operating
Green LED Faint and Blinking

Discharging and Operating
Power and Battery
When the unit is first unboxed, it may be low on battery as this is how Lithium Batteries must be stored and transported. Connect the unit to a computer or preferably a battery box. The unit should immediatly come to life and make a Ta-Da sound and the green led will be bright and solid. Bright and solid green means charging. Blinking Bright means charging and working. light green and light flashing means working and discharging.
Be careful when connecting to battery boxes for charging the device. Some modern battery boxes have a chip that controls the power delivery. these are usually USB-C capable charging devices. These battery boxes may give up on charging at around 80% and will cause problems.
These chargers and battery boxes are designed to communicate a handshake with the device to understand the power required. This unit does not have this capability. As a result, it is possable the unit will not draw enough power from the charger and it will think it is not connected and deactivate the power delivery. This happens with small devices like XIAO and others that may sleep. This error will cause the battery to not fully charge. As a result, connect a phone or other high draw to the battery box at the same time to keep the box awake, or connect to a computer or old power supply that does not exhibit this power cut off error.
Deep Battery Discharge
Depending on the settings, the unit, if left uncharged for a long time will deep discharge the battery. This happens, because, if the unit is allowed to discharge to a critical level, and it attemps a transmission the current rush will brown out the unit. The unit should be set to not attempt to restart after a brownout.
If the unit attempts to restart, most likely it will and the cycle will repeat. If this brownout condition persists, the battery will critically discharge and may be damaged. Critical discharge may not allow future charging. When this has happened, the magnetic double click procedure should be attempted to try to inject enough power into the battery for it to begin to take a charge.
Discharging to Restart
As a result of the above, it is possable to force a restart of the unit by discharging it for several days or weeks until the brownout occurs and the unit self restarts. This is time consuming and not good for the battery. A restart can be forced using some of these other methods, however it can be effectve
Serial Monitor
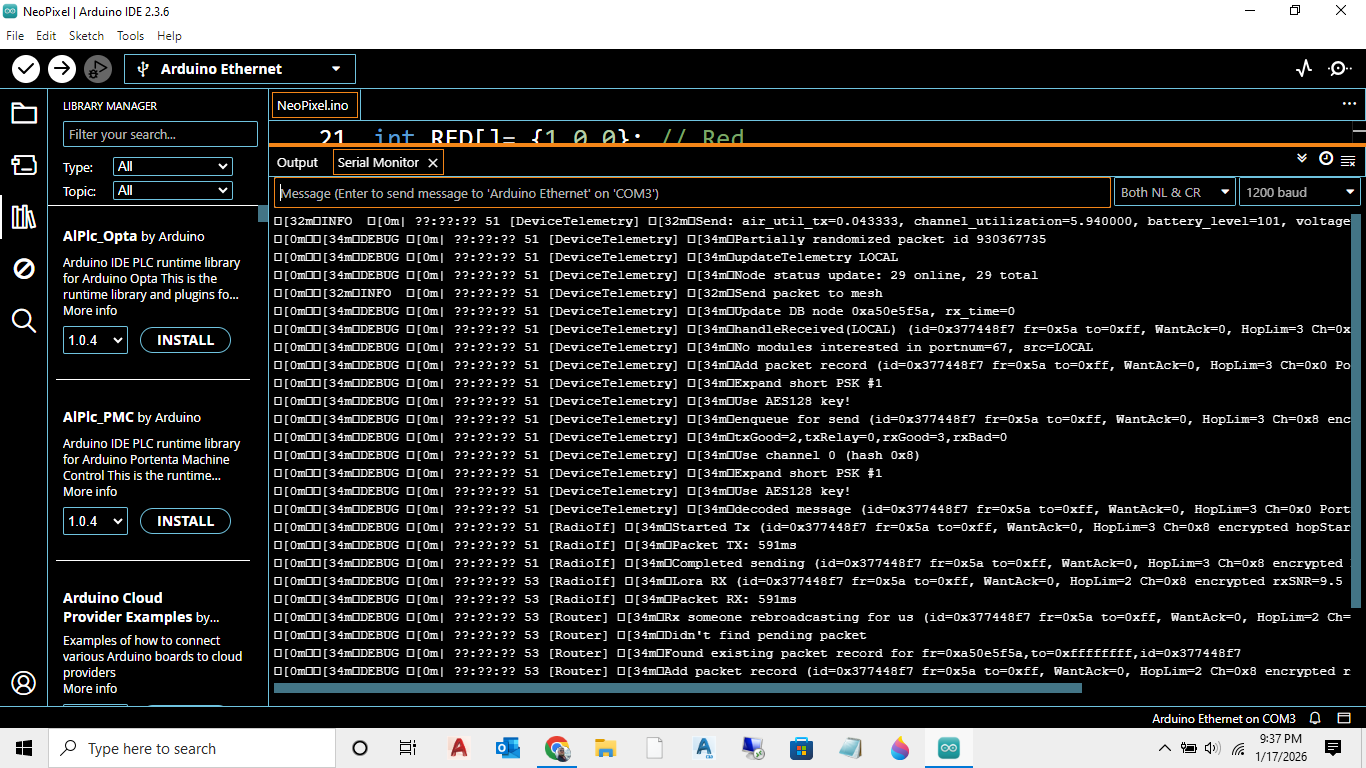
To confirm the unit is operational you can connect to a computer running a serial monitor. IMPORTANT: THE SERIAL BAUD RATE IS 1200 BPS
It is important to manually set this baud rate in your serial monitor or you will get giberish or the unit will not recognize that someone wants to communicate with it. I have tested this with Arduino IDE. without a 1200 baud it may not show any communication and will appear dead.
also, you can use the Meshtastic Web Flasher website at https://flasher.meshtastic.org/ or google Meshtastic Web Flasher. Look for Open Serial Monitor on the lower left at the time of this writing
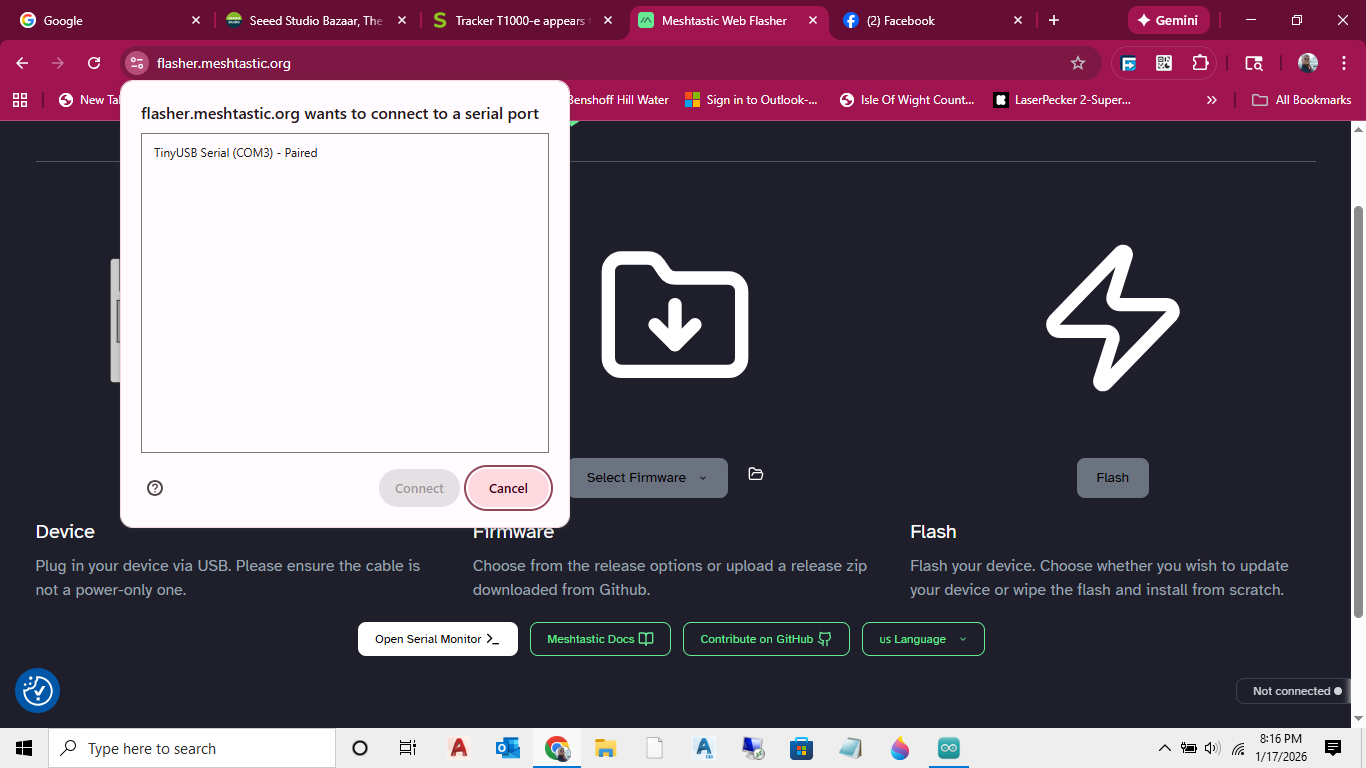

If you see this blank screen, it may appear the device is not communicating… but it is just not seeing anything important going on, if you go to your MESHTASTIC APP and communicate commands to the device from the app, double and tripple check the green light is on and

you will see activity!
[Power] e[34mBattery: usbPower=1, isCharging=1, batMv=4214, batPct=100
if the unit is communicating you should be able to observe the log and see the battery power report
Bluetooth Pairing Pin
[PowerFSM] e[32mBluetooth pin set to '123456'
if the unit is communicating, in ititial startup the unit will generate a random bluetooth pairing pin if the firmware is updated, or the setting has been changed. The default Bluetooth Pairing Pin is 123456, but if you change it or monkey around with the settings, it is who knows how many ways to screw this up… What da?
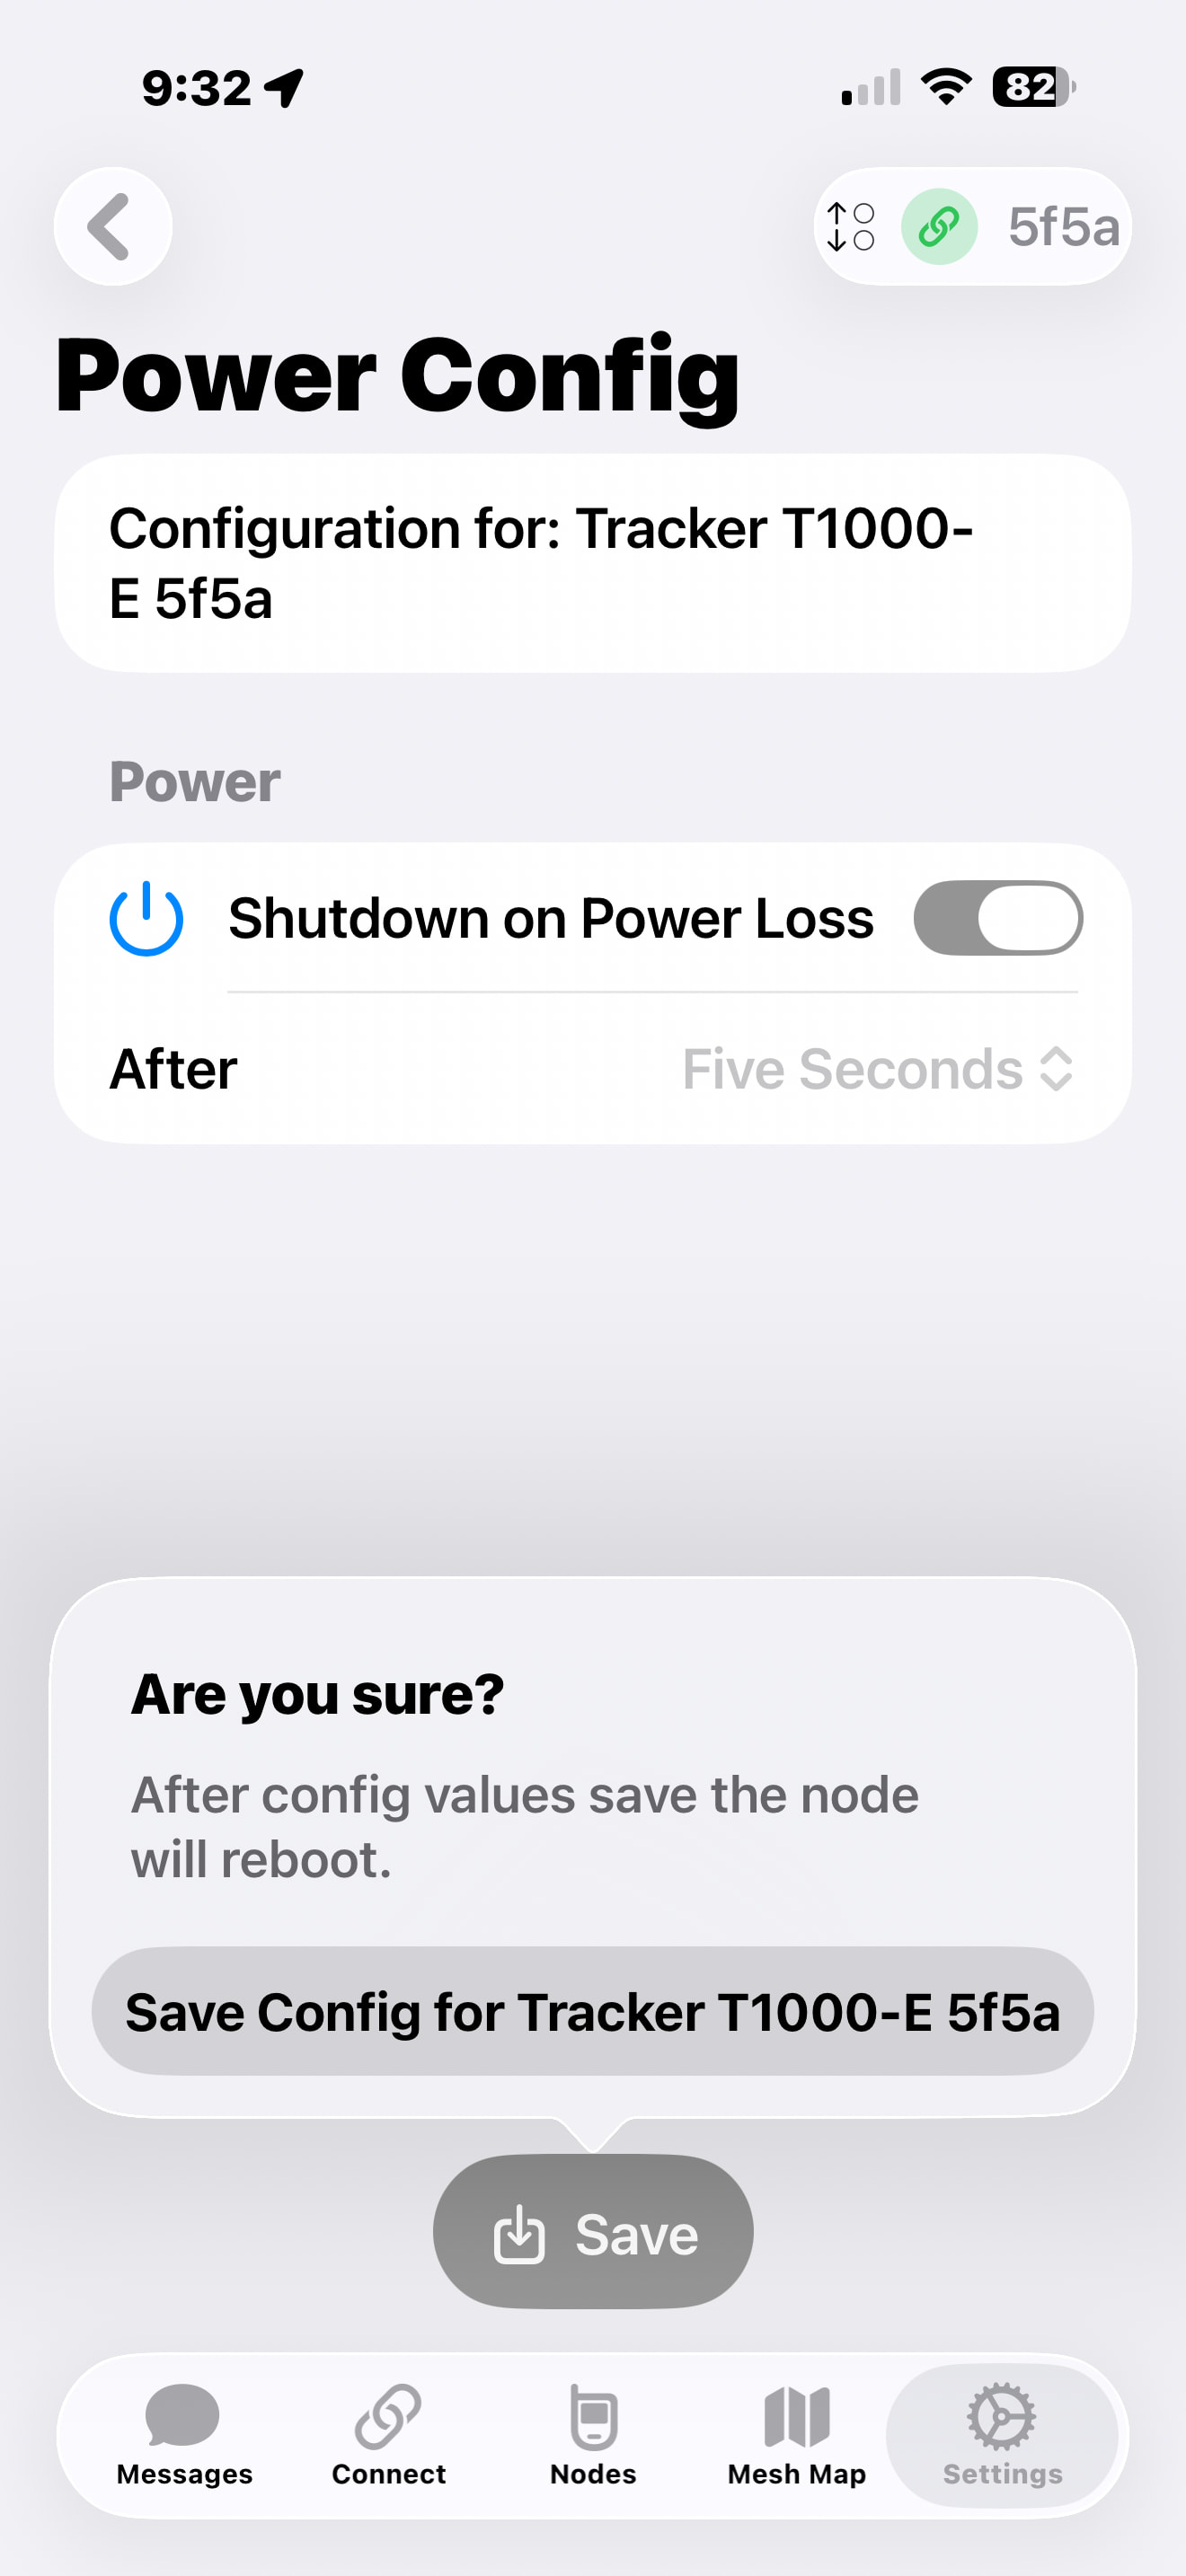
DO NOT CHANGE THE BLUETOOTH PAIRING PIN, no one cares to hack into your T-1000-e meshtastic device. Also the bluetooth range is so short they would have to be standing next to you to do this. However, just for information and because you will jump off a bridge if i tell you not to do it. I will show how to set this feature in the MESHTASTIC APP
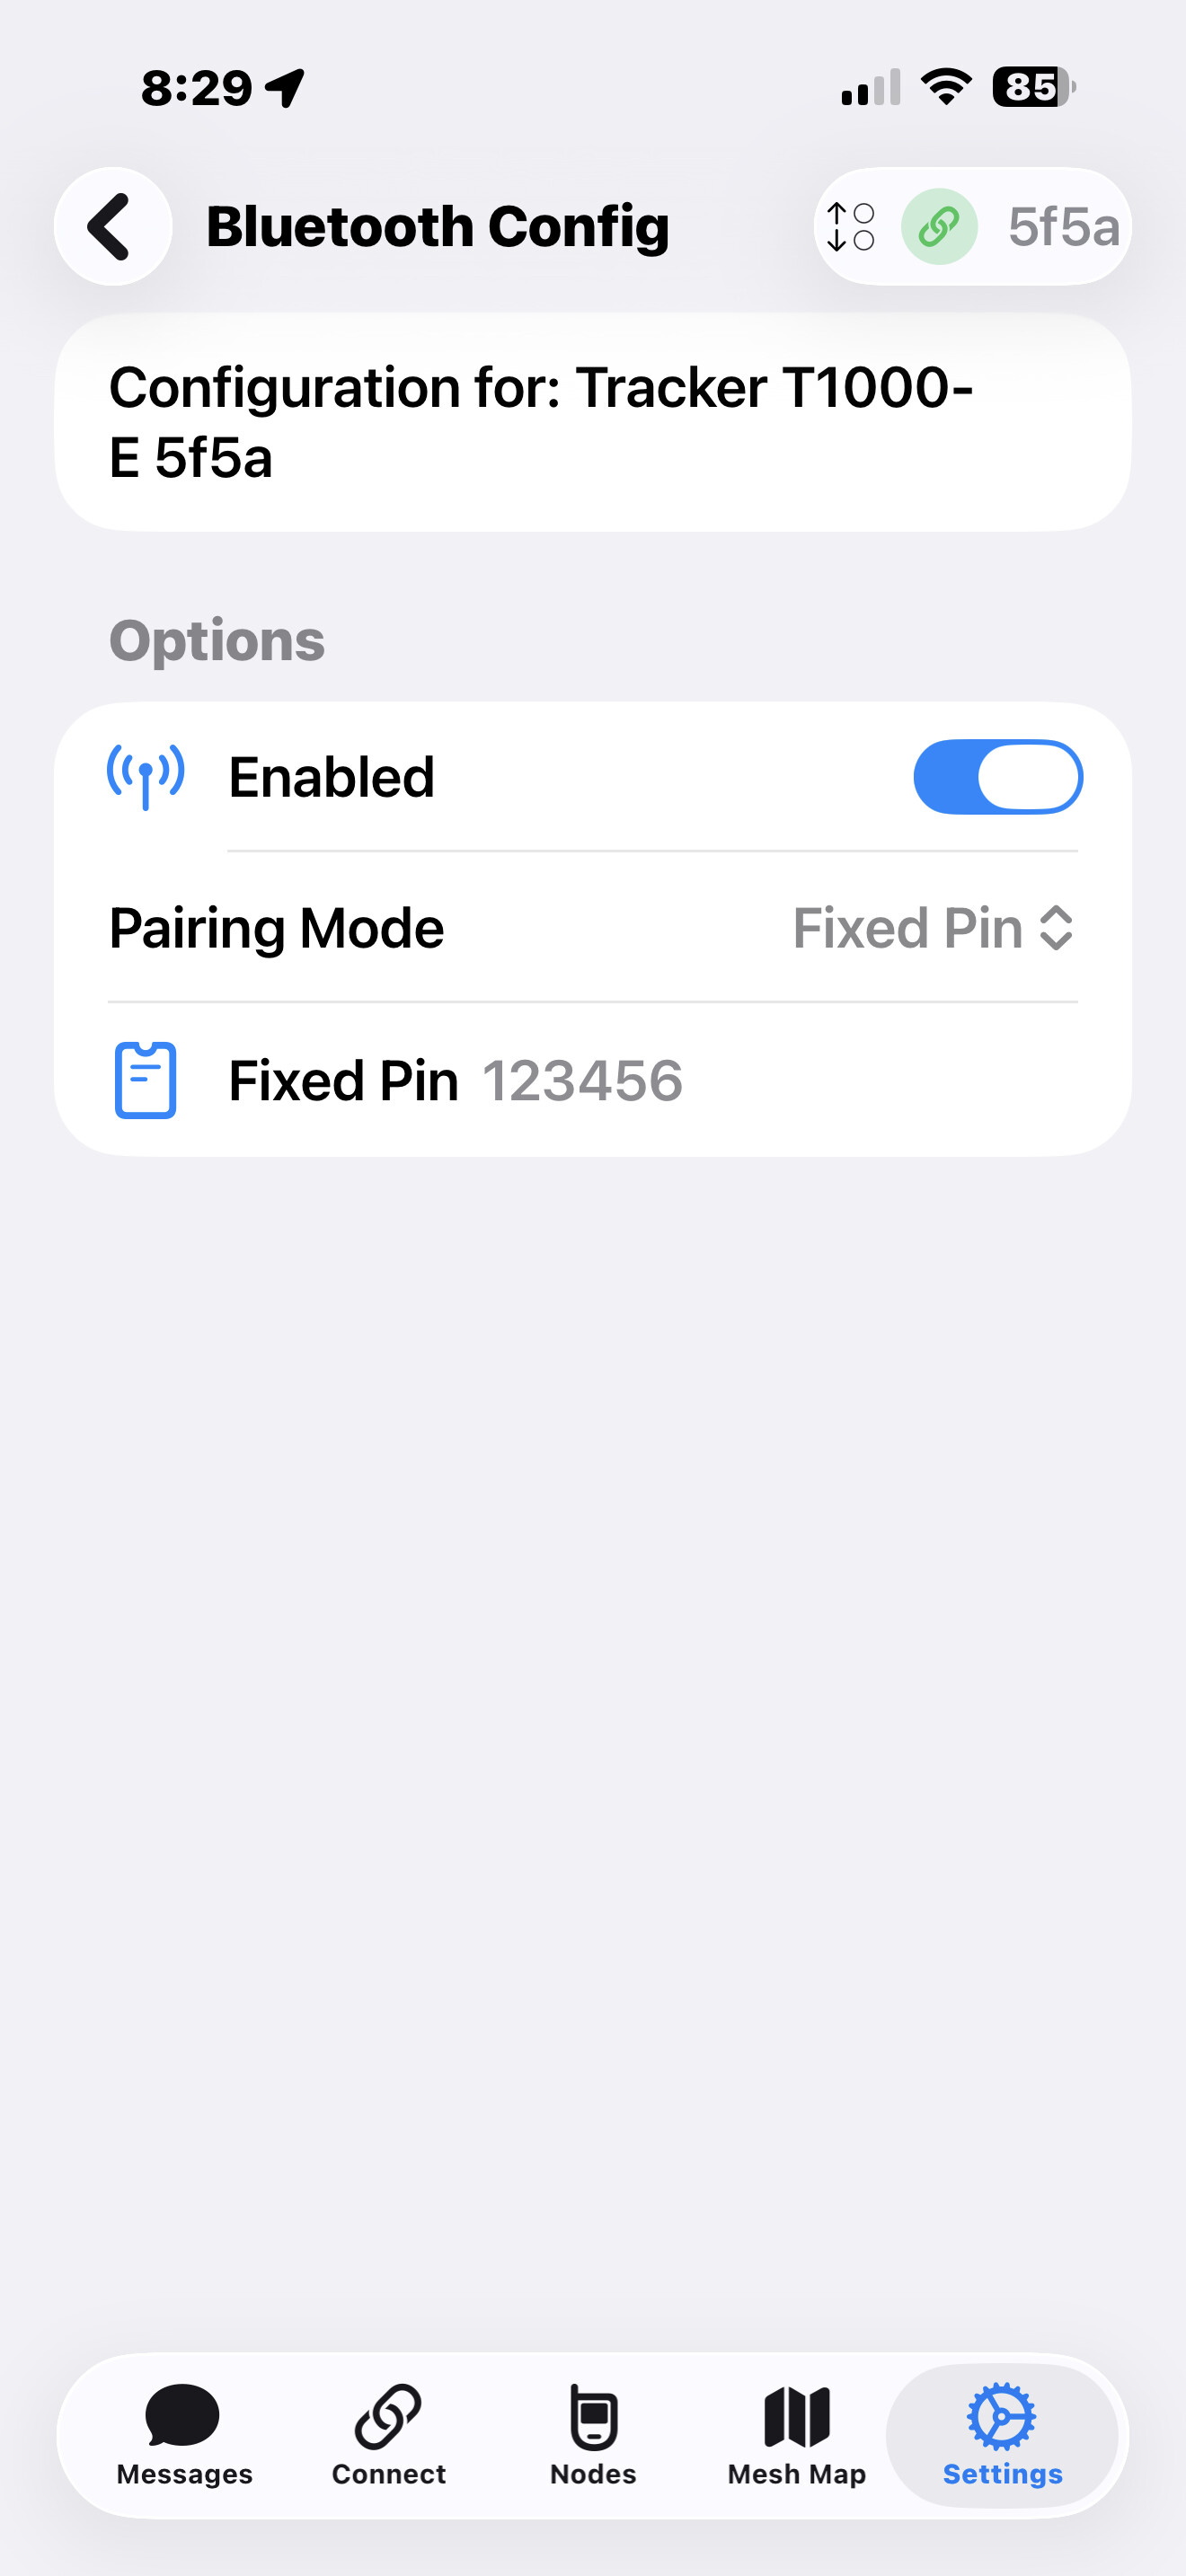
Use the MESHTASTIC APP to force the unit into FIXED PIN PAIRING MODE with the default pin set to 123456
If your MESHTASTIC APP refuses to connect to your device, your Bluetooth pin may have changed or some encripted handshake may have been corrupted… so inter the bluetooth configuration of your iphone and find the unit and delete or forget the bluetooth pair and reconnect

If your Meshtastic is driving you crazy, or it is working good, go out to your favorite Vietnameese place and hook yourself up whith some Pho and soft rolls and you will be feeling better soon!


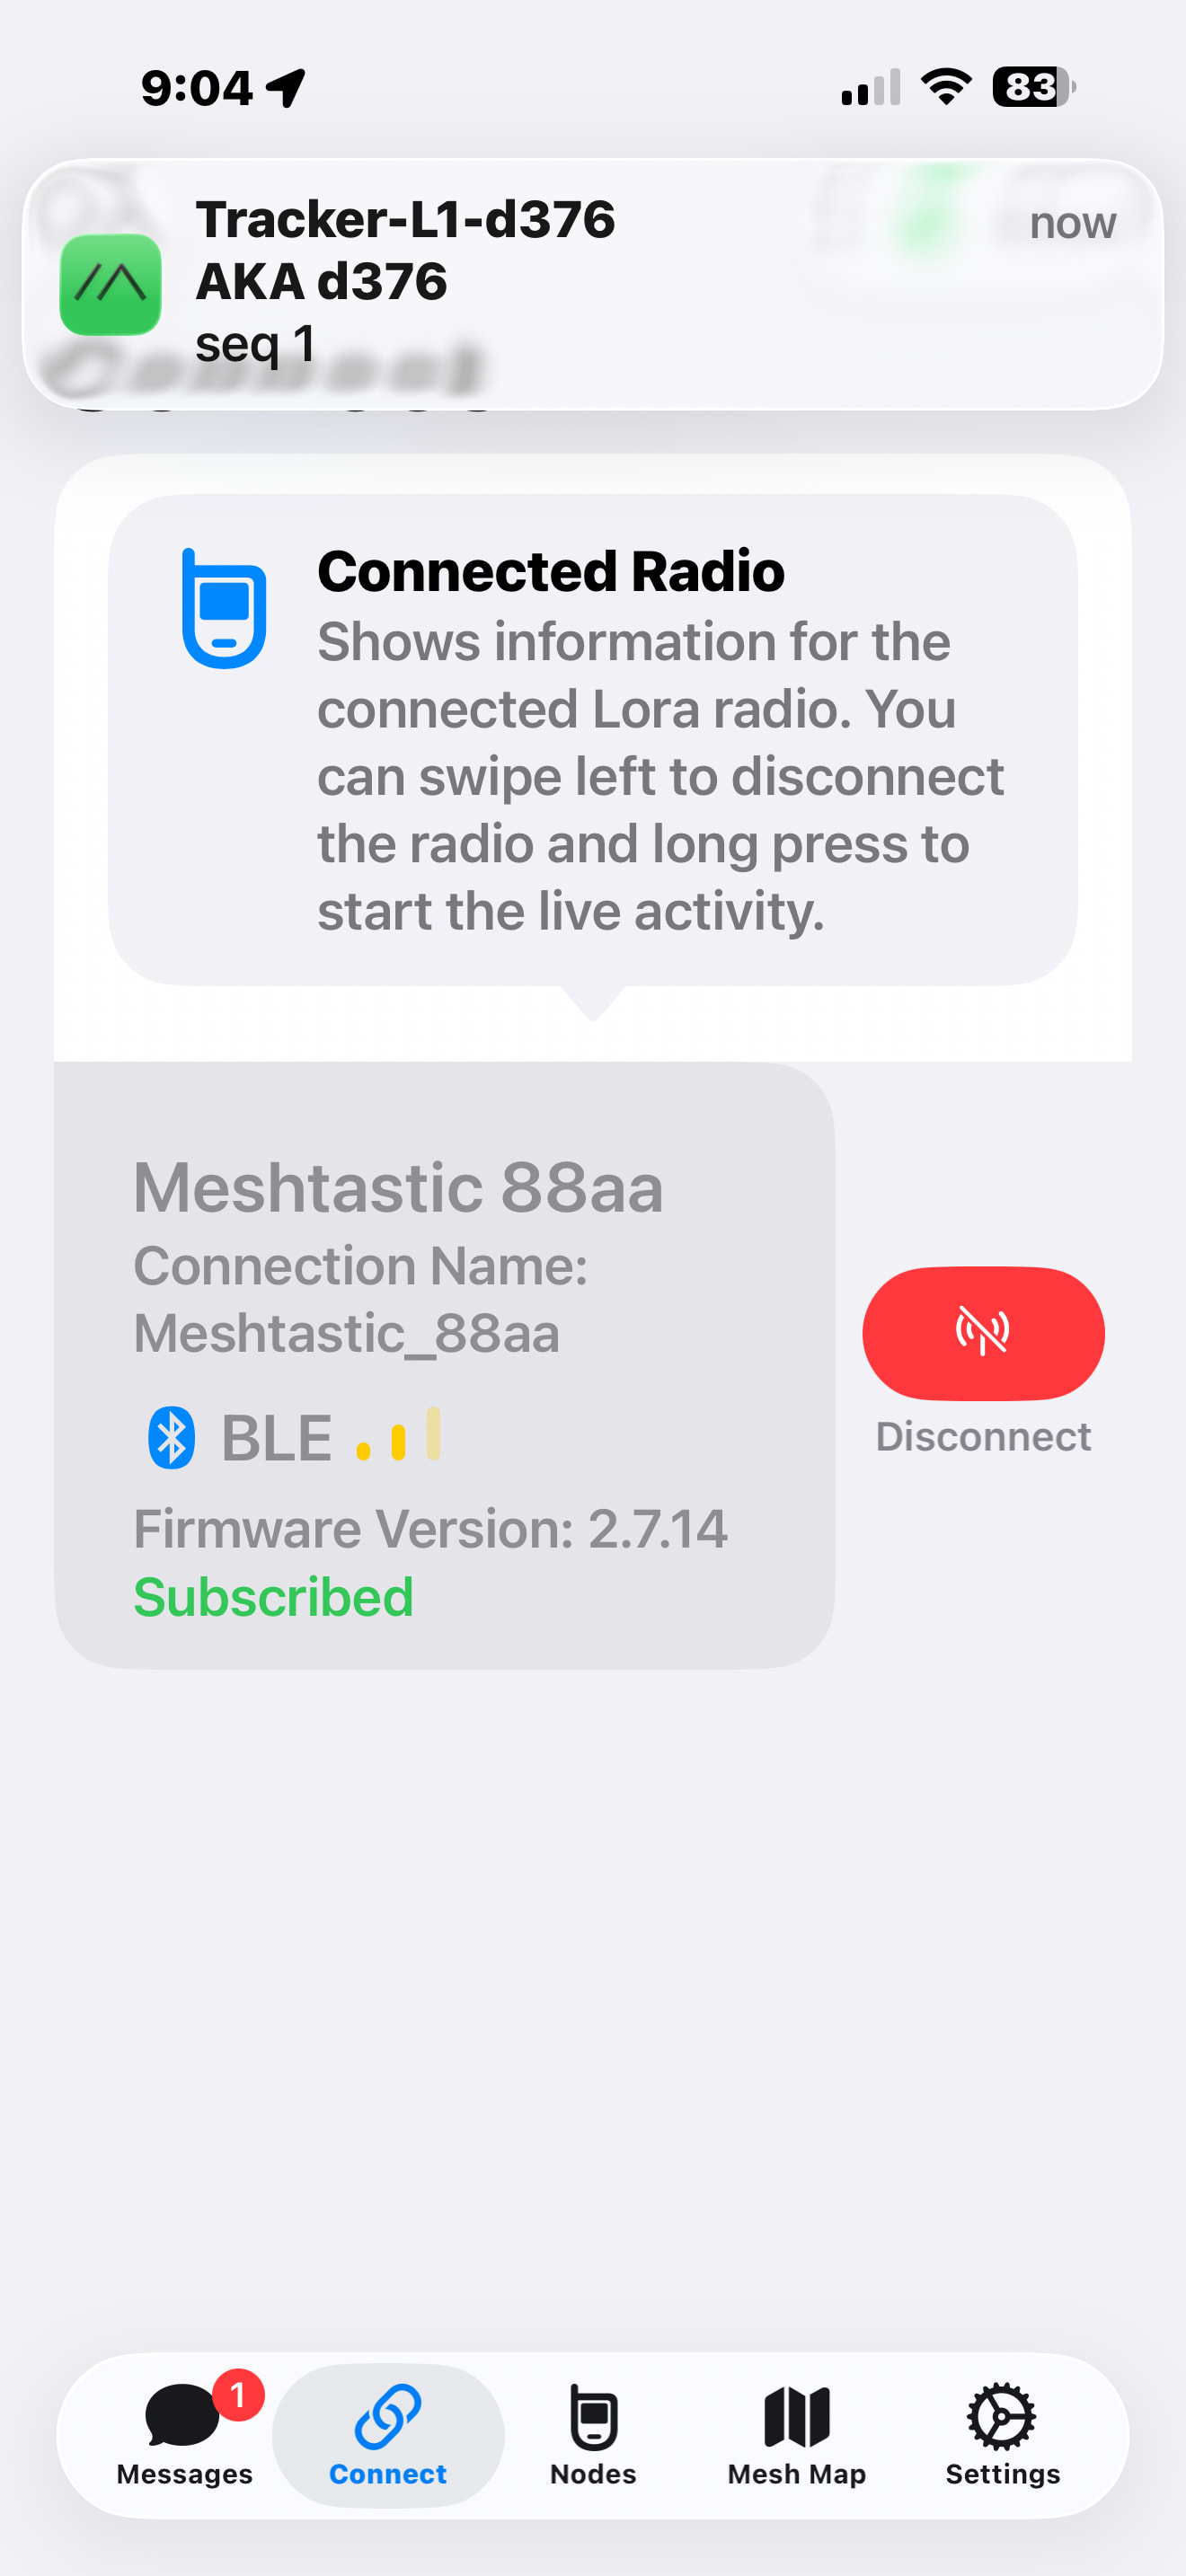
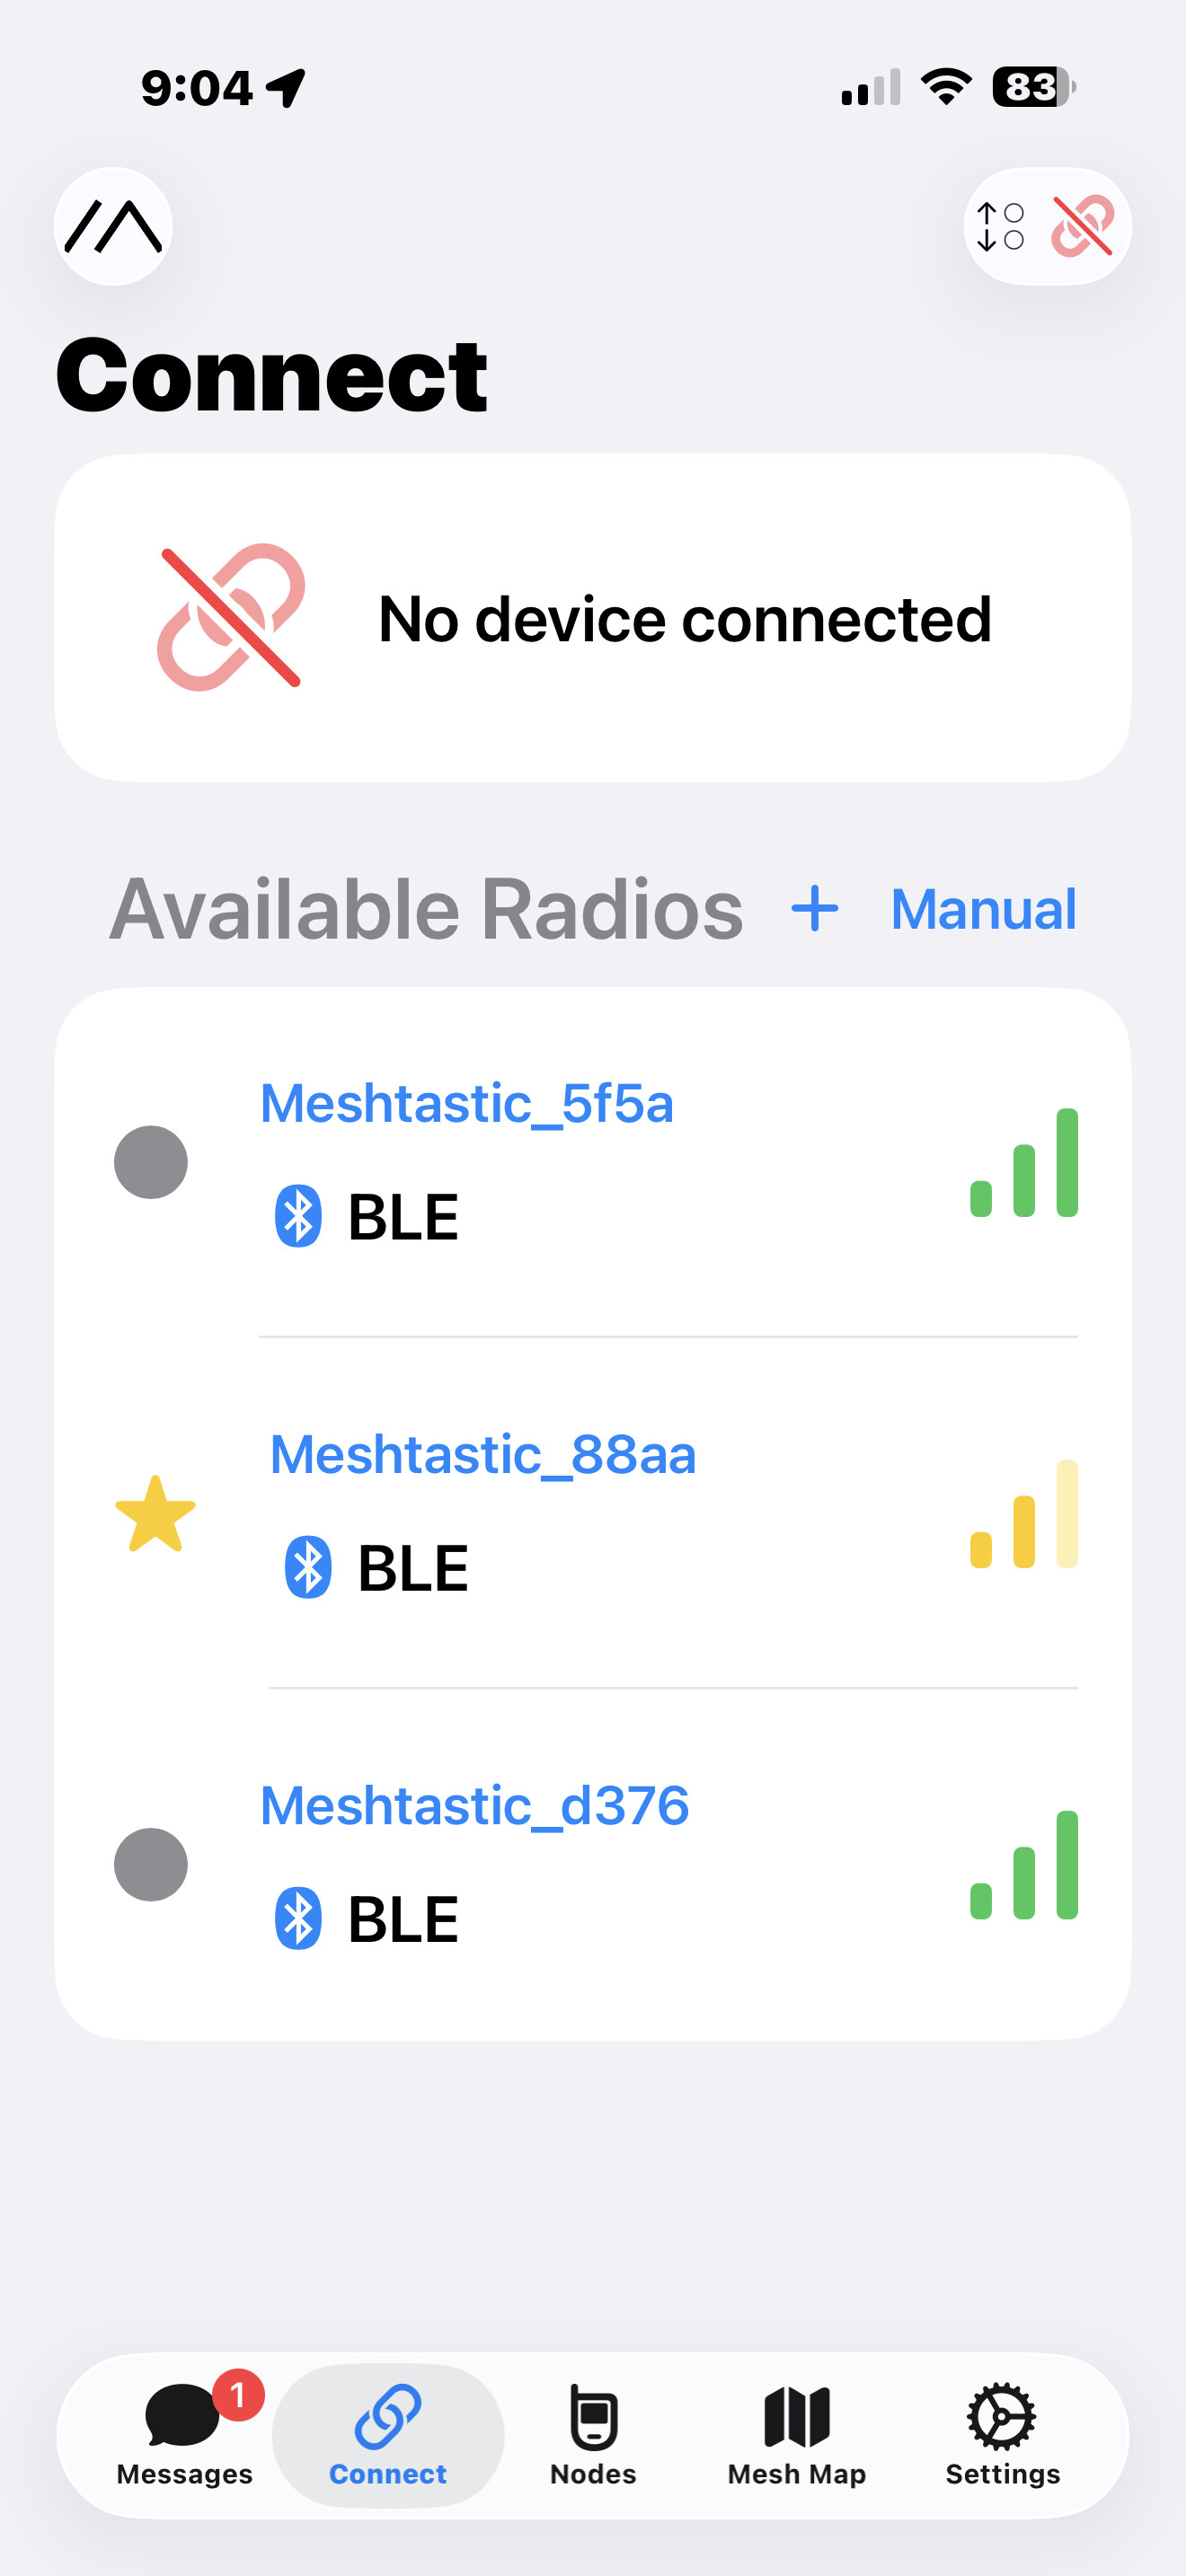
It is not 100% obvious that the MESHTASTIC APP can only be connected to one unit at a time. This screen can be deceptive to make you think that only one meshtastic unit is around your vacinity and that your device must be DEAD or BRICKED or not transmitting. This may not be true The app may be hung and need a restart, also you can swipe left on the device and it will give you the option to disconnect from the current device. You should do this and it will show all the devices within Bluetooth Range. You may now see the device you are looking for all along!
No IA was used or harmed in the making of this post…