Hi there,
So I’m just getting Started 
Here is the TouchRing Video Demo and code for you to compile yourself.
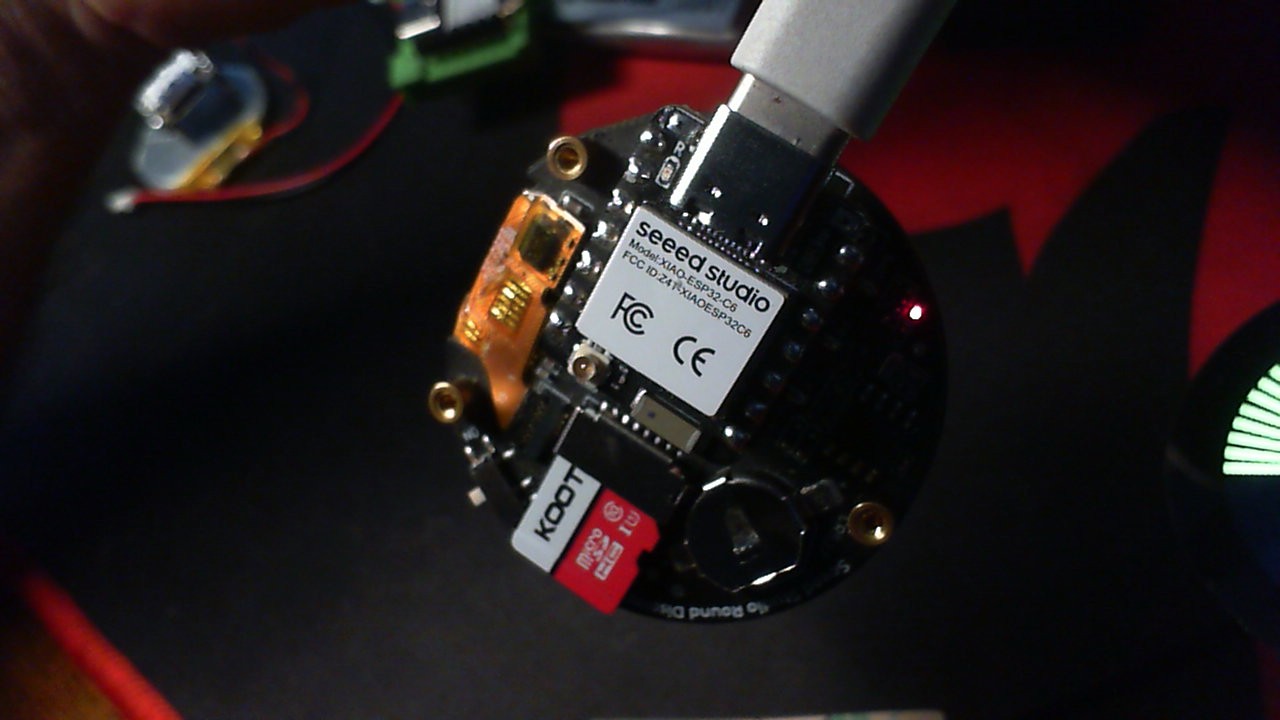
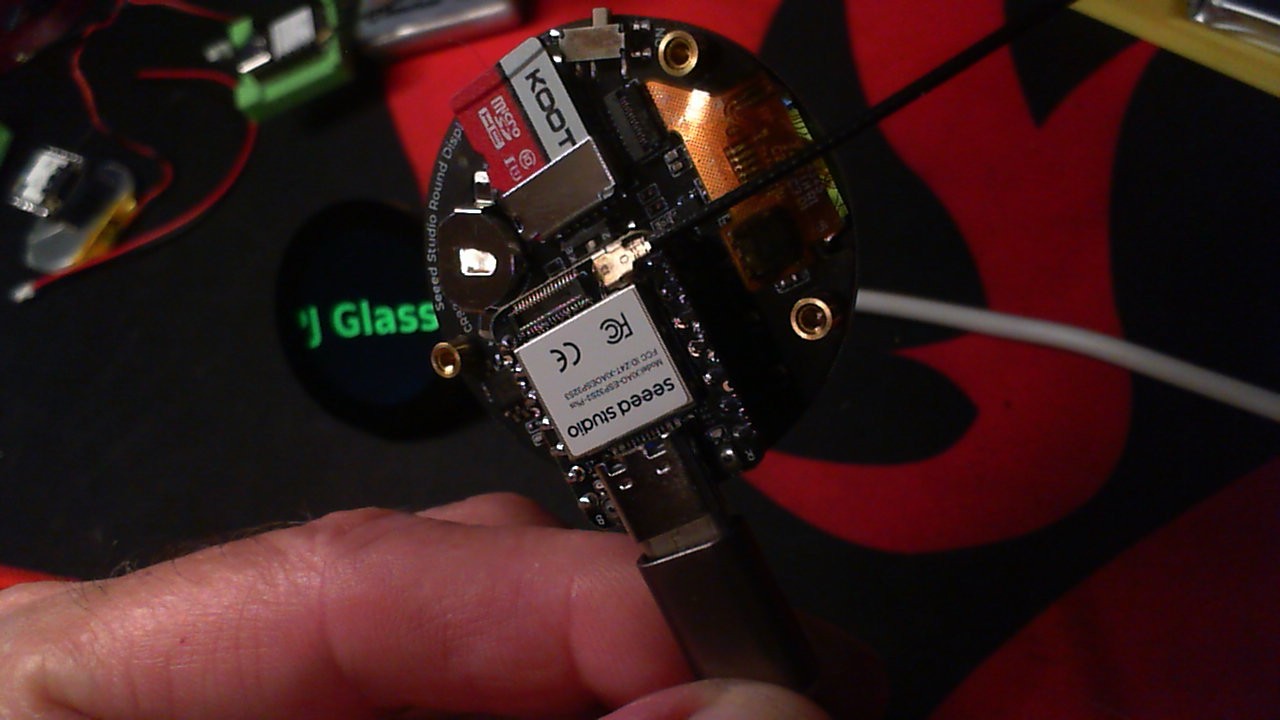
The TouchRing Meter Demo showcases an elegant and responsive user interface on the Seeed Studio 1.28" Round Display powered by the GC9A01 driver. Featuring a 240×240 pixel TFT panel and capacitive touch input via the CST816S controller (I2C).
This code project creates an interactive analog-style ring meter that responds to Touch and up/down swipe gestures. The visual interface includes a color-coded arc scale (green to red), a central numeric value display, and on-screen ‘+’ and ‘–’ indicators.
The demo unit is powered by the Seeed Studio Xiao ESP32-C6 or S3 and uses the TFT_eSPI and lv_xiao_round_screen libraries for high-performance graphics and touch handling.
Users can drag their finger to adjust a value between 0 and 99, with immediate visual feedback. The layout is optimized for the round form factor, making it an ideal base for control knobs, gauges, or user input widgets. This standalone version is clean, smooth, and PHAT—perfect for embedded UI prototypes or hardware demos.
AMA
HTH
GL  PJ
PJ 
// ===================================================================================
// PJ DEMO FINAL - Xiao ESP32C6 & ESP32S3-Plus & Round Display
// Rev        : v1.3
// Build Time : __DATE__ and __TIME__
// Features   :Touch Test Ring meter DEMO 1.4
// Authors  : Pj Glasso, & Embedded AI Assistant
// ===================================================================================

#include <TFT_eSPI.h>
#include <SPI.h>
#define USE_TFT_ESPI_LIBRARY
#include "lv_xiao_round_screen.h"  // CST816S touch driver

#define RADIUS 120
#define SEEED_GREEN 0x07E0
#define SEEED_BLUE  0x001F
#define YELLOW      0xFFE0
#define ORANGE      0xFD20
#define RED         0xF800
#define GREY        0x2108
#define WHITE       0xFFFF
#define BLACK       0x0000

int currentValue = 50;
lv_coord_t touchX, touchY;

// -----------------------------------------------------------------------------------
void setup() {
  Serial.begin(115200);
  delay(500);
  Serial.println("=== Touch Ring Meter Demo v1.4 Start ===");

  pinMode(TOUCH_INT, INPUT_PULLUP);
  Wire.begin(); // SDA=D4, SCL=D5

  tft.begin();
  tft.setRotation(0);
  tft.fillScreen(BLACK);
  tft.setTextDatum(MC_DATUM);
  tft.setTextColor(WHITE, BLACK);
  showMainScreen();
    delay(500);
    tft.fillScreen(TFT_BLACK);

  drawPlusMinus();
  ringMeter(currentValue, 0, 99, 0, 0, RADIUS);
  drawText(String(currentValue), 120, 125, currentValue);
}

// -----------------------------------------------------------------------------------
void loop() {
  static int lastValue = -1;

  if (chsc6x_is_pressed()) {
    chsc6x_get_xy(&touchX, &touchY);

    int dx = touchX - 120;
    int dy = touchY - 120;

    float dist = sqrt(dx * dx + dy * dy);

    if (dist > 20) {  // Ignore center tap
      if (abs(dy) > abs(dx)) {
        if (dy < -10 && currentValue < 99) currentValue++;
        if (dy > 10 && currentValue > 0) currentValue--;
      }
    }

    if (currentValue != lastValue) {
      ringMeter(currentValue, 0, 99, 0, 0, RADIUS);
      drawText(String(currentValue), 120, 125, currentValue);
      lastValue = currentValue;

      //Serial.printf("Touch (X:%d Y:%d) Value: %d\n", touchX, touchY, currentValue);
      Serial.printf("%d\n", currentValue);

    }
  }

  delay(30);
}

// -----------------------------------------------------------------------------------
int ringMeter(int value, int vmin, int vmax, int x, int y, int r) {
  x += r;
  y += r;
  int w = r / 3;
  int angle = 150;
  int v = map(value, vmin, vmax, -angle, angle);
  byte seg = 3;
  byte inc = 6;

  for (int i = -angle + inc / 2; i < angle - inc / 2; i += inc) {
    float sx = cos((i - 90) * DEG_TO_RAD);
    float sy = sin((i - 90) * DEG_TO_RAD);
    uint16_t x0 = sx * (r - w) + x;
    uint16_t y0 = sy * (r - w) + y;
    uint16_t x1 = sx * r + x;
    uint16_t y1 = sy * r + y;

    float sx2 = cos((i + seg - 90) * DEG_TO_RAD);
    float sy2 = sin((i + seg - 90) * DEG_TO_RAD);
    int x2 = sx2 * (r - w) + x;
    int y2 = sy2 * (r - w) + y;
    int x3 = sx2 * r + x;
    int y3 = sy2 * r + y;

    uint16_t color = GREY;
    if (i < v) {
      int mapped = map(i, -angle, angle, 0, 99);
      if (mapped <= 24) color = SEEED_GREEN;
      else if (mapped <= 50) color = SEEED_BLUE;
      else if (mapped <= 75) color = YELLOW;
      else if (mapped <= 86) color = ORANGE;
      else color = RED;
    }

    tft.fillTriangle(x0, y0, x1, y1, x2, y2, color);
    tft.fillTriangle(x1, y1, x2, y2, x3, y3, color);
  }

  return x + r;
}

// -----------------------------------------------------------------------------------
void showMainScreen() {
  String mcuType = "Unknown";

#if CONFIG_IDF_TARGET_ESP32C6
  mcuType = "ESP32-C6";
#elif CONFIG_IDF_TARGET_ESP32C3
  mcuType = "ESP32-C3";
#elif CONFIG_IDF_TARGET_ESP32S3
  mcuType = "ESP32-S3";
#elif CONFIG_IDF_TARGET_ESP32
  mcuType = "ESP32";
#endif

  // Optional: Detect S3-Plus specifically
#ifdef ARDUINO_XIAO_ESP32S3
  mcuType = "ESP32-S3-Plus";
#endif

  tft.fillScreen(TFT_BLACK);
  tft.setTextColor(SEEED_GREEN);
  tft.setTextSize(2);
  tft.setCursor(40, 40);
  tft.println("Seeed Studio");

  tft.setTextColor(0xFFFF);
  tft.setCursor(30, 90);
  tft.print("MCU: ");
  tft.println(mcuType);

  tft.setCursor(30, 135);
  tft.println("Rev: PJ Demo v1.3");

  delay(3000);
}


void drawText(String text, int x, int y, int value) {
  uint16_t color = (value > 86) ? RED : WHITE;
  tft.setTextColor(color, BLACK);
  tft.setTextDatum(MC_DATUM);
  tft.setTextSize(3);
  tft.drawString(text, x, y);
}

// -----------------------------------------------------------------------------------
void drawPlusMinus() {
  tft.setTextDatum(MC_DATUM);
  tft.setTextSize(3);
  tft.setTextColor(WHITE, BLACK);
  tft.drawString("+", 120, 30);   // Top center
  tft.drawString("-", 120, 210);  // Bottom center
}
Link to it in the BLE…
🧐 Round Display w/TouchRing BLE Xiao C6 & S3-Plus