Hi - on April 3rd the driver was expected to be delivered in two weeks. What is the status on getting this driver completed?
I had some success with triggering the motor by following @PJ_Glasso’s example code and modifying it to work with the camera sensor’s internal functions for register access.
My system starts the camera, focuses, and takes a photo when triggered by a button.
#include <esp_camera.h>
#include <Arduino.h> // For Serial, delay

void ov5640_write_reg(sensor_t *s, uint16_t reg, uint8_t data) {
  // The s->set_reg function handles the SCCB/I2C communication.
  // The mask 0xFF means all 8 bits of 'data' will be written to the register.
  int res = s->set_reg(s, reg, 0xFF, data);
}

void trigger_ov5640_autofocus(sensor_t *s) {
  // OV5640 Autofocus Register Sequence
  ov5640_write_reg(s, 0x3000, 0x20); // Enable/prepare autofocus system
  delay(10);
  ov5640_write_reg(s, 0x3000, 0x00); // Clear/reset autofocus bits
  delay(10);
  ov5640_write_reg(s, 0x3022, 0x08); // Command to start single-shot autofocus

  Serial.println("Waiting for autofocus to complete (500ms)...");
  delay(500);
  Serial.println("Autofocus sequence complete.");
}


camera_fb_t* takePhotoWithAutofocus() {
    sensor_t *s = esp_camera_sensor_get();

    trigger_ov5640_autofocus(s);

    Serial.println("Taking focused photo...");
    camera_fb_t *fb = esp_camera_fb_get();
    if (!fb) {
        Serial.println("❌ Camera capture failed!");
        return NULL;
    }

    Serial.println("Photo captured successfully.");

    return fb;
}
After adding the autofocus code the OV5640 seems to get much hotter much faster, which is starting to affect the image quality (it’s possible this might be caused by something else in my code). Hope this helps! Would be great to get the official driver soon for a less hacky solution ![]()
Hi there,
So I finally received the unit in the Post ![]() .
.
For testing I was using the CameraWebServer Demo as a base
adding the AF function when you press the boot button.
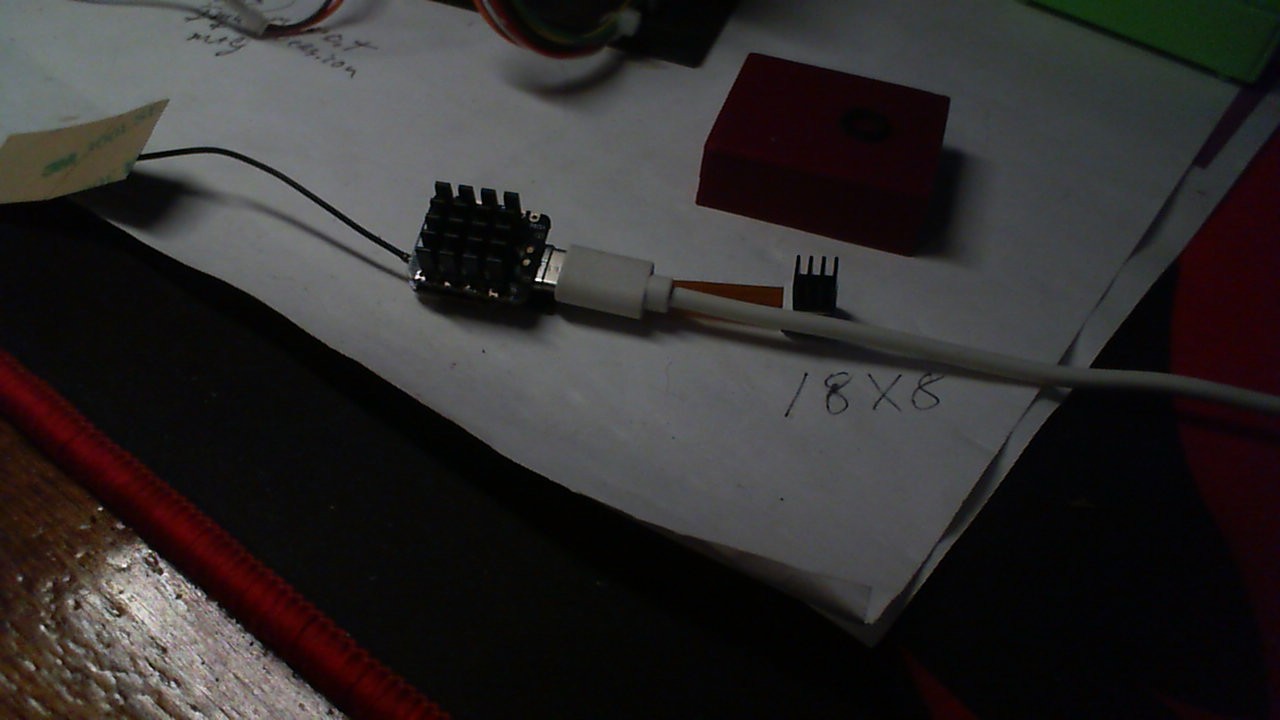
I’m using the Heat sinks and before that I would see the image start to degrade as the temp went up , So by ALL means use the heat sinks.
HTH
GL ![]() PJ
PJ ![]()
from the Data Sheet…
8.2 functional temperature table 8-2 parameter functional temperature operating temperature range-30°C to +70°C junction temperature stable image temperature 0°C to +50°C junction temperature a. b. sensor functions but image quality may be noticeably different at temperatures outside of stable image range image quality remains stable throughout this temperature range
1 Like
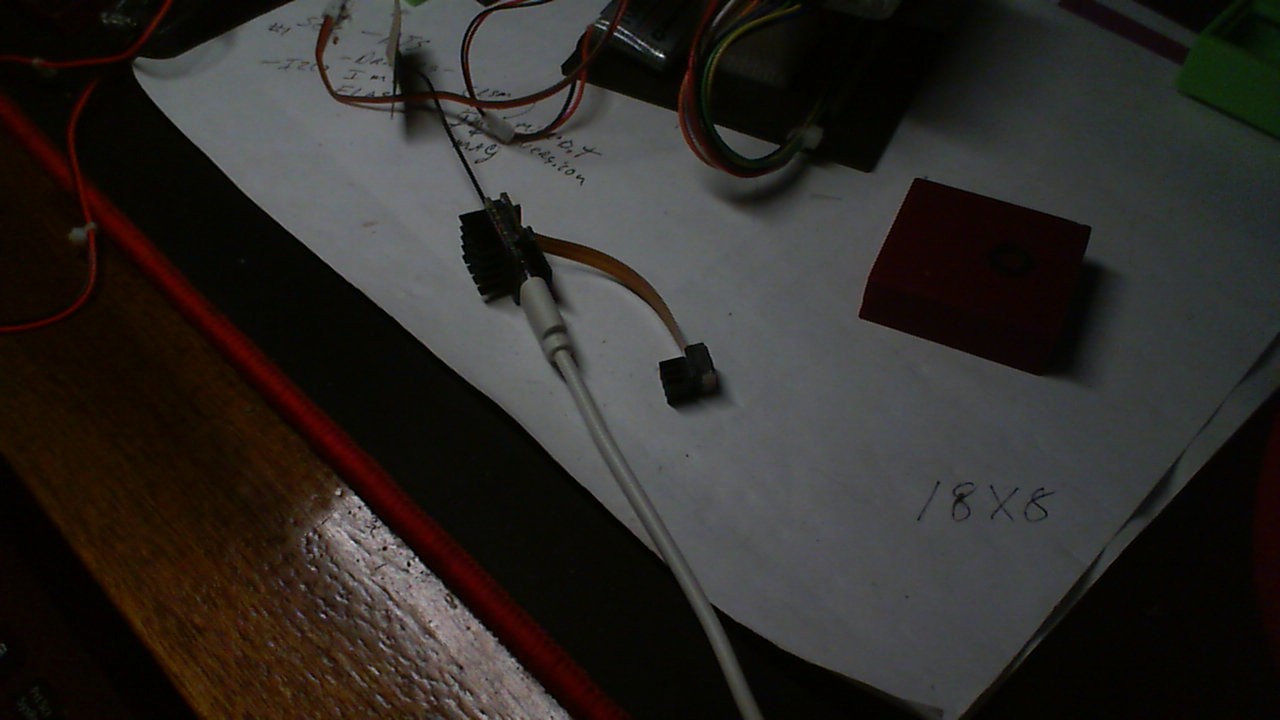
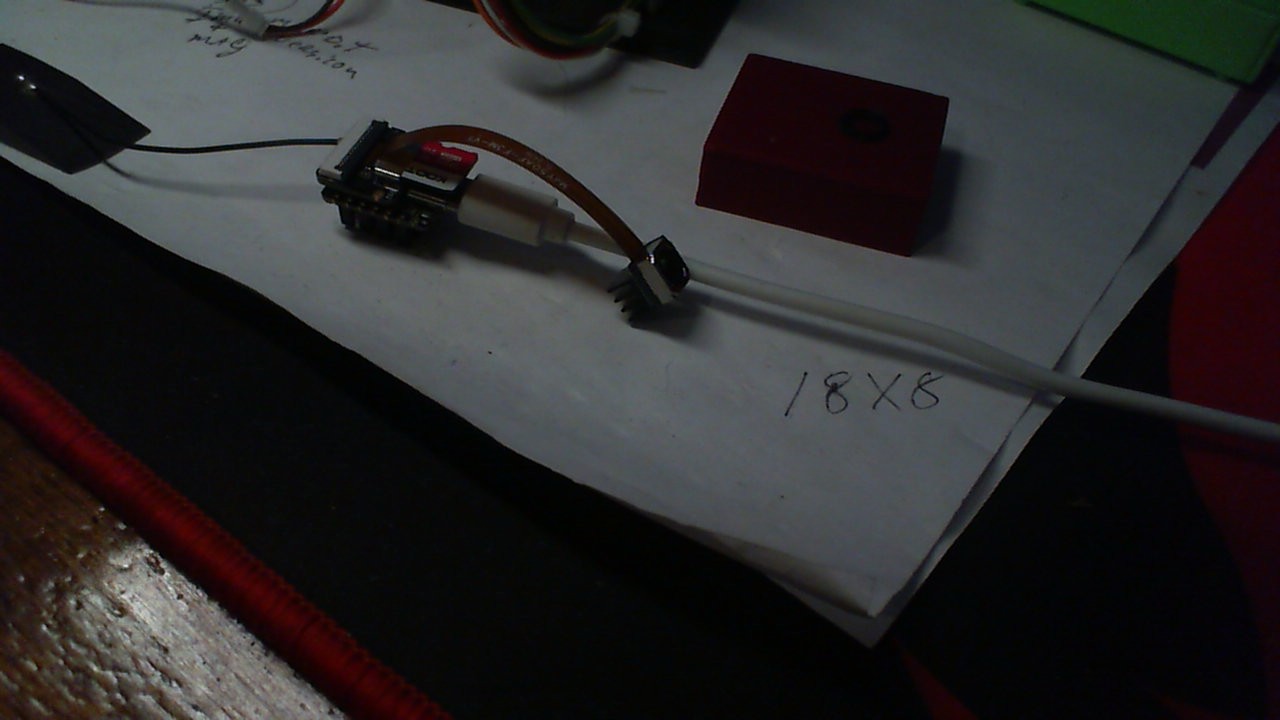
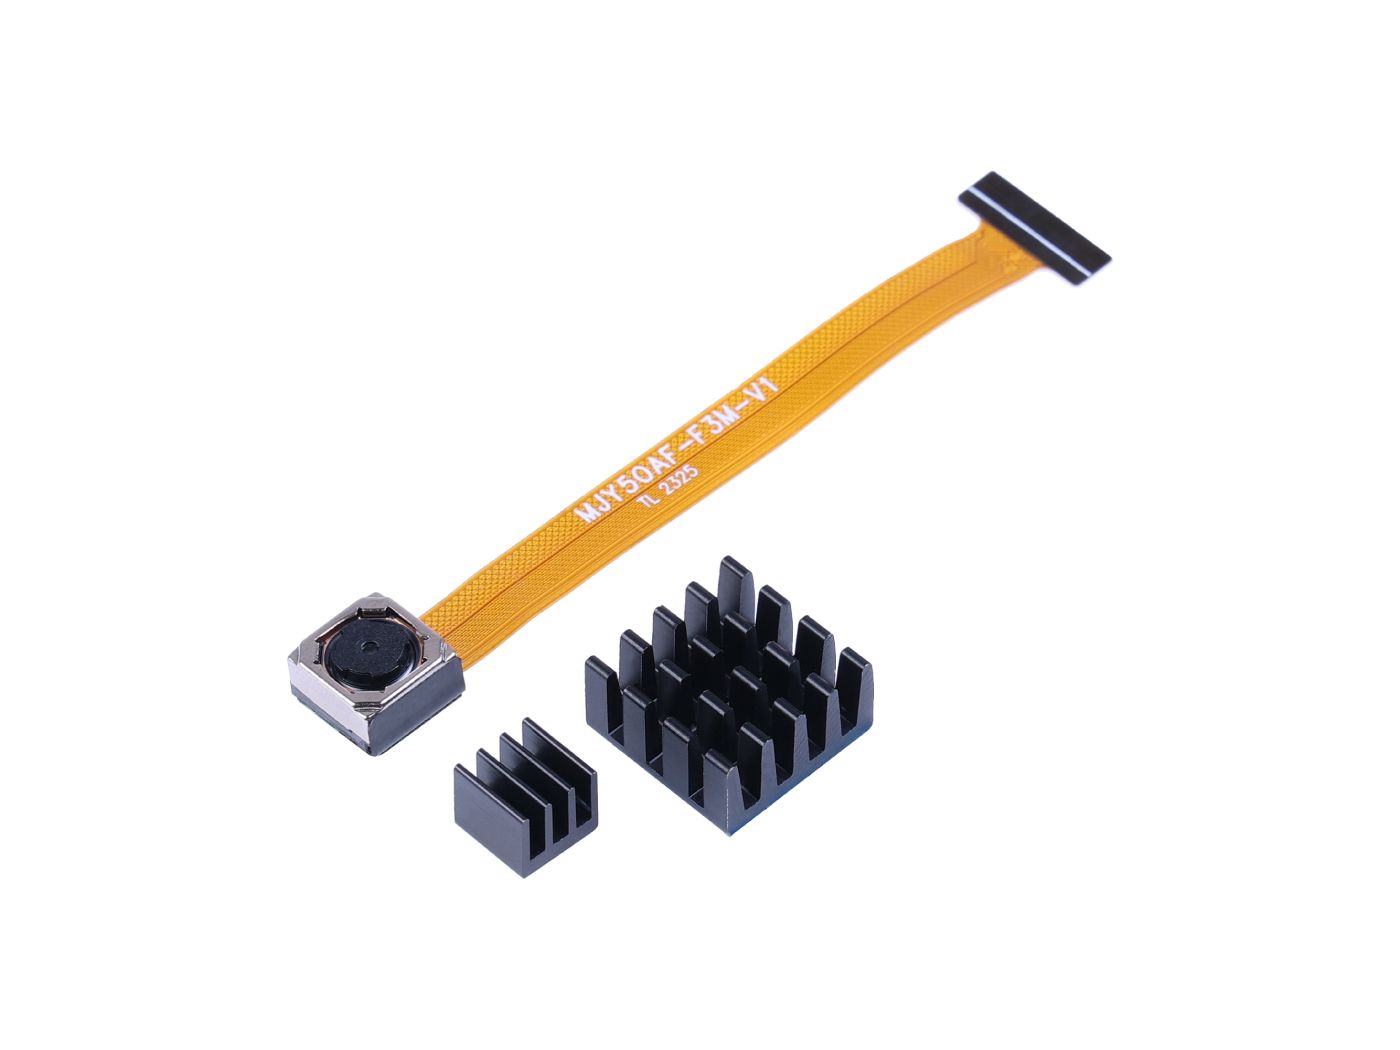
If autofocus is not working, confirm your camera has the VCM (voice coil motor). It should have a flex cable with extra pins and a square metal lens body.
![]()
C’mon man… Did you even read the whole thread, What makes you think we are not using the correct Hardware. I notice a lot of these “BOT” type responses on many posts ???
You see the picture ? It has “AF” on the ribbon cable…OP states he had it move? i.e. (autofocusing) ?so ?
HTH
GL ![]() PJ
PJ ![]()
Hi PJ,
I tried your code and I do not hear the voice coil motor working. Does it work for your setup?
I tried the sample code that support uploaded I when it goes through this portion of code I get OV5640_Auto_Focus Failed! - [3].
Tried with 2 different units so not sure if I am missing something in the camera setup.
// auto focus
#if 1
sensor_t* sensor = esp_camera_sensor_get();
int ret = 0;
ov5640.start(sensor);
if (ov5640.focusInit() == 0) {
Serial.println(“OV5640_Focus_Init Successful!”);
} else {
Serial.println(“OV5640_Focus_Init Failed!”);
}
ret = ov5640.autoFocusMode(false);
if (ret == 0) {
Serial.println(“OV5640_Auto_Focus Successful!”);
} else {
Serial.printf(“OV5640_Auto_Focus Failed! - [%d]\n”, ret);
}
#endif
kc
Hi there,
So , Finally some progress, won’t be long now.
Here is what I got.
using this test code, and the BSP 2.0.14 I can see the Lens move out and in and on the serial monitor if you move it it is in AF mode, check out the status coming back… ALL GOOD!
Try it on yours I’ll upload a video, in the mean time. ![]()
#include "esp_camera.h"
#include "ESP32_OV5640_AF.h"

// #elif defined(CAMERA_MODEL_XIAO_ESP32S3)
#define PWDN_GPIO_NUM     -1
#define RESET_GPIO_NUM    -1
#define XCLK_GPIO_NUM     10
#define SIOD_GPIO_NUM     40
#define SIOC_GPIO_NUM     39
#define Y9_GPIO_NUM       48
#define Y8_GPIO_NUM       11
#define Y7_GPIO_NUM       12
#define Y6_GPIO_NUM       14
#define Y5_GPIO_NUM       16
#define Y4_GPIO_NUM       18
#define Y3_GPIO_NUM       17
#define Y2_GPIO_NUM       15
#define VSYNC_GPIO_NUM    38
#define HREF_GPIO_NUM     47
#define PCLK_GPIO_NUM     13

OV5640 ov5640 = OV5640();

void setup() {
  Serial.begin(9600);

  camera_config_t config;
  config.ledc_channel = LEDC_CHANNEL_0;
  config.ledc_timer = LEDC_TIMER_0;
  config.pin_d0 = Y2_GPIO_NUM;
  config.pin_d1 = Y3_GPIO_NUM;
  config.pin_d2 = Y4_GPIO_NUM;
  config.pin_d3 = Y5_GPIO_NUM;
  config.pin_d4 = Y6_GPIO_NUM;
  config.pin_d5 = Y7_GPIO_NUM;
  config.pin_d6 = Y8_GPIO_NUM;
  config.pin_d7 = Y9_GPIO_NUM;
  config.pin_xclk = XCLK_GPIO_NUM;
  config.pin_pclk = PCLK_GPIO_NUM;
  config.pin_vsync = VSYNC_GPIO_NUM;
  config.pin_href = HREF_GPIO_NUM;
  config.pin_sscb_sda = SIOD_GPIO_NUM;
  config.pin_sscb_scl = SIOC_GPIO_NUM;
  config.pin_pwdn = PWDN_GPIO_NUM;
  config.pin_reset = RESET_GPIO_NUM;
  config.xclk_freq_hz = 20000000;
  config.pixel_format = PIXFORMAT_JPEG;
  config.frame_size = FRAMESIZE_VGA;
  config.jpeg_quality = 10;
  config.fb_count = 2;

  esp_err_t err = esp_camera_init(&config);
  if (err != ESP_OK) {
    Serial.printf("Camera init failed with error 0x%x", err);
    return;
  }

  sensor_t* sensor = esp_camera_sensor_get();
  ov5640.start(sensor);

  if (ov5640.focusInit() == 0) {
    Serial.println("OV5640_Focus_Init Successful!");
  }

  if (ov5640.autoFocusMode() == 0) {
    Serial.println("OV5640_Auto_Focus Successful!");
  }
}

void loop() {

  uint8_t rc = ov5640.getFWStatus();
  Serial.printf("FW_STATUS = 0x%x\n", rc);

  if (rc == -1) {
    Serial.println("Check your OV5640");
  } else if (rc == FW_STATUS_S_FOCUSED) {
    Serial.println("Focused!");
  } else if (rc == FW_STATUS_S_FOCUSING) {
    Serial.println("Focusing!");
  } else {
  }

  camera_fb_t* fb = esp_camera_fb_get();

  if (!fb) {
    Serial.println("Camera capture failed");
    esp_camera_fb_return(fb);
    return;
  }

  if (fb->format != PIXFORMAT_JPEG) {
    Serial.println("Non-JPEG data not implemented");
    esp_camera_fb_return(fb);
    return;
  }

  // Draw Image on the display or Send Image to the connected device!
  // With (fb->buf, fb->len);
  esp_camera_fb_return(fb);
}
I’m using the LIB from here;
here is the serial output, put your hand in front and you’ll see it AF like a BOSS ![]()
![]()
OV5640_Focus_Init Successful!
OV5640_Auto_Focus Successful!
FW_STATUS = 0x10
Focused!
FW_STATUS = 0x10
Focused!
FW_STATUS = 0x10
Focused!
FW_STATUS = 0x20
FW_STATUS = 0x20
FW_STATUS = 0x20
FW_STATUS = 0x20
FW_STATUS = 0x20
FW_STATUS = 0x20
FW_STATUS = 0x20
FW_STATUS = 0x20
FW_STATUS = 0x20
FW_STATUS = 0x20
FW_STATUS = 0x20
FW_STATUS = 0x20
here is video…LOL ![]()

HTH
GL ![]() PJ
PJ ![]()
1 Like
Hi there,
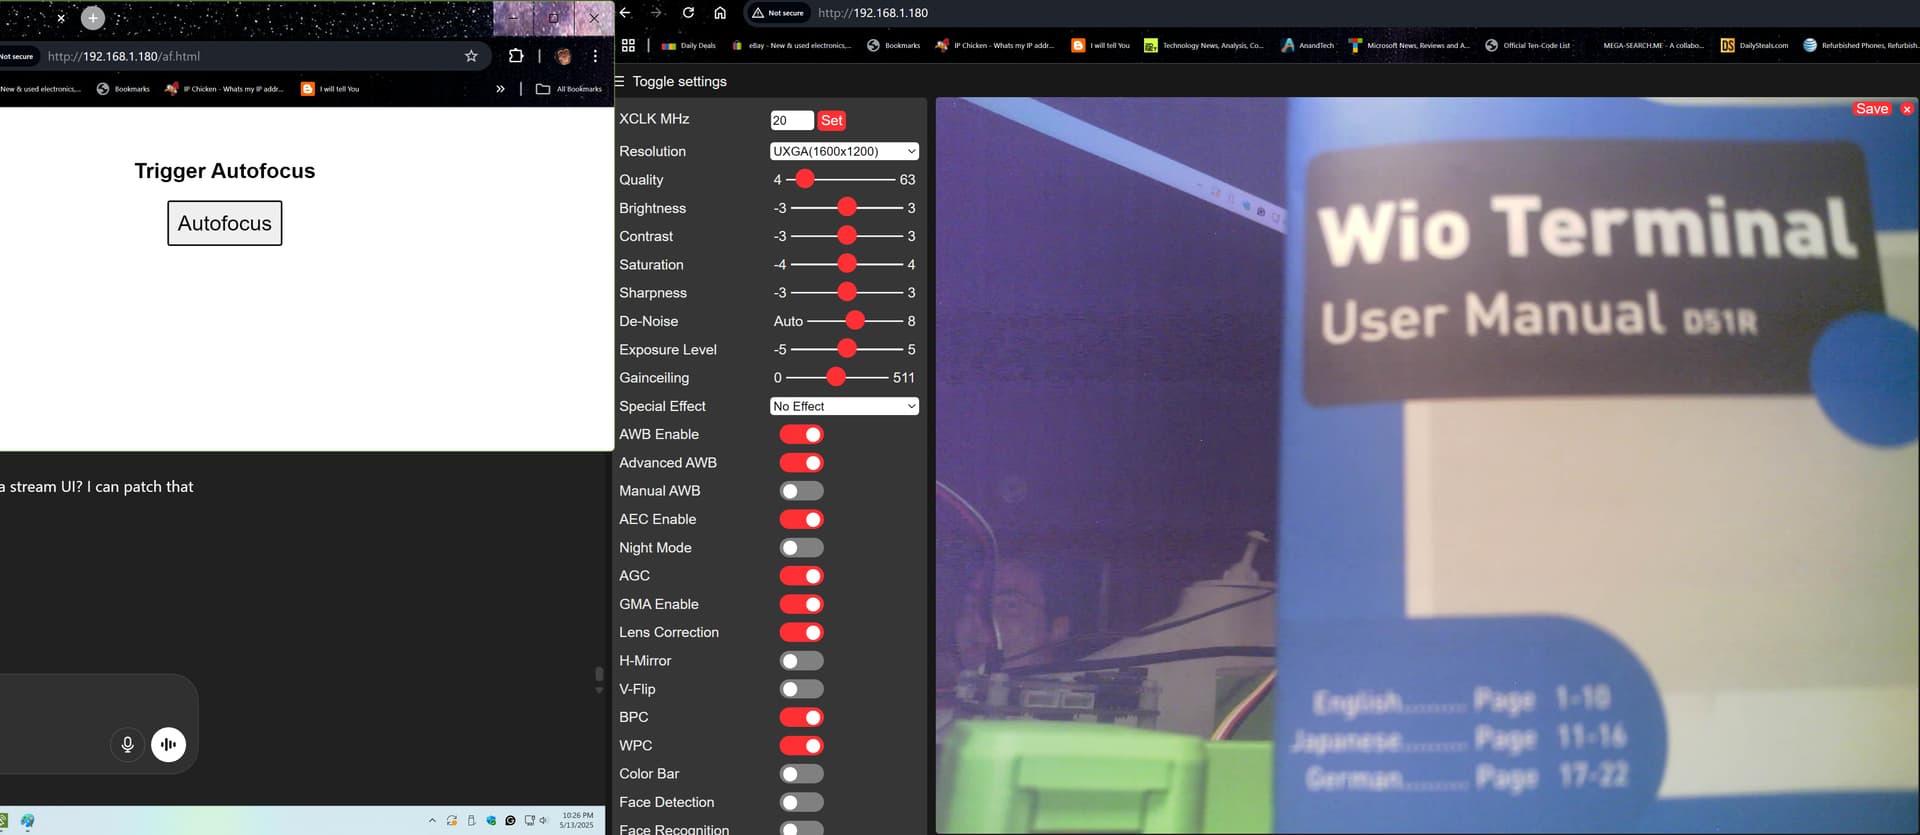
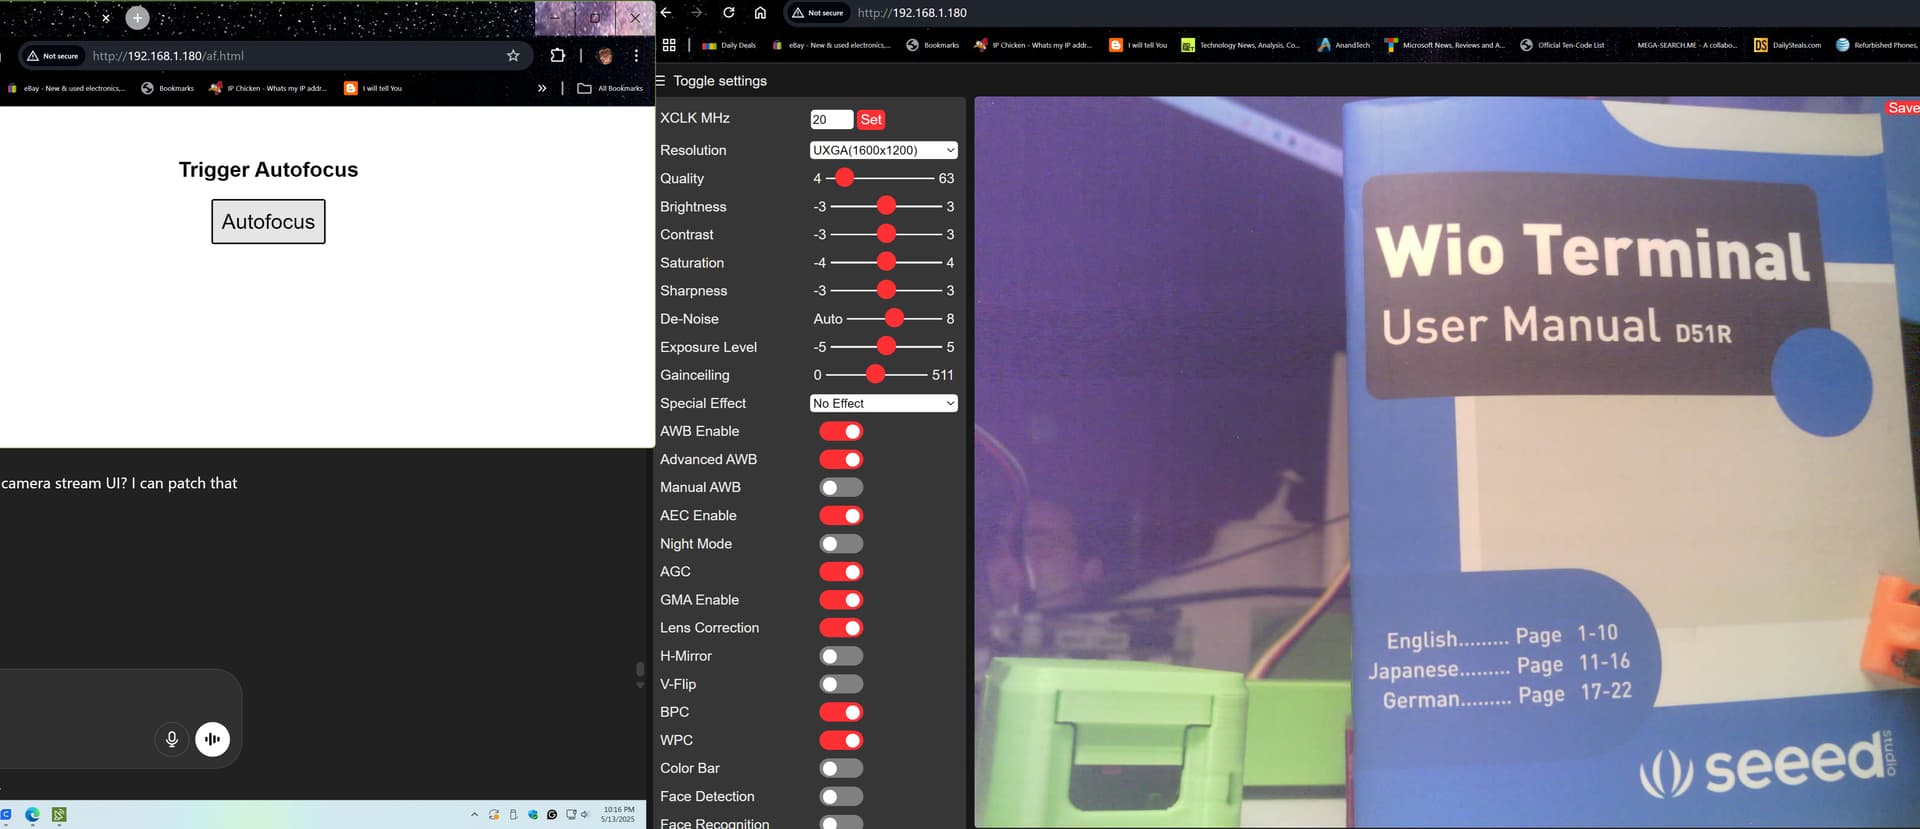
So I updated it and Shoe-Horned in the AutoFocus to the CameraWebServer Demo. It adds a separate web page with a single trigger button (until I gzip another camera_index.html page with the button added) time permitting.
For now you add your wifi credz, flash and upload it. Open the Camera Server web page IP address and set the resolution to UxGA 1600x1200 (is optimal for AF) start the stream and place a paper or object in front of it, Open the AF webpage adjacent to it, and click the button you will see the image adjust after a 3 seconds.
move the object back (further away) or forward (closer) it will auto focus now continuously.
WORKS VERY , WELL!!! ![]()
I zipped the folder and attached so help yourself.
check out the stills of before and after , and Yes it runs HOT!
but with the heatsinks installed image is Great!
Before…
After …
HTH
GL ![]() PJ
PJ ![]()
camera_AF.zip (52.8 KB)
5 Likes
Thank you very much for putting your test video results on top of the forum to show you the results, the wiki has now been updated Camera Usage for Sense Version | Seeed Studio Wiki where we have the autofocus on the OV5640 camera A series of code is given, and the subsequent test video is also shown by @PJ_Glasso, where we can clearly see a retraction of the camera motor
2 Likes
Hi PJ,
Thank you for taking the time to share. I will give this a try today and let you know how it goes. ![]()
kc
1 Like
Hi PJ - absolutely perfect example. Thank you.
Question, do you know if you can preset the AF distance in the setup?
Thanks again. Great example code ![]()
kc.
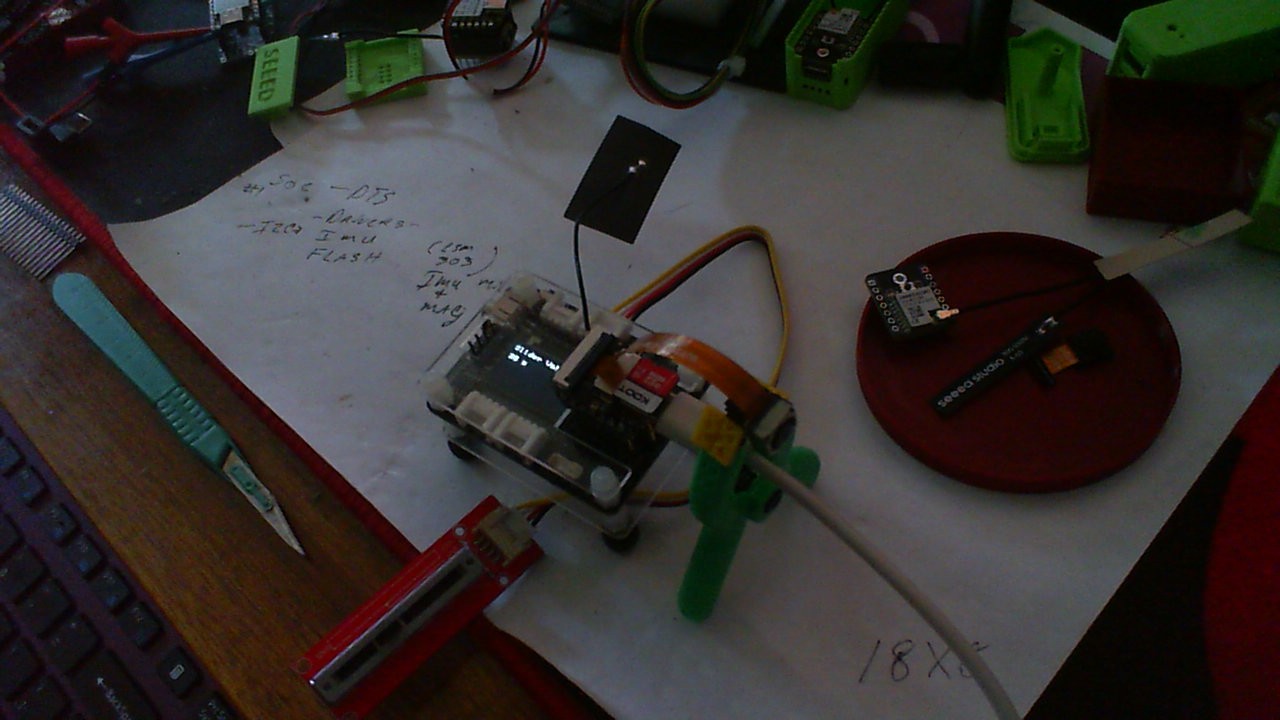
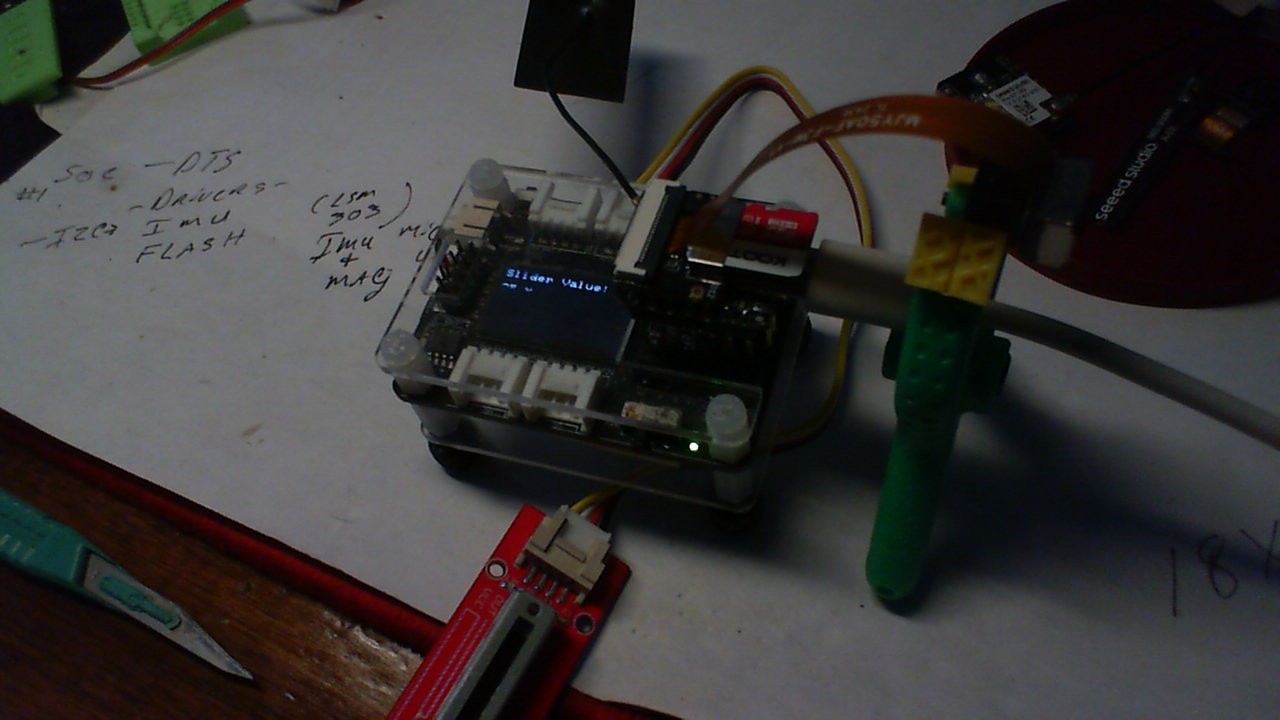
Hi there,
Awesome, Wow, you must be related ![]() As I was thinking the same thing I wondered, So I put a slider POT(grove) on the dev board and trimmed down the heat sink for the Xiao so it would fit with pins: check it out…
As I was thinking the same thing I wondered, So I put a slider POT(grove) on the dev board and trimmed down the heat sink for the Xiao so it would fit with pins: check it out…
- The focus is controlled via a register write that sets the VCM position.
- Normally, the autofocus routine uses an image-based algorithm to choose a VCM position for sharpness.
- But you can bypass AF and manually write to the focus register.
I’m trying this:
// Write focus value to VCM (range ~0 to 1023, but usable range is typically ~100–900)
void setManualFocus(sensor_t *s, uint16_t vcm_value) {
  s->set_reg(s, 0x3000, 0x20, 0xFF);  // Enable VCM interface
  delay(10);
  s->set_reg(s, 0x3022, 0x00, 0xFF);  // Manual mode
  delay(10);
  s->set_reg(s, 0x3023, (vcm_value >> 8) & 0x03, 0xFF); // High byte (only bits 0–1 used)
  s->set_reg(s, 0x3024, vcm_value & 0xFF, 0xFF);        // Low byte
}
Example calls:

setManualFocus(sensor, 100);  // Near focus
setManualFocus(sensor, 500);  // Mid-range
setManualFocus(sensor, 900);  // Far/infinity
- l need to experiment and calibrate to real distances myself (e.g., tape measure + test target).
- Some modules reset VCM on power-up — I may need to reapply the value.
-
- I’m using a manual slider on a web UI or serial input to sweep the VCM range live and get Instant feedback as you “rack focus” manually.
- Recording the value where my test subject is sharpest for fixed-distance applications (TEXT reading, barcode reading or industrial inspection).
It’s a WIP so Stay tuned… I like that it’s AF’ing though nicely ![]()
![]()
HTH
GL ![]() PJ
PJ ![]()
the gist of it is like this:
#define SLIDER_PIN A0   // Analog input from Grove slider
#define SENSOR_VCM_MIN 100   // Approx. near focus
#define SENSOR_VCM_MAX 900   // Approx. far/infinity

sensor_t *s = esp_camera_sensor_get();  // Assuming ESP32-CAM-style OV5640 init

void setManualFocus(uint16_t vcm_value) {
  s->set_reg(s, 0x3000, 0x20, 0xFF);  // Enable VCM interface
  delay(10);
  s->set_reg(s, 0x3022, 0x00, 0xFF);  // Manual mode
  delay(10);
  s->set_reg(s, 0x3023, (vcm_value >> 8) & 0x03, 0xFF);
  s->set_reg(s, 0x3024, vcm_value & 0xFF, 0xFF);
}

void loop() {
  int analogVal = analogRead(SLIDER_PIN);  // Read 0–4095 on ESP32
  uint16_t vcmFocus = map(analogVal, 0, 4095, SENSOR_VCM_MIN, SENSOR_VCM_MAX);
  setManualFocus(vcmFocus);
  delay(100);  // Tune this for smoothness vs. responsiveness
}
![]()
1 Like
HI PJ… Haha we must be because with a little help from ChatGPT wrote:
void setAutoFocus(sensor_t *s, uint16_t focusValue) {
if (focusValue > 1023) focusValue = 1023;
uint8_t high = (focusValue >> 8) & 0x03;
uint8_t low = focusValue & 0xFF;
ov5640_write_reg(s, 0x3022, 0x00); // Pause AF
ov5640_write_reg(s, 0x3023, high); // High byte
ov5640_write_reg(s, 0x3024, low); // Low byte
ov5640_write_reg(s, 0x3022, 0x06); // Trigger manual focus
Serial.printf(“Set manual focus to: %d\n”, focusValue);
}
Still working on refining this, and will compare to what you have done.
Great work ![]()
kc
1 Like
Hi there,
I know, I’m LOL, Its been trained with the "ArdyPie " cameras’ and Data set , seems all the recommends are based around it… but they do use the Esspessif cam ![]() ? Wacky.
? Wacky.
Still a WIP here… ![]()
![]()
GL ![]() PJ
PJ ![]()
I want to rack the focus with a slider. ![]()
1 Like
For anyone wanting just manual focus, here is the function I came up with from the datasheets.
You would not load the AF firmware as it would be conflicting with this direct VCM control. There may be some command the the firmware supports for manual focus, but I could not find that.
It seems to work on my XIAO ESP32S3 with OV5640.
I will append the sketch based on the web server example with an added slider for the focus if I can upload it later. - As a new user, it is not letting me upload now.
constexpr int REG_VCM_CONTROL_0 = 0x3602;
constexpr int REG_VCM_CONTROL_1 = 0x3603;
uint16_t focus = 0;
int set_focus(sensor_t *s, uint16_t vcm_value)
{
  // Set DAC bits 3:0 into reg bits 7:4
  s->set_reg(s, REG_VCM_CONTROL_0, 0xF0, vcm_value << 4);
  // Set DAC bits 9:4 into reg bits 5:0
  s->set_reg(s, REG_VCM_CONTROL_1, 0x3F, vcm_value >> 4);
  focus = vcm_value;
  Serial.println((std::string("Focus set to ") + std::to_string(focus)).c_str());
  return 0;
}