I’m developing firmware for the XIAO MG24 Sense using the Gecko SDK in Simplicity Studio, and I’m currently working on ensuring the onboard LSM6DS3 sensor functions correctly.
To simplify things, I first wanted to confirm the sensor can be probed over I2C by reading the WHO_AM_I register (0x0F, expecting 0x69). For reference, I looked at the Seeed Arduino driver.
From what I understand:
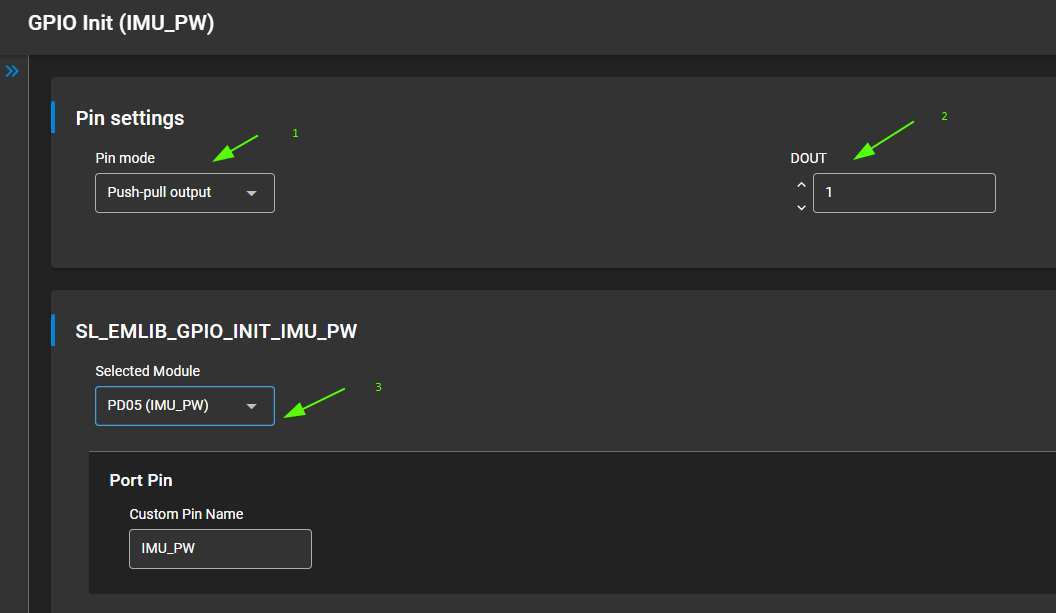
PD5 needs to be configured as output and driven high to power the sensor.
Wire1 is used, which maps to I2C1 on the XIAO MG24, corresponding to PB3 (SDA1) and PB2 (SCL1).
Here’s a snippet of my sl_i2cspm_I2C_config.h defining I2C1 and my pins:
Despite that, I’m not getting the expected response from the sensor (or I2C might not be transferring at all). I2C_TransferReturn_TypeDef ret = I2CSPM_Transfer(SL_I2CSPM_I2C_PERIPHERAL, &seq); returns i2cTransferInProgress.
Has anyone here successfully used I2C peripherals (esp. LSM6DS3) with the Gecko SDK and the XIAO MG24 Sense?
So, Not a direct ANSWER to your specific Question, so disregard if so.
However, You may gain some incite from this example, demo code with compiler output & video. Perhaps as a sanity check before leaving the planet on Simplicity studio. to embark on the IMU journey
@mattmagic - I tested your code here and it works fine - with a little change.
The EXPECTED_WHOAMI should be 0x6A (LSM6D3TR-C)
Rather check the response is OK and then check the response value…
@grobasoz Great news! I tried a few more things yesterday as well, but unfortunately, still no success. One of the tests I ran was a basic I2C scan, but it consistently returns i2cTransferInProgress.
@grobasoz, ok, I switched to the SiSDK 2024.12.2. Not sure if this makes a difference, but which compiler and Part in the configuration are you using?
I am using the GNU 12.2.1 and EFR32MG24B220F1536IM48.
@mattmagic - I restarted the app in 4.4.6 but can switch back to the latest SDK for a demo.
When I get back to the office I will create a new app for posting to my GitHub repository for you. I’ll continue documenting the steps I took as well.
I just need to know what application you are trying to build? I’m guessing BLE still?
If so, what do you want in the GATT apart from Motion?
The compiler and chip you have chosen is what I normally use for Xiao MG24 development as well.
A few checks you may want to make before I get code completed for you… in SS5.
Ensure that the clocks are set correctly, see Clock Manager.
For BLE set high precision on the LFRCO or use LFXO.
Set the DCDC to disabled and bypass.
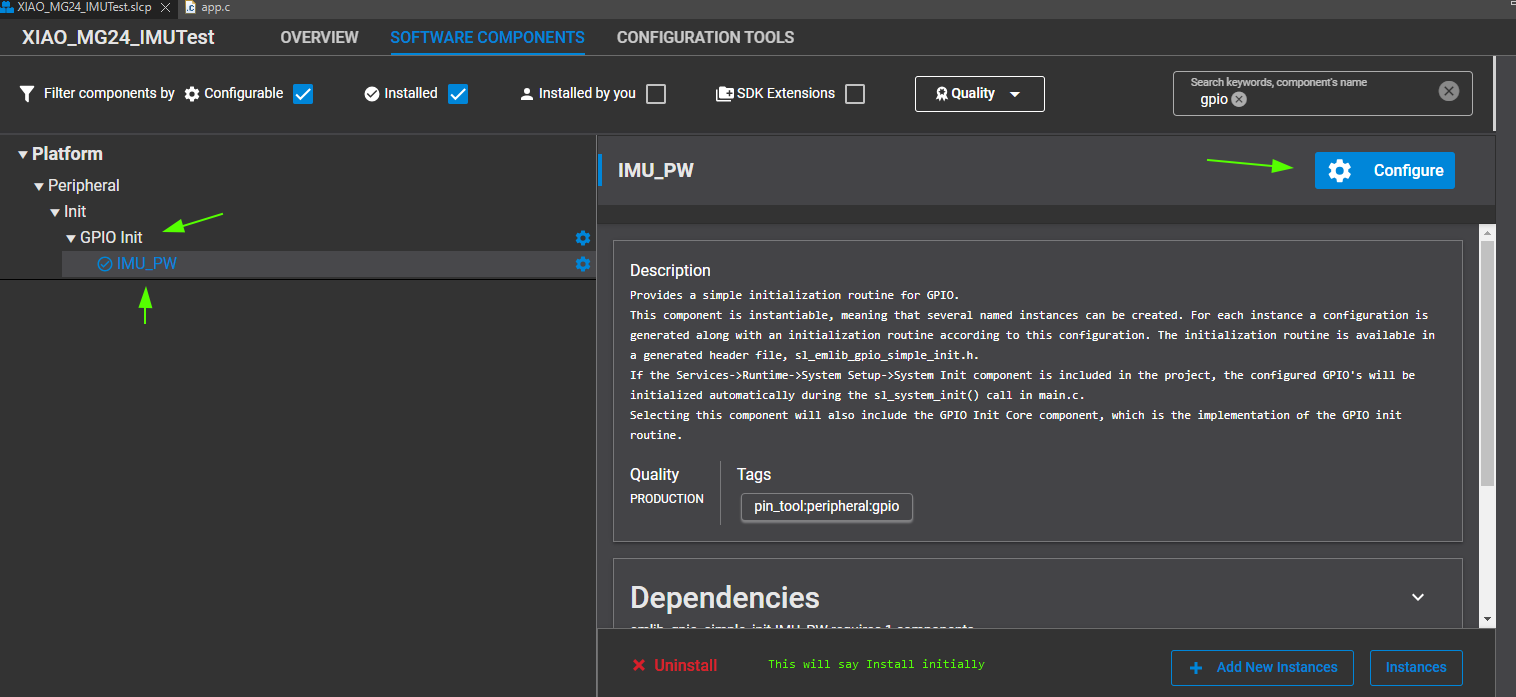
Add the GPIO settings.
Add the I2C via the I2CSPM component.
There are a few other settings but I can’t remember all of them without being in front of my computer.
@grobasoz thanks again for the detailed help — I very much appreciate it!
Yes, BLE is still part of my goal, but I think I’ll figure it out once the IMU is up and running — I don’t want to waste more of your time.
To your checks:
Clock Manager: I haven’t made any changes there yet — I’m still using the default configuration. I’ll read up on it to see if anything needs adjusting.
DCDC: I’ve disabled and set it to bypass as suggested. Does this setting influence the onboard IMU or power rails for I2C devices? (Just making sure I understand the implication.)
GPIO: Configured PD5 as you showed to pull it high — that part looks good.
I2C via I2CSPM: I’ve added this, but I suspect this might be where the issues are still occurring. I’ll double-check the I2C routing and pin mux to ensure it matches what the IMU expects.
I appreciate your offer to post a new GitHub app — that will help a lot with aligning on a known-good baseline.
Just wanted to follow up on this in case anyone else runs into a similar issue.
As it turns out, the problem was due to a mismatch in the I2C pin definitions — the SDA and SCL were swapped. Big thanks to @grobasoz for spotting the issue!
For anyone using the XIAO MG24 with the Arduino framework: the comment for the I2C pin definitions might be incorrect, which I had used as a source. According to the official XIAO MG24 schematic (KiCAD PDF), the correct wiring is: