DS203 quad user interface design

Gabonator,

It is really good news to see you back in the forums.

I have been making intensive use of your app/interface for many purposes and you made it: the device is useable, simple and neat. There other developers focused in measurement accuracy/reliability but IMHO the device has to be easy to use also.
There are BASIC features that need to work fine before thinking of things like X/Y mode or FFT analysis.
My priorities with this device are:

  1. Ease of use -> DONE
  2. Readings accuracy
  3. Rest

So I am really pleased your next aim is to fix the calibration issue.

I cannot help with the code as I am not familiar with these devices, however I can help with beta testing :smiley: (test on real devices, not just lab tests with signal generators).

Regarding the CALIBRATION.

Is there any way to access the calibration subtask from your app? If I could start the calibration task I could run some tests and get linearity curves and so.
If not, could you make an app release with that feature so we can give it a try?

It is clear that a single compensation point is a joke as the device is not linear at all.
Are you using 6 compensation points for each grid? (V scale)
If it is working fine without moving the Vpos I think it is a good achievement for now and it is worth a try.

Thanks and good luck!

Hello again,

and thank you for your posts, it is a big motivation for me to continue with this project, when I see more and more people involved in my project. Some posts were about the compilation on linux platform. I can’t remember exactly, but the script “arm_linux/Makefile” and necessary changes in “common/build.mk” were done by some guy here on this forum. When I am looking again to these files, it seems there are some errors like wrong slashes, and so on… Unfortunatelly I am not keeping the linux build scripts up to date, because I don’t have a linux machine to test it. It maybe needs some light changes, so if someone finds out what to change to get it working, please let me know, or push me a request on github with your changes.

About the line ending. I thought that github autmatically changes the line endings to linux style when committing the files to the server. Maybe it does not know what to do with “.hex” files. So again, if you have any idea how to fix this problem, let me know… Installing a windows virutal machine just for compiling the source codes is stupid (sorry for this word). After all gcc was initially developed for unix platform, not for windows :slight_smile:

I am currently working on the calibration process, during the weekend I have made a lot of measurements to find out what will be the best approximation algorithm for correcting the ADC values. Yesterday I made some graphs to review these measurements, but something went wrong and for negative voltages I get incorrect values. If you are interested, here is a screenshot:

and here is an interactive view of this graph:
http://pub.valky.eu/calibbad/meas9mage.html

Every curve represents different Vpos setting (from -20 to 280), on the horizontal axis there are voltages from -2.0 to +2.0 with step 0.1V. On the horizontal axis there is measured ADC value. These ADC values were calculated as average of full sampled waveform.

I am still having problems to understand, why the negative voltages are measured incorrectly. I used RIGOL signal generator as voltage source. I was changing the voltage offset of sine wave with amplitude set to minimum (it did not allow to set the amplitude to zero, but it was under 0.4mV or so). This DC voltage was measured accurately with UNI-T digital multimeter. And this voltage was connected with the A channel probe of DSO.

Maybe it has something with the ground loop…

To answer your question, no currently there isn’t any way to calibrate the oscilloscope from the application. After I finish initial measurements and I will find a good correction algorithm, I will prepare a calibration application. But this app will be implemented probably in html/javascript with the use of DSO SDK, due the lot of calculations in floating point arithmetics.

gabriel

gabonator. If in your software you want to use lists and have functions like getPrev, getNext, getFirst, getLast, for this is a class DoubleLinkedList which has a structure -
class DListElement //element of double linked list
{
DListElement *_prev, *_next; //here are pointers to prev and next element
…//your data
DListElement *get_next(){return _next;};
DListElement *get_prev(){return _prev;};
}

class DLinkedList //the double linked list itself
{
DListElement *_first, *_last; //pointers to first and last elements of the list
DListElement *get_first(){return _first;};
DListElement *get_last(){return _last;};
}

so you do not need this iterations over single linked list, as you have in your windows.
do not invite bicycle :wink: data structures must be suitable for algorithms.

also why are you trying to implement MS Windows style of UI objects, messages and functions, if this processor has only 64k of ram. MS Windows style is a C-style of GUI implementation, but you are using C++

I enjoy your GUI, and your features. I can’t wait to see what else you come up with, and I wish I were able to help. Keep up the good work.

Small update about the DSO calibration. As I mentioned I was measuring each combination of input voltage and channel vertical position. The dependency of ADC output from input voltage is pretty linear (at least in the range 16…240), so the only issue to achieve small error is compensating the vertical position. For each position I was calculating the linear approximation of measured values (adc => voltage) with well known formula Y=k*X+q. The “q” coefficient is function of vertical position and is pretty linear. The interesting thing is, that the “k” coefficient is really strange and I had to use 6-point linear approximation curve for it. Everything is calculated in HTML/javascript and all the charts / coefficients you can see here:

http://pub.valky.eu/dsocalib/calib_display.html

The javascript calculates everything necessary and produces directly C code that can be compiled with the DSO. Don’t worry, it was only for the development/debugging purposes. I am working on onboard calibration algorithm, but it doesn’t achieve so nice results because the internal generator of DSO cannot generate negative voltages. Currently I was able to calibrate my device in 200mV range and the results look really good!

Anyway, if it doesn’t measure accuratelly, you can play a snake game I designed for DSO and is part of the User applications of latest firmware :slight_smile:

Regarding the double linked list that alys mentioned. Yes I know about that. But I was thinking hard to design the CWnd class as simple as possible to keep the memory requirements as low as possible. Reverse iterator is only used when the back key is pressed and the window system is looking for previous children to give focus to it. Instead of having pointer to the previous children I decided to find it programatically by iterating the window parent’s children. It is slower, but it doesn’t matter, because the user can’t notice it. So the pointer to previous window is redundancy and I was trying to remove all redundancy I was able to find.
The window system I designed is lightweight and easy to maintain. I am not using any dynamic allocation or other C++ things. I used only the C++ features to keep the code nicely organized and easy to read. I am not C/C++ expert, but I am sure that by using C++ your code will not require more than 10% extra rom/ram than the same project written in C.
Maybe the seeedstudio team will design new version of DSO with more powerful CPU and this will not be an issue at all :slight_smile: Currently the binary size of my firmware is 64kB, so the half of the program space is still available…

Gabriel

Good find! Unknowingly, I’m sure this has happened before. Using git in a linux terminal then over to xp in VirtualBox.
Thanks!

I finally figured out how to keep the line endings on the hex file correct. By calling this command “git config core.autocrlf false” from my github repository folder, it will commit the files to the github server without any changes… And when you download it, it should be the same file as when I was comitting it.

As a quick download link for latest hex file, you can use this one:
https://raw.github.com/gabonator/DS203/master/Bin/APP_G251.hex

Gabonator! You mentioned that genarator gives signal above zero only. Connect generator and a probe via capacitor.
I missed the reason why device is so unlinear. But i see few experiments with it.(I have not device itself, so it is only imaginations).

  1. Battery test. Take AAA(AA) battery and try to measure voltage. it must be about 1.5 volts in direct polarity and -1.5 in reversed. if it is so(omitting details that battery has not exactly 1.5v), then linearity in point 1.5/-1.5 looks good.
  2. Test with sawtooth signal - connect generator and probe via capacitor, the waveform must be really linear and visually symmetric relative to zero level. if it is so…you really do not need any calibration.
    anyway you can develop a calibration application based on measurements of “sawtooth via capacitor” measurement data.
    regards.

Ive been busy for some weeks and just found this.
The first release was amazing but this one has impressed me even more.

I will give it an intense try, during the last weeks I have been using the latest comunity software compilation and I have been missing your interface SO much.

Thanks!

Is this APP_G251 version based on pmos69 APP_G251 version with a new GUI?

DrV, I hope you won’t be disappointed too early. It has nice maybe interface, but it cannot be used for serious measurements. Actually, it doesn’t implement more than 10% functions as the original firmware. Currently I am finishing the calibration UI and I hope, in one-two months I will start implementing the rest of the UI.

glt, no, this firmware is written from a scratch and has only a little in common with the pmos62-es firmware. We just use the same build script that produces same named hex file.

alys, I really like your idea of connecting the generator to the input through a capacitor for obtaining the negative voltages. You should maybe buy this oscilloscope and help me developing it :slight_smile:

gabonator1, not me but my colleague was dissapointed with the new release haha. It is obvious you are focusing in the interface, just the opposite from the “comunity” package. If both your interface and the functionality of the comunity release merged into a single app…

Just have in mind the title for this thread DS203 quad user interface design, for now I am expecting nothing else than a nice interface.

I like the menu layout, selecting the mode in the first tab, settings, etc. The original release is not practical for me, I really dont need to switch over ALL the options to reach one…

Just let us know how we can help you in the development of the app :slight_smile:

Cheers.

Hello,

I have finally finished some basic calibration module and I would really appreciate it, if you would try it and give me some feedback.
Here are the instructions:

  1. We need to calibrate the DAC module at first, you will need some volt meter for that. Go to “User applications” menu, tab “Calib”
  2. Select the ADC button, here are two lines:

0.5V…0725
1.5V…2176

use the slider buttons to move between the four digit numbers. The first dac number (725) should correspond to the 0.5V voltage on wave out, and the second (2176) to 1.5V. Connect the volt meter to wave out and change the numbers to achieve the voltage as precisely as possible.

  1. Press the “Use values” button
  2. Save calib data
  3. Select “Analog” button
  4. Connect wave out to CH1 input
  5. Start calibration (CH1 200mV range) (it will take about 3 minutes)
  6. Save calib data
  7. Analog -> Get info and post me your results, in my case it looks like that:

Calibration data CH1: 200mV
Q0: -20 -> 46900 (-22.9)
Q1: 280 -> -774080 (377.968)
K0: -20 -> 2905 (1.418)
K1: 15 -> 2900 (1.416)
K2: 75 -> 2905 (1.418)
K3: 90 -> 2910 (1.420)
K4: 245 -> 2920 (1.425)
K5: 280 -> 2900 (1.416)

Check the calibration in oscilloscope view and for precise measurements you can use the voltmeter application (User applications->meter)

the oscilloscope calibration depends on the level of battery charge

Gabriel,

Good job on the work so far. Am I correct in thinking that a bunch of the functions are not coded yet, so it’s a GUI development ontop of a basic scope right now? It would be great to get some of this GUI merged with the community App project.

I recently bought another DS203, sourced in the UK from a Chinese importer, and it’s come with a new firmware, App (plus A1) Version 1.00 running on Hardware version 2.60 with sys version 1.51. I was really hoping it was from this forum because the UI is super improved, but the core scope functions are much better with the community APP. I am posting some screen shots because they have taken a somewhat similar approach to you. I like some of your nice features but this new DSO is actually more consistant and easier to use. Please take this as constructive review.
Plus A1 APP.jpg

For Example, in this new APP the right mouse key is always navigation, and the left mouse key is always chose and left press is always select. Triangle key always and only toggles between horizontal menu and vertical menu. So it’s very easy to move around.
You have the left key as horizontal and the right as vertical, which is fine, except when you move between the two, where it’s necessary to move the vertical selection until it rejoins the horizonal by going horizontal, at which point it stops working and you have to switch keys to go horizontal, then switch again to go horizontal on the vertical key into the new menu. Proposal: have the vertical menu remember it’s last selection, and have the horizontal always work not be disabled by the vertical menu. Result: the horizontal is always horizontal and vertical is always vertical, and it’s quicker to move around both. For example, move from trigger to dY cursors is 3 keys and 14 dabs on your scheme, but it could be just one horizontal dab.

Vertical menu contains most of the functions that were so difficult to get to in the old UI eg: cursor posistions. Now it’s easy: triangle toggle then mouse keys.

You have context menus which are great, as coded on the input page. Personally I’d have them toggle which I think is more expected action of buttons and frees up circle, or more usefully free up play/hold to do just that. I keep going into sub-menus when I want to exit. I’m assuming the scope display will remain when eg: cursor boxes substitutes for input boxes otherwise it would be impossible to set them. Because you use square to close menus, you have inconsistancy again. For example, I go into CH2 menu with Play, but I close it with Square. However if I go into the sub menu Resolution, I can close it with Play (the toggle on-off I keep trying), but then have to go back to Square to close the CH2 menu. If I try the Timebase menu I can have toggle-off. But if I go into the Functions tab and select say Spectrum analyser, I must use toggle off as nothing else has any effect.

The new DSO has measurement toggled on-off by circle, and a long hold enters the menu to change measurements, where, as before, left mouse is chose, left press is select channel and right mouse is vertical move as usual. However it’s still the old terse descriptions and poor colours, and it sits on the display so I can’r recommend it. Yours are easier to read, and I think will be easier to select off the context menus. As you are coding it, it seems that maths and cursors are mutually exclusive, so you might want to consider a footer displaying two or more cursor values (eg: t1, t2, delta-v). The new DSO has fixed them at dT and dV but it’s useful to have them on display along with eg: frequency.
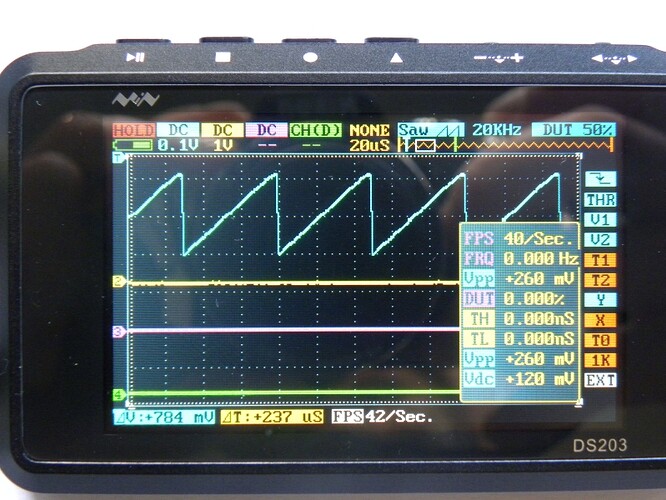
Measure display.jpg

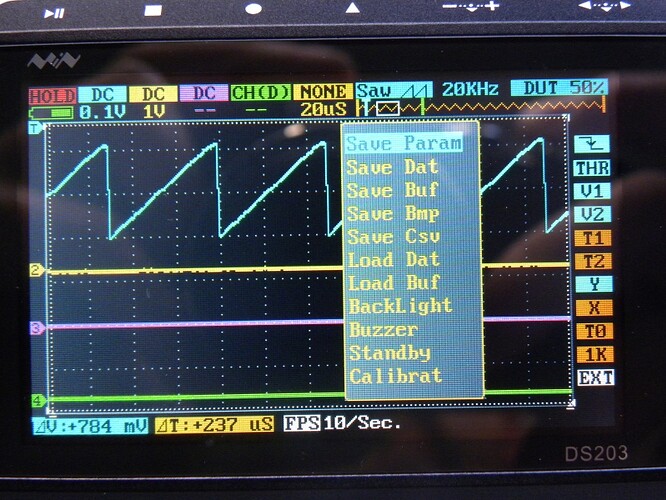
In learning your keys I think I have captured around 38 bitmaps. Here’s a screenshot of the functions menu on the new DSO: all these file operations are in one place (square) and as before, right vertical mouse is vertical, left mouse is chose and left press is select, so it’s completely consistant again. I think you have yet to code in the menus so you might like to consider this extended menu approach.
Function menu.jpg

For info, the new App also includes

  • display record length change 4k-2k-1k-512-360
  • Cute function out icons with Square wave duty and up to 8MHz, others to 20k

Hope this is of some help.
Cheers,
Mike

Mikey63: Thanks for the review and for posting the pics of the newest Chinese version of the DS203; it helped me confirm the version I bought and received a few months ago on eBay. Also wanted to add my +1 to the menus and encourage Gabriel to use the same or similar.

All: Since we’re discussing UI for the DS203, here’s my playlist on Youtube with some screen shots on the various versions of the DS203.
http://www.youtube.com/playlist?list=PLRUTSitNpxYcLQXyfJgFYCanWeD8X_150
Number 3 on the playlist that has some PAWN scripting language used on the DS203, might be useful?
http://www.youtube.com/watch?v=WwzGsEINN3o&feature=share&list=PLRUTSitNpxYcLQXyfJgFYCanWeD8X_150

Gabriel: Its been a few months since I downloaded your project, but I did successfully open it in my VS2010 Ultimate…I primarily use VS for WS and UI in VB; I’m a novice when it comes to C#. I don’t have a lot of free time but if I and my VS2010 can be of assistance let me know.

Stephen

Gabriel,
I do not understand!

Calibrating Adc - OK except that “Use values” instead of “Use labels”

Calibrating analog channel:
Ground calibration - OK for CH1 and CH2
Change coeficient do not work at all on both CH1 CH2

Vin = 1.4242V = const and do not changed with K changes.

What is wrong

I really want to try Gabonator’s app for my Quad, but whenever I try and load the APP_G251.hex file, it complains that there is not enough space, it needs about another 400kb (this app is about 1mb, as opposed to around 100kb for the old one I was using). I suspect it may be because I have that frequency analyzer in the fourth app slot, but as far as I can tell, there is no way to remove it. Any ideas?

Ignore my last post, I’m idiot. I’m not familiar with github, and the .hex file I got when right clicking on the link and saving it was…different…to what I needed. Working now. For those hunting around for the link: https://github.com/gabonator/DS203

Kabron, I am sorry, there was some minor bug in calibration and triggering code. It’s fixed now, tell me whether it worked for you.

Mikey63, thank you for your extensive review. I liked the option of original firmware which allows to reduce the number of samples to lower count (2k, 1k, 360 instead of 4k) which should improve the screen redraw times (important in timebase resolution greater than 1ms). I tried to work with latest BIOS code, which should implement this feature, but for some reason I was unable to get it working. Anyway, I solved this problem in another way. Regarding the keys - the function of circle and triangle buttons is now user assignable including trigger control.

ObservativeTiger: thank you for the youtube playlist, some features of JPA’s firmware (pawn programming) and new version of original firmware I like very much. But the sad thing is, I ran out of RAM, so now I will think how to reduce the memory requirements and probably it is good time to start fixing bugs :slight_smile: At least I would like to implement FIR filtering with user defined filters and also the slow scrolling mode for low speed sampling.

Gabriel