Hello,
i have a problem with connection my motor to an seeduino XIAO ESP32C3 through the mini motor driver v1.0.
Normally when i am connecting it directly to the seeduino xiao or expansion board motors are working well, but when i am trying to connect them with mini motor driver, there is no reaction.
Could you explain me how to solve the problem?
Maybe i need to use some ready libraries.
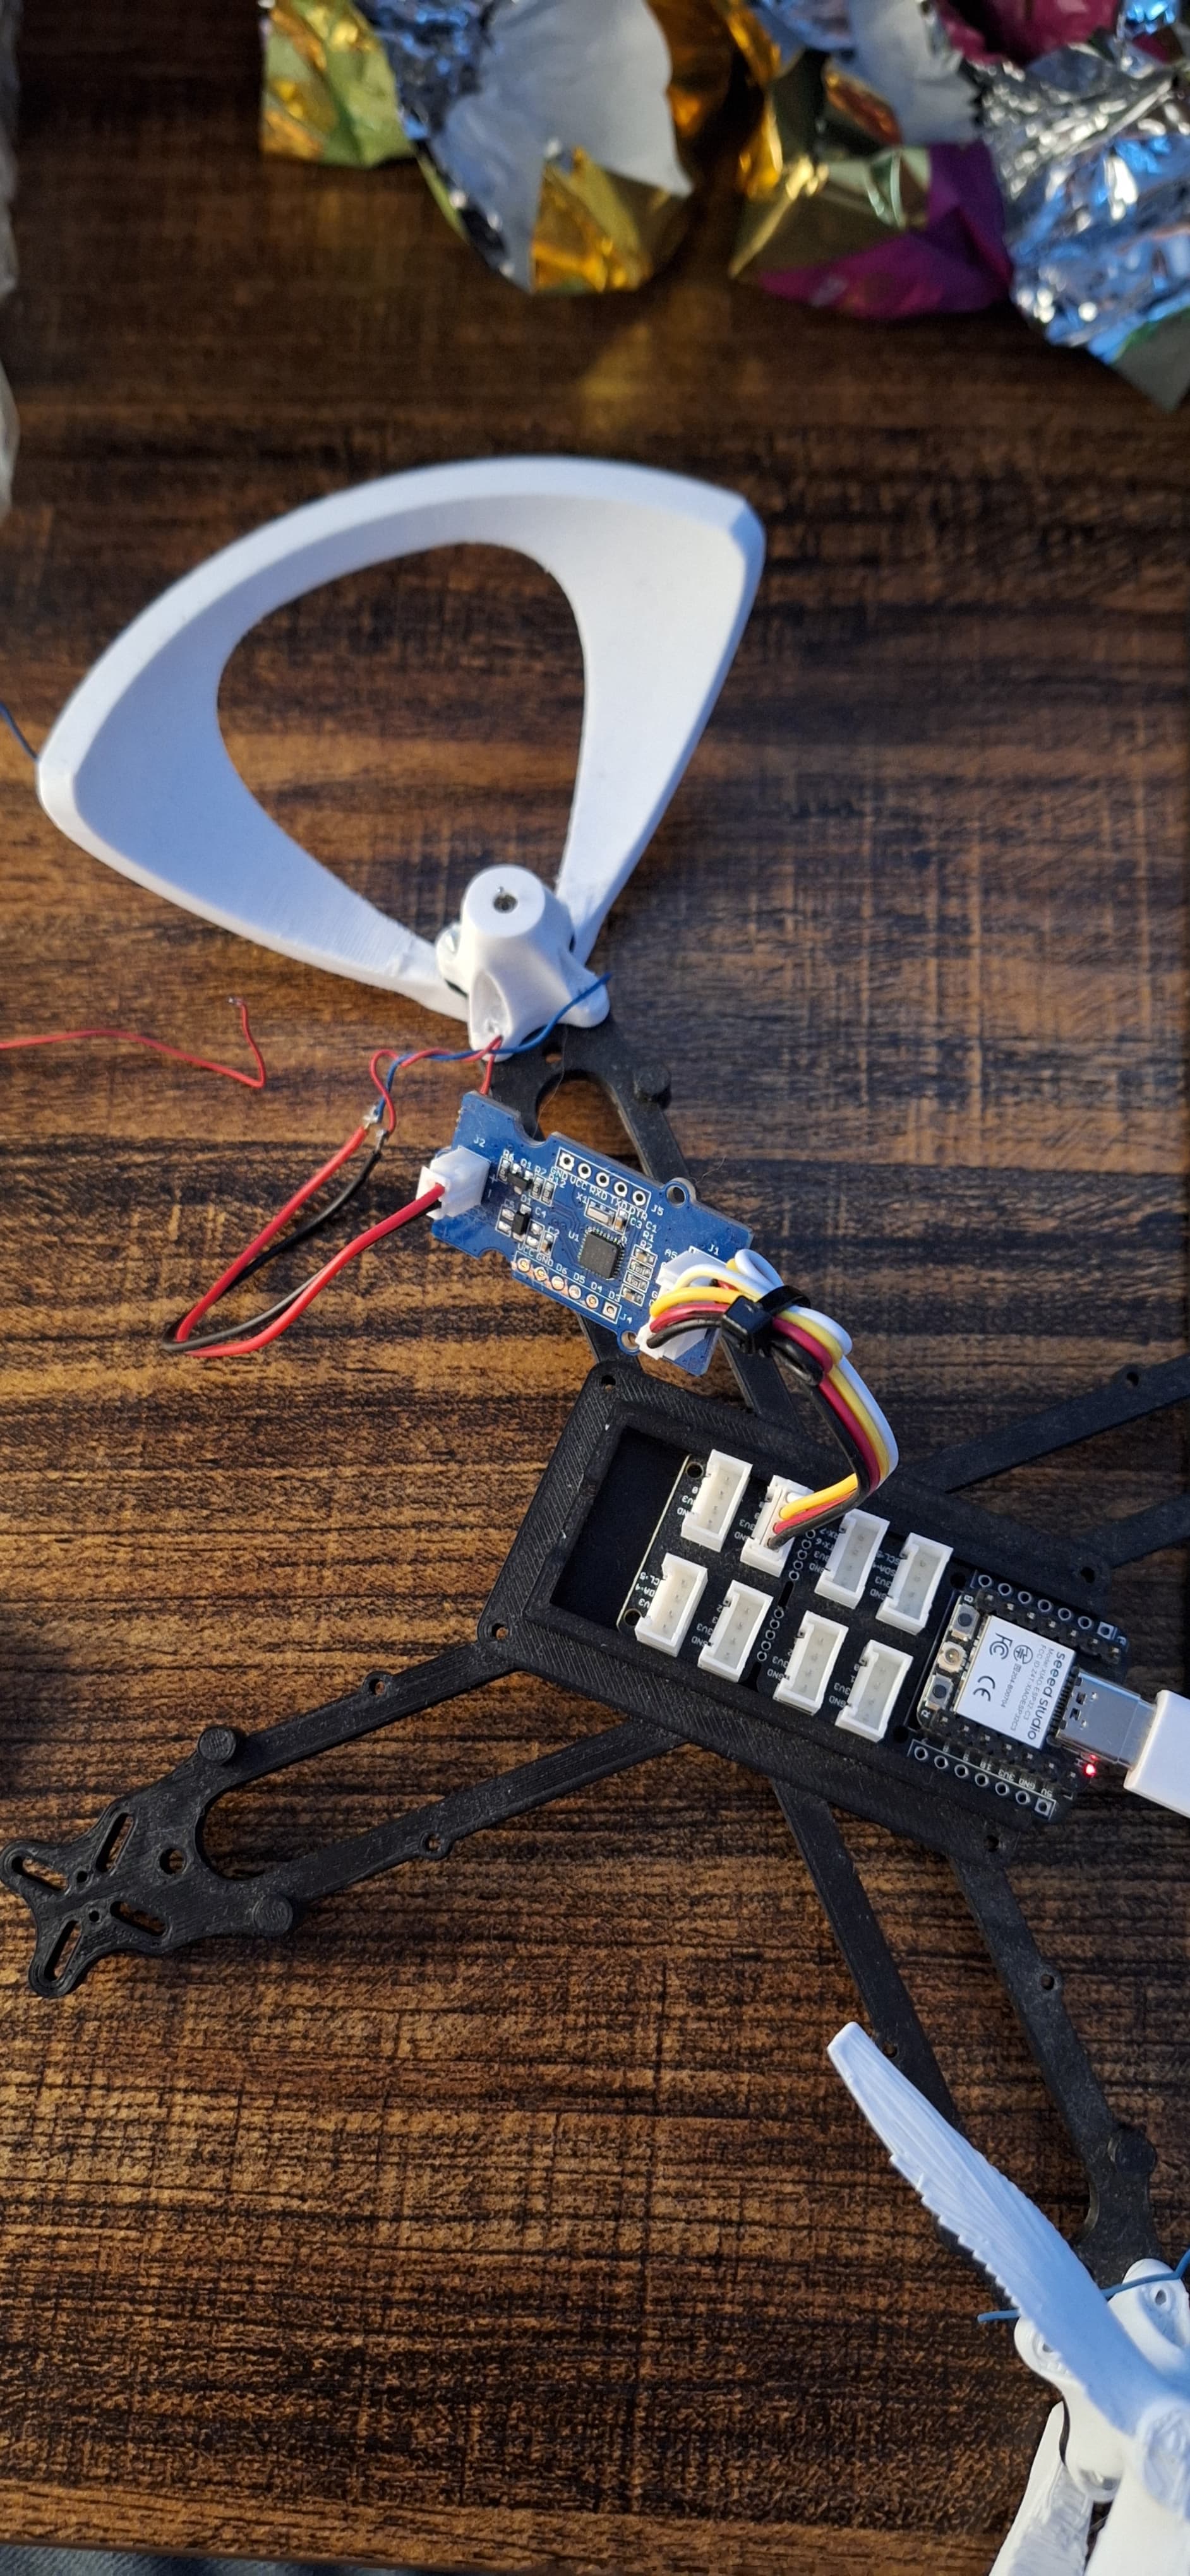
Below is the photo how i connect the motor
Double-check the wiring between the Mini Motor Driver and your motor. Ensure that all connections are secure and correct. Pay attention to the motor power supply, ground, and signal connections. Confirm that the Mini Motor Driver is receiving the appropriate power supply. Check the voltage requirements of both the motor and the motor driver, and ensure they match. If you’re using Arduino IDE, make sure you have the necessary libraries installed for your Seeeduino XIAO ESP32C3 and the Mini Motor Driver. Check the Seeed Studio GitHub repository or other relevant sources for the appropriate libraries. Review the documentation for the Mini Motor Driver library to understand how to initialize and control the motor using the driver. This information should guide you on how to use the library functions to control the motor.
@cypek55 I know this is an old post, but how did you get the Mini Motor Driver to work with the XIAO ESP32C3? When I try to compile the example code from the Seeed-Studio/Drv8830_Motor_Driver repo.
I get errors as follows (plus many more similar) :
/Arduino/libraries/Drv8830_Motor_Driver/SparkFunMiniMoto.cpp: In constructor ‘MiniMoto::MiniMoto(byte)’:
/Arduino/libraries/Drv8830_Motor_Driver/SparkFunMiniMoto.cpp:29:5: error: ‘TWBR’ was not declared in this scope
29 | TWBR = 72;
| ^~~~
Hi there,
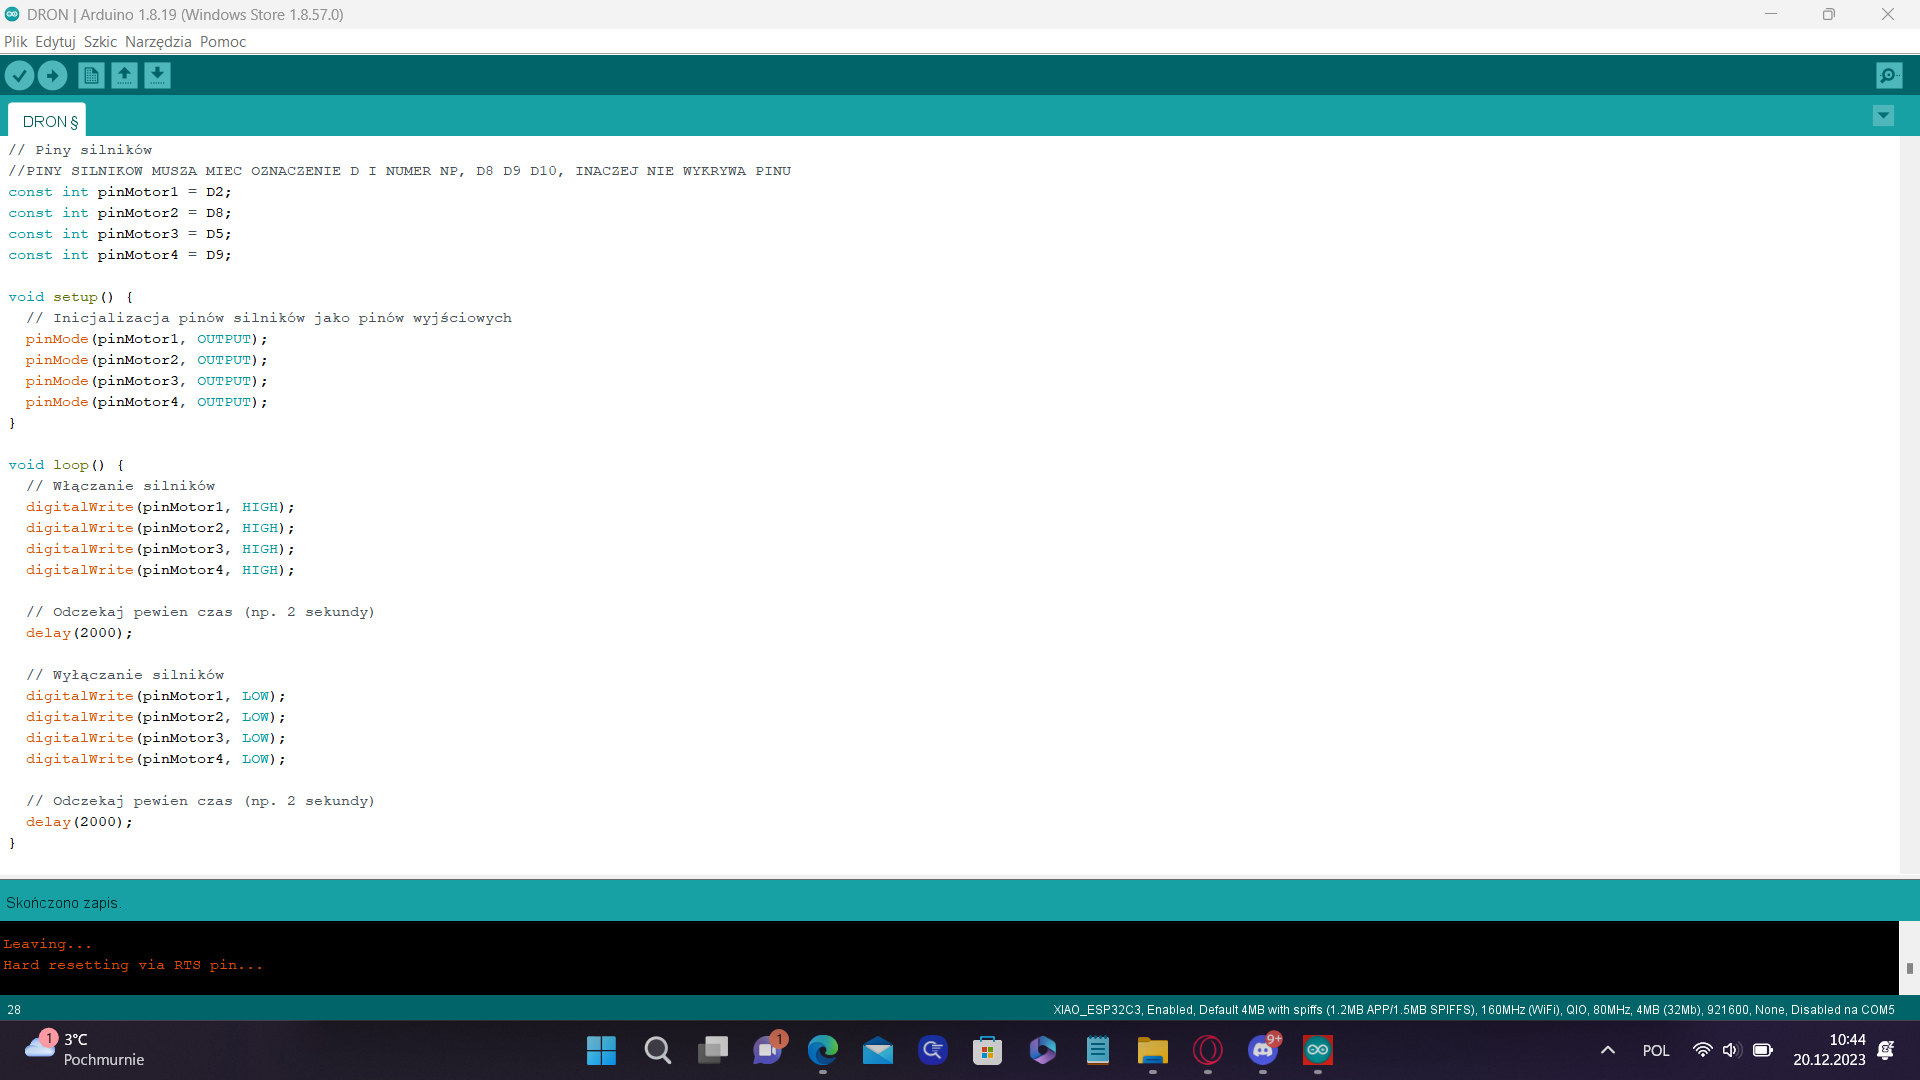
It’s the code, You are using pins 8 & 9 on one motor? How’s that gonna work? It’s not going to.
Work with one motor at a time , get it going then add another.
HTH
GL PJ
I found that wiki and I’m trying to use the library it suggested. The example sketch works fine with other Arduino-compatible boards. But, when I try to compile it with the XIAO_ESP32S3, it fails with errors like “TWBR was not declared in this scope” which I believe is “Two Wire Baud Rate” register of the MCU to set the speed of I2C communication. I’m assuming something is not compatible.
Try learning about Wire library and IIC
the problem is each module may do wire differently due to age and hardware
that i think is the problem, i do not have the module, but it compiled on XIAO SAMD but thru the same error on me when I tried XIAO ESP32S3
If you look in SparkFun_MiniMoto and look at .cpp and .h files and wiki you can see the regesters
all you are really doing is reading and writing to regesters by IIC, so maybe google it
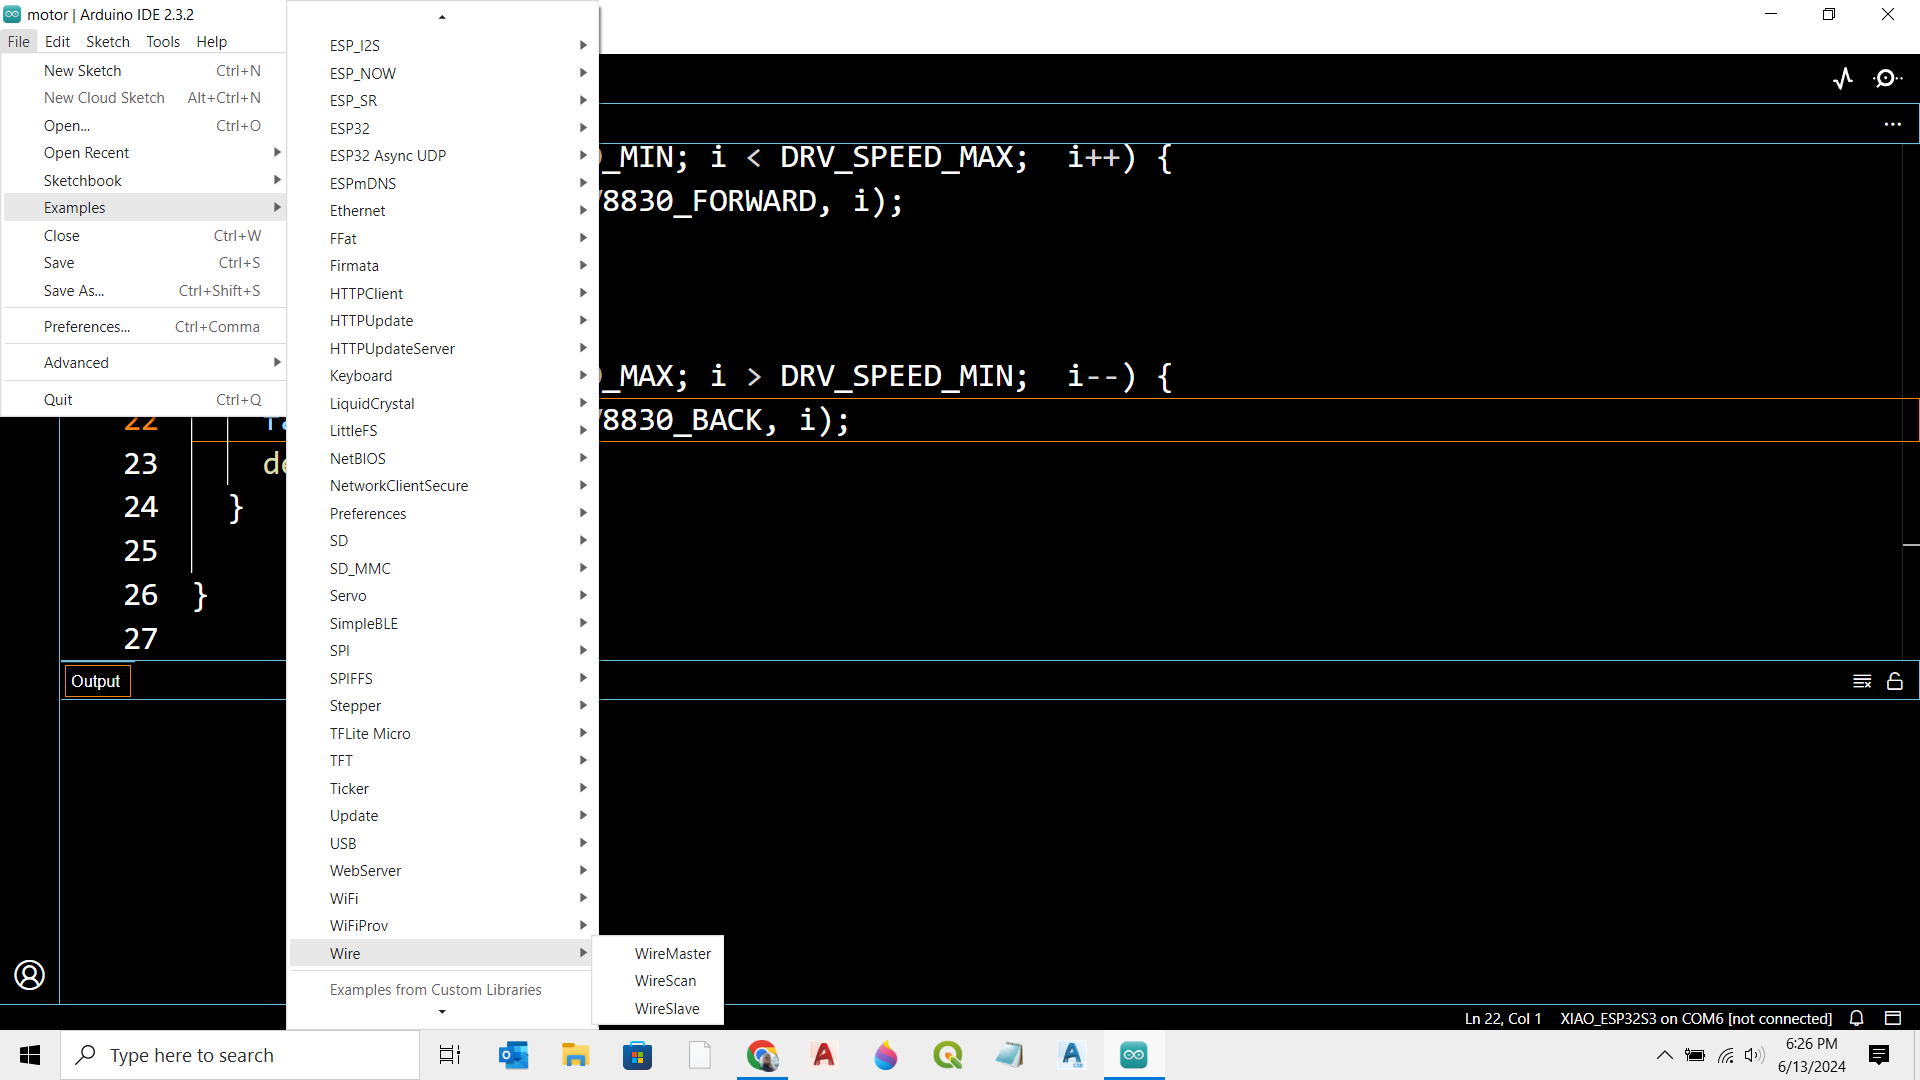
Try running wirescan and see if it discovers any IIC devices
Hi there,
Can you post the code you are using, and please use the code tags above(</>) so we can test it
you do know the I2C pins are different on the Xiao Esp32C3 than a Arduino Uno?
HTH
GL PJ
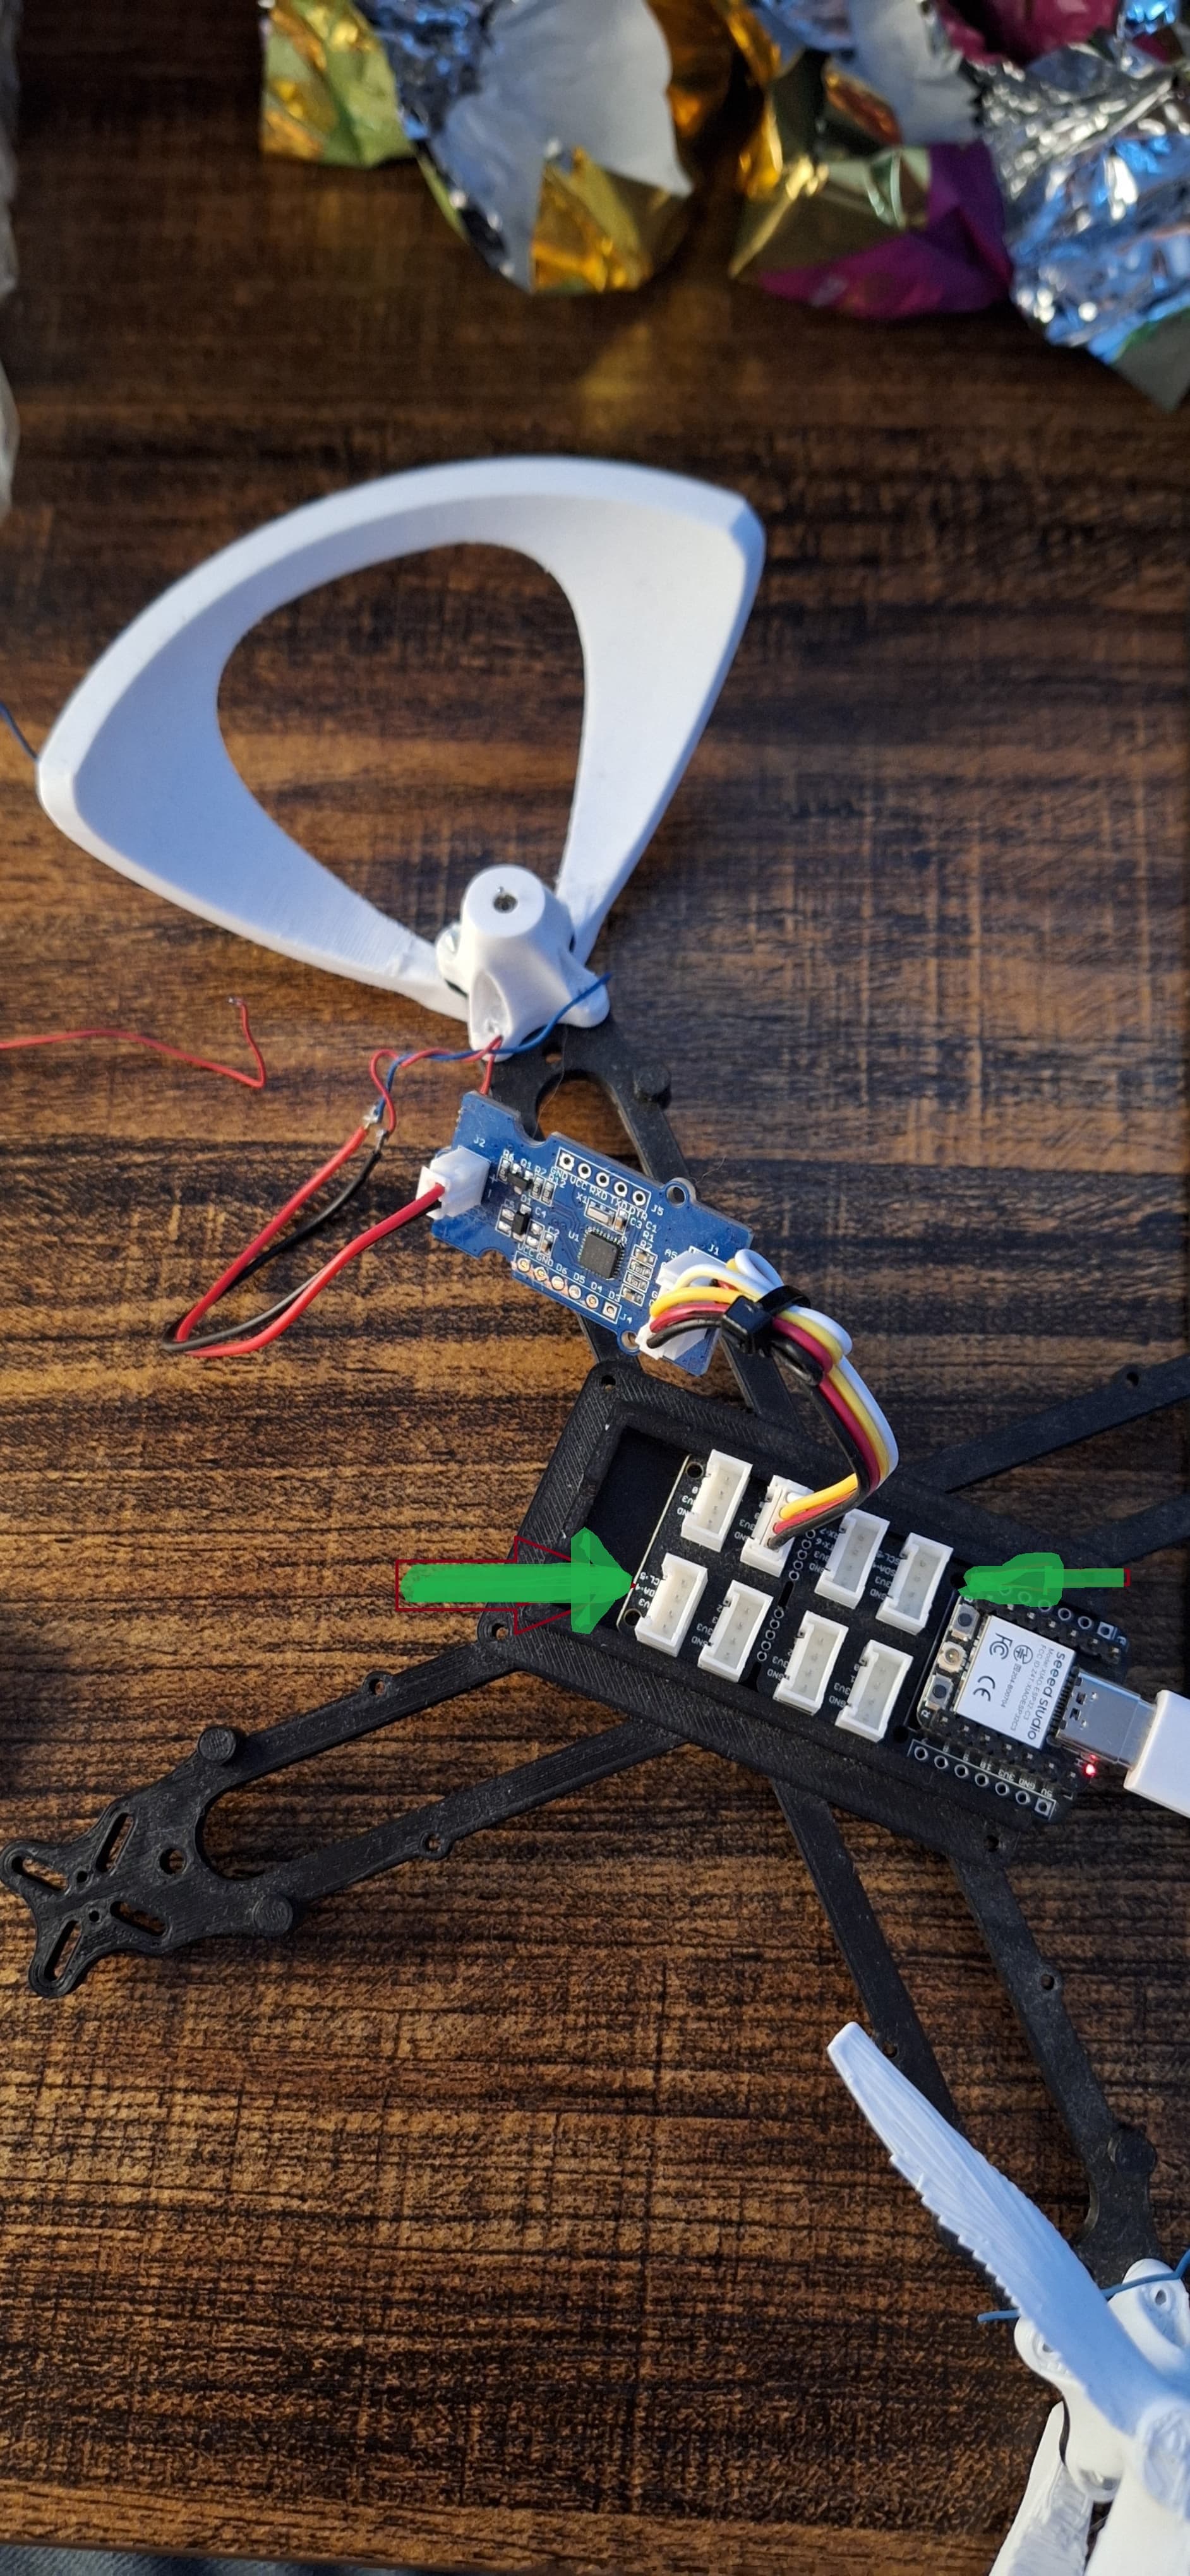
also move the plug to one of these…
did you read what i said? … But good catch that the port it is plugged into is not IIC! I didnt see the photo Its a problem with the difference between wire or some other dependancy which is different on XIAO ESP32 instead of SAMD… this is seeming to be a common problem as code ages, and people use DEFINE and interdependancy of code that is in many ways not obvious… What da? I downloaded a different library from gethub and that one didnt compile at all… Someone who is smarter than me could probably re-write the code in the mater of minutes
Thank you for responding, PJ. The code I’m trying to compile (below) is the example code from the repo seedstudio…/Grove-Mini_I2C_Motor_Driver_v1.0. I did not write it. BTW, this is the repo recommended on the wiki page.
The photo above is from the original poster, not me. I’m simply trying to compile the example code with the XIAO_ESP32S3 board selected in the Arduino IDE. I don’t even have the motor driver board connected at this point.
Here’s the code:
/****************************************************************
    Example code demonstrating the use of the Arduino Library for
    the SparkFun MiniMoto board, which uses the TI DRV8830 IC for I2C
    low-voltage DC motor control.

    This code is beerware; if you use it, please buy me (or any other
    SparkFun employee) a cold beverage next time you run into one of
    us at the local.

    17 Sep 2013- Mike Hord, SparkFun Electronics

    Code developed in Arduino 1.0.5, on a Fio classic board.

**Updated for Arduino 1.6.4 5/2015**
****************************************************************/

#include <SparkFunMiniMoto.h>  // Include the MiniMoto library

// Create two MiniMoto instances, with different address settings.
MiniMoto motor0(0xC4); // A1 = 1, A0 = clear
MiniMoto motor1(0xC0); // A1 = 1, A0 = 1 (default)

#define FAULTn  1     // Pin used for fault detection.

// Nothing terribly special in the setup() function- prep the
//  serial port, print a little greeting, and set up our fault
//  pin as an input.
void setup() {
    Serial.begin(9600);
    Serial.println("Hello, world!");
    pinMode(FAULTn, INPUT);
}

// The loop() function just spins the motors one way, then the
//  other, while constantly monitoring for any fault conditions
//  to occur. If a fault does occur, it will be reported over
//  the serial port, and then operation continues.
void loop() {
    Serial.println("Forward!");
    motor0.drive(100);
    motor1.drive(100);
    delayUntil(1000);
    Serial.println("Stop!");
    motor0.stop();
    motor1.stop();
    delay(1000);
    Serial.println("Reverse!");
    motor0.drive(-100);
    motor1.drive(-100);
    delayUntil(1000);
    Serial.println("Brake!");
    motor0.brake();
    motor1.brake();
    delay(1000);
}

// delayUntil() is a little function to run the motor either for
//  a designated time OR until a fault occurs. Note that this is
//  a very simple demonstration; ideally, an interrupt would be
//  used to service faults rather than blocking the application
//  during motion and polling for faults.
void delayUntil(unsigned long elapsedTime) {
    // See the "BlinkWithoutDelay" example for more details on how
    //  and why this loop works the way it does.
    unsigned long startTime = millis();
    while (startTime + elapsedTime > millis()) {
        // If FAULTn goes low, a fault condition *may* exist. To be
        //  sure, we'll need to check the FAULT bit.
        if (digitalRead(FAULTn) == LOW) {
            // We're going to check both motors; the logic is the same
            //  for each...
            byte result = motor0.getFault();
            // If result masked by FAULT is non-zero, we've got a fault
            //  condition, and we should report it.
            if (result & FAULT) {
                Serial.print("Motor 0 fault: ");
                if (result & OCP) {
                    Serial.println("Chip overcurrent!");
                }
                if (result & ILIMIT) {
                    Serial.println("Load current limit!");
                }
                if (result & UVLO) {
                    Serial.println("Undervoltage!");
                }
                if (result & OTS) {
                    Serial.println("Over temp!");
                }
                break; // We want to break out of the motion immediately,
                //  so we can stop motion in response to our fault.
            }
            result = motor1.getFault();
            if (result & FAULT) {
                Serial.print("Motor 1 fault: ");
                if (result & OCP) {
                    Serial.println("Chip overcurrent!");
                }
                if (result & ILIMIT) {
                    Serial.println("Load current limit!");
                }
                if (result & UVLO) {
                    Serial.println("Undervoltage!");
                }
                if (result & OTS) {
                    Serial.println("Over temp!");
                }
                break;
            }
        }
    }
}
Hi there,
So that is for a samd21 or seeduino, compiles fine.
I would try this one, and it compiles for ESP32C3 aok.
it’s for an 8835 motor which is newer. But will still work.
#include <DRV8835MotorShield.h>

/*
 * This example uses the DRV8835MotorShield library to drive each motor with the
 * Pololu DRV8835 Dual Motor Driver Shield for Arduino forward, then backward.
 * The yellow user LED is on when a motor is set to a positive speed and off when
 * a motor is set to a negative speed.
 */

#define LED_PIN 13

DRV8835MotorShield motors;

void setup()
{
  pinMode(LED_PIN, OUTPUT);

  // uncomment one or both of the following lines if your motors' directions need to be flipped
  //motors.flipM1(true);
  //motors.flipM2(true);
}

void loop()
{
  // run M1 motor with positive speed

  digitalWrite(LED_PIN, HIGH);

  for (int speed = 0; speed <= 400; speed++)
  {
    motors.setM1Speed(speed);
    delay(2);
  }

  for (int speed = 400; speed >= 0; speed--)
  {
    motors.setM1Speed(speed);
    delay(2);
  }

  // run M1 motor with negative speed

  digitalWrite(LED_PIN, LOW);

  for (int speed = 0; speed >= -400; speed--)
  {
    motors.setM1Speed(speed);
    delay(2);
  }

  for (int speed = -400; speed <= 0; speed++)
  {
    motors.setM1Speed(speed);
    delay(2);
  }

  // run M2 motor with positive speed

  digitalWrite(LED_PIN, HIGH);

  for (int speed = 0; speed <= 400; speed++)
  {
    motors.setM2Speed(speed);
    delay(2);
  }

  for (int speed = 400; speed >= 0; speed--)
  {
    motors.setM2Speed(speed);
    delay(2);
  }

  // run M2 motor with negative speed

  digitalWrite(LED_PIN, LOW);

  for (int speed = 0; speed >= -400; speed--)
  {
    motors.setM2Speed(speed);
    delay(2);
  }

  for (int speed = -400; speed <= 0; speed++)
  {
    motors.setM2Speed(speed);
    delay(2);
  }

  delay(500);
}
add the lib and it rolls right along, HTH
GL PJ
here is the link , these POLOlu guys have cornered the market on this stuff. Check it out.