Hi there,
Sure I’ll revisit it, I remember it being a PITA but doable, Seeed-neeeds to provide it in other formats too! would be Steller of them. ![]() , you see the pics in the early attempts the big move forward was “FLAT” had to be perfectly flat against the Xiao. You see those USB-C ports Mounting Legs coming through the Xiao, those need to be over sized in the PCB so not to interfere with the “laying -Flatness” I will try and do a video of the process, time permitting.
, you see the pics in the early attempts the big move forward was “FLAT” had to be perfectly flat against the Xiao. You see those USB-C ports Mounting Legs coming through the Xiao, those need to be over sized in the PCB so not to interfere with the “laying -Flatness” I will try and do a video of the process, time permitting.
My hit list was,:
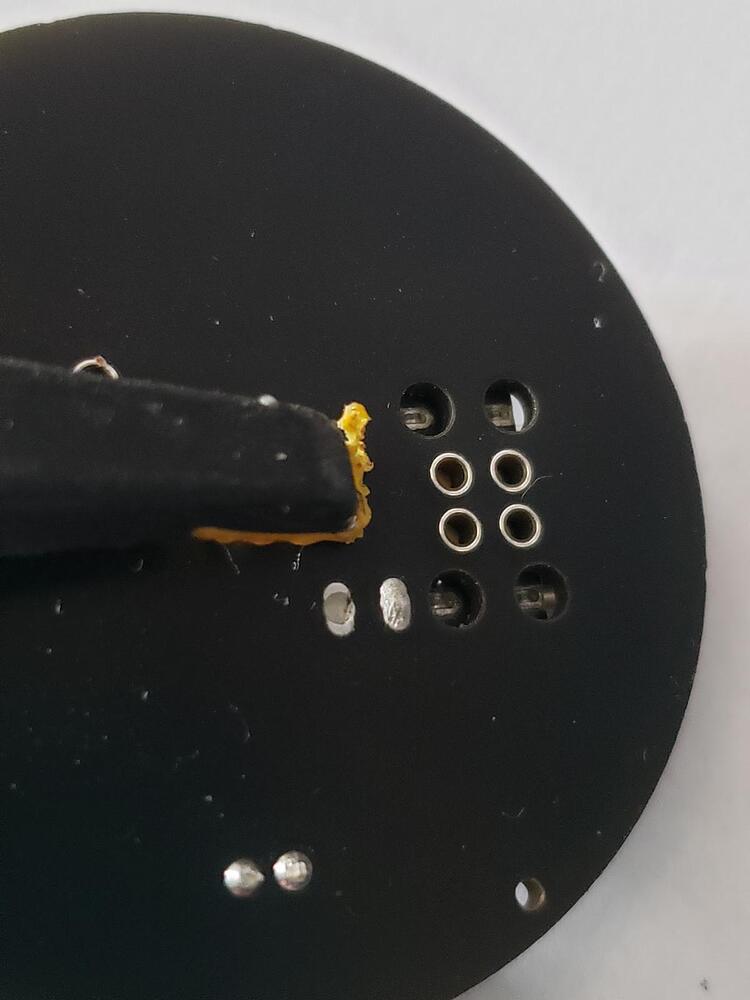
- use paste on the Xiao’s Battery Pads
- use a small tip that can reach through the HOLE to touch the pad, “just ever so slightly”
- Holes are OVAL & Plated Through the Ovals are LONG ways over BAT PADS
- Clamp it together gently.
- FLUX is your Friend, Fill the holes with it.
- Using the Soldering IRON and the Roll Solder I poke the solder into the flux filled hole,
the Tip of Iron is placed to the side and the melting begins,
“it’s a feel thing” soldering is like an art form , Practice makes perfect, so do get some practice first, but I digress.
As the flux melts and the temperature and timing is correct I ADD & melt the solder with the tip of the iron and as it melts and begins to flow, I plunge the tip into the hole and touch the BATTERY pad for a second or two, as the paste now melts and flows it joins with the roll solder and the connection is made. You will notice the air comes out off the hole and the solder looks like a PLUG. - test is with a meter that is on standby and SUCCESS is a sound of the Beep!
HTH
GL ![]() PJ
PJ ![]()
also note My PCB’s are made by JLCPCB. I have never lost a hole or PAD and I have tried other PCB manufacture’s. Just Saying , YMMV. check your boards specs for the proper parameters. (material, metals, E/R-values, TEMPS, etc.)