touchAttachInterrupt not working on S3 running on battery

sounds like a power brownout issue, have you tested with a bench power supply?

Hi there,
Do you have the " while Serial " in the code? comment it out.
Post it, we can see what you went awry…
HTH
GL :slight_smile: PJ
:v:

1 Like

ypu didnt post that code right… What da?

Please tell me what I did wrong. 1st time user :frowning:

Hi there,
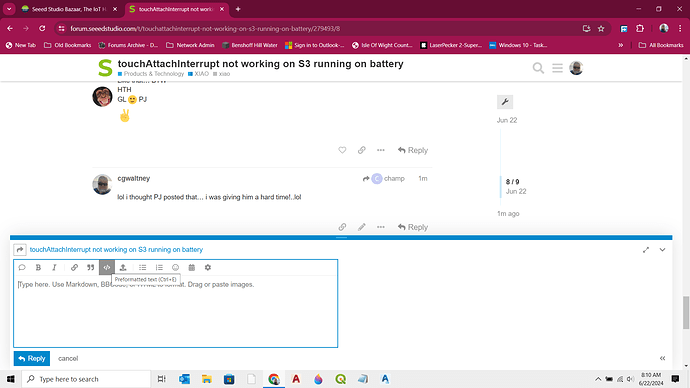
Use the code tags to make it look correct, " </>"
paste it in there,

#define MOTIONPIN GPIO_NUM_4

void setup() {
  Serial.begin(115200);
  pinMode(LED_BUILTIN, OUTPUT);
  pinMode(MOTIONPIN, INPUT);
  digitalWrite(LED_BUILTIN, HIGH);
  delay(250);
  digitalWrite(LED_BUILTIN, LOW);
  delay(250);
  digitalWrite(LED_BUILTIN, HIGH);
  delay(250);

  Serial.println("Going to sleep...");
  delay(1000);
  esp_sleep_enable_ext0_wakeup(MOTIONPIN, 1);
  delay(5000);
  esp_deep_sleep_start();
}

void loop() {
}

Like that… BTW
HTH
GL :slight_smile: PJ
:v:

lol i thought PJ posted that… i was giving him a hard time!..lol

if you use the </> button in the message and post the code in that bracket it puts it into a nice code window that makes it easier for us to scroll past without even looking at it… lol

Just for practice, go back and edit your old post and move the code into the bracket…
Ohh, nice, My bad, wont forget anymore :slight_smile:

/*

This is an example how to use Touch Intrrerupts
The sketh will tell when it is touched and then relesased as like a push-button

This method based on touchInterruptGetLastStatus() is only available for ESP32 S2 and S3
*/

#include "Arduino.h"

// OLED screen
#define OLED_ADDRESS 0x3C

#define pOLED(message) \
  if (bOLED)           \
  oled.print(message) // print to OLED if connected

#include <Wire.h>
#include "SSD1306Ascii.h"
#include "SSD1306AsciiWire.h"

SSD1306AsciiWire oled; // Class Oled
bool bOLED = false;    // is OLED screen indstalled


bool setupOLED()
{
  byte error;

  Wire.beginTransmission(OLED_ADDRESS);
  error = Wire.endTransmission();
  if (error == 0)
  {
    oled.begin(&Adafruit128x32, OLED_ADDRESS);
    oled.setFont(Verdana12);
    oled.clear();
    oled.setScrollMode(SCROLL_MODE_AUTO);
    oled.setRow(oled.displayRows() - oled.fontRows());
    return true;
  }
  return false;
}

// END OLED screen

int threshold = 50000;  // ESP32S2
bool touch1detected = false;
bool touch2detected = false;

void gotTouch1() {
  touch1detected = true;
}

void gotTouch2() {
  touch2detected = true;
}

void setup() {
  Serial.begin(115200);
  delay(1000);  // give me time to bring up serial monitor

  Wire.begin();
  bOLED = setupOLED(); // Get the OLED running. If conncted OLED = true

  Serial.println("\n ESP32 Touch Interrupt Test\n");
  pOLED("\n I'm awake");
  touchAttachInterrupt(T7, gotTouch1, threshold);
  touchAttachInterrupt(T8, gotTouch2, threshold);
}

void loop() {
  if (touch1detected) {
    touch1detected = false;
    pOLED("\n --- T7 Event");
    if (touchInterruptGetLastStatus(T7)) {
      Serial.println(" --- T7 Touched");
      pOLED("\n --- T7 Touched");
    } else {
      Serial.println(" --- T7 Released");
      pOLED("\n --- T7 Released");
    }
  }
  if (touch2detected) {
    touch2detected = false;
    pOLED("\n --- T8 Event");
    if (touchInterruptGetLastStatus(T8)) {
      Serial.println(" --- T8 Touched");
      pOLED("\n --- T8 Touched");
    } else {
      Serial.println(" --- T8 Released");
      pOLED("\n --- T8 Released");
    }
  }
  delay(50);
}

/*
void loop() {
//  Serial.println(touchRead(T1));  // get value using T0
  pOLED("\n");
  pOLED(touchRead(T7));
  pOLED("\n");
  pOLED(touchRead(T8));
  delay(1000);
}
*/
1 Like

No problem! I love it when a plan comes together…

This brings up a good point that we need a better way to share and troubleshoot code
I wonder if seeed could set us up a virtual machine ?

Can you believe this scam Arduino is running… $300 a year? for a VM that does less… what da

Ok, in the meantime I installed PlatformIO compiled the code and it woks now as meant to :frowning:
So building on Arduino the touchAttachInterrupt seems not to work. From now on, moving away from Arduino

Hope this issue might help others. Thanx you for your help

Hi there,
It does work in Arduino…
the above code compiles and runs without errors FYI.
HTH
GL :slight_smile: PJ
:v:

1 Like

Thanx, will recompile on Arduino tomorrow and re-test it again.

Been going over it for 2 days. Have been struggling with the int threshold = 50000 As you can see I had to put it up far far above the 1500 suggested

Bart

i have sometimes seen code not compile today, but compile tomarow with no apparent change… computer ghosts

Sorry comming back to this issue.
I recompiled and uploaded again but no joy :frowning:
I checked all but my problem stays.
Removed the OLED screen and code, just to be sure
Instead of the OLED I introduced the LED_BUILDIN blinking. Blink once on T7 Blink twice on T8.

Code compiles and runs and does the blinking as expected.
HOWEVER: it runs fine as I started this post with. It runs on the USB cable attached to my computer.
Running on battery (>4.00v) I only get T7 or T8 events when pressing the 2 sensors simultaneously

Any suggestion for me to investigate?
@PJ_Glasso , did you test the above code on running battery as well?

PS, my remark abot the working on PlatformIO was a mistake. Same issue

PS II,
removed all the Serial.print( as well

Bart

Hi there,
Ok so I don’t have the LIB’s “SSD1306Ascii.h” or the wire one?
Are they custom?
You would need to use an Interrupt or IO “Bit MASK” ie. “11000000” for the touch inputs “attach interrupt” you want to generate the interrupt, check the technical ref guide S6 and you get it going as you want.
HTH
GL :slight_smile: PJ
:v:

Is the charge LED ON , when you plug in the USB with the Battery connected? for how long or always?

Thank you for youir answers

Wire.h is a lib for I2C communications and SSD1306Ascii is an unbuffered character only library for small OLED displays. So no worries. I took the OLED out and replaced it with the blinking the onboard LED. Results are the same.
The charge battery LED is not ON. This because I connected the battery to the side strip, not the bottom connectors. I could see and change that

Bart

Hi there,
Yea, I know what Wire.h is and Show a picture of this device with the battery connected HOW?
What pins and what side strip? You will still need the interrupt bit mask to get the functionality you described.
I’ll locate the libs if they are standard i.e nothing funny in there.
Have you loaded the factory firmware and example program the device comes with?
also on the WiKi.
GL :slight_smile: PJ :v:

Put your unit on a breadboard and make some touch wires like in this demo

Very nice and thank you. I’m having about the same solution only with 2 touch sensors and the build in LED. And my solution works perfectly if I run it on 5V! and I need to run it on battery. This video is about the PIC16F627A microcontroller and I am using the Xiao ESP32-S3!
If you are saying, switch to the PIC16F627A microcontroller than the use Xiao S3 product from Seeedstudio does not make any sence and I need further functionality of the S3