Hi there,
Ok , well I would hold up on posting other code. If you can’t get the Example to run(Animated Gif) your wasting your time and NOT learning anything from the experience only left with “Frustration” as manny go this path…
Do this;
(or check off what you have done and then proceed)
- Download ZIPs, Start with GifViewer_target.zip
- Extract it. (2 files) chimpwink.gif and the GifViewer_target.bin
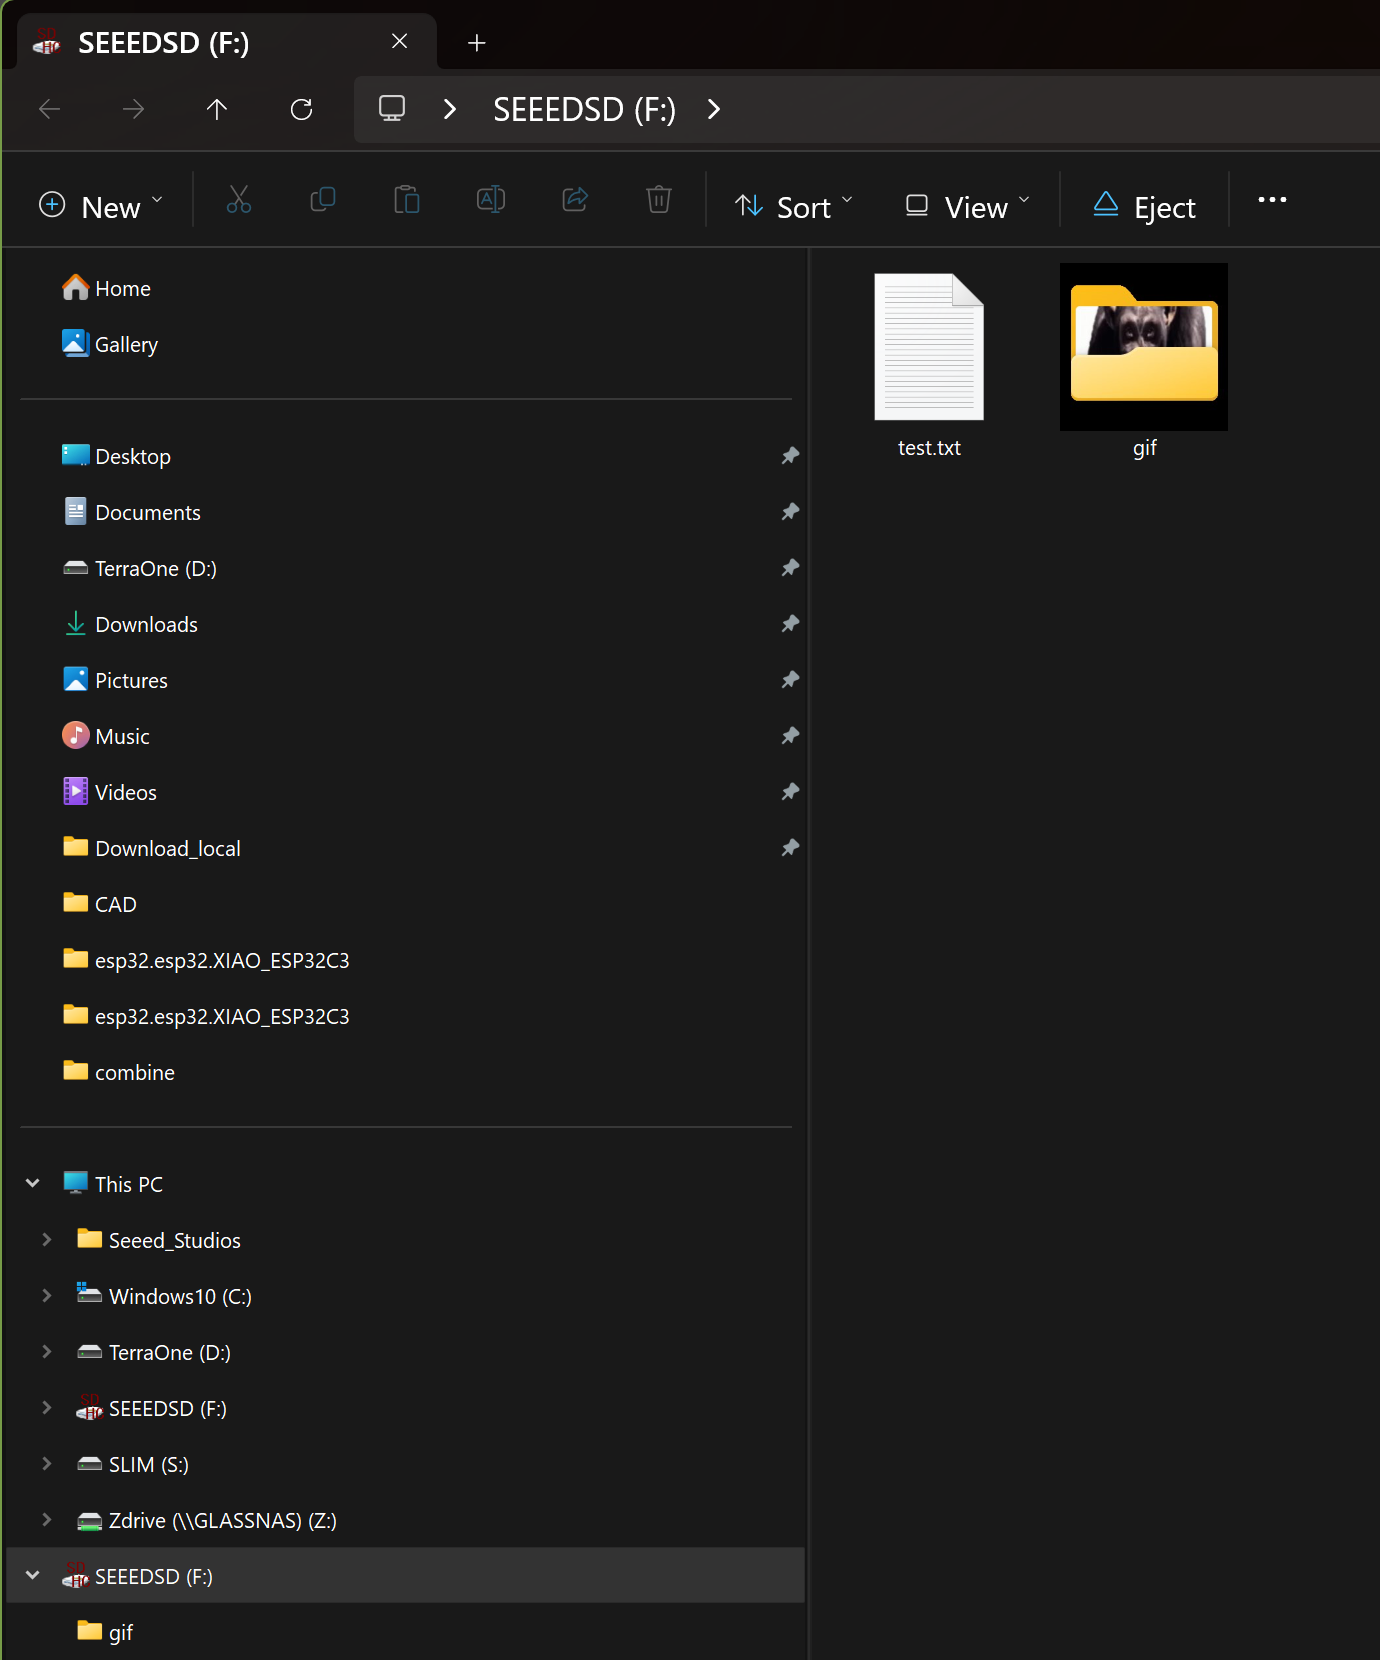
- Make a Folder on the SD card (formatted Fat32) called gif.
- Copy the chimpwink.gif file to that directory on the SD card.
Place SD card into Round Display(set both switches OFF)
- Download the ESP32 RF Test tool also Referred to on the Getting Started Xiao ESP32C3 Wiki
Install it. (EspRFTestTool_v3.6_Manual.zip) is the current version. This tool is GREAT and a MUST have for any ESP32 programing Shenanigans , you use it to (UPLOAD) the factory BIN (unBrick) or to Flash Production Bins.Testing BLE and WiFi also , but we will use it to put (my dev enviro Compiled GifViewer.bin) on your or Blank hardware. All things being equal it will run, doing two things for you, Verify your hardware is Good and The code you provided is correct. (pointing you to the only area that’s broken) Your dev enviro, BSP, LIB versions, etc… But Now you have a solid starting point.
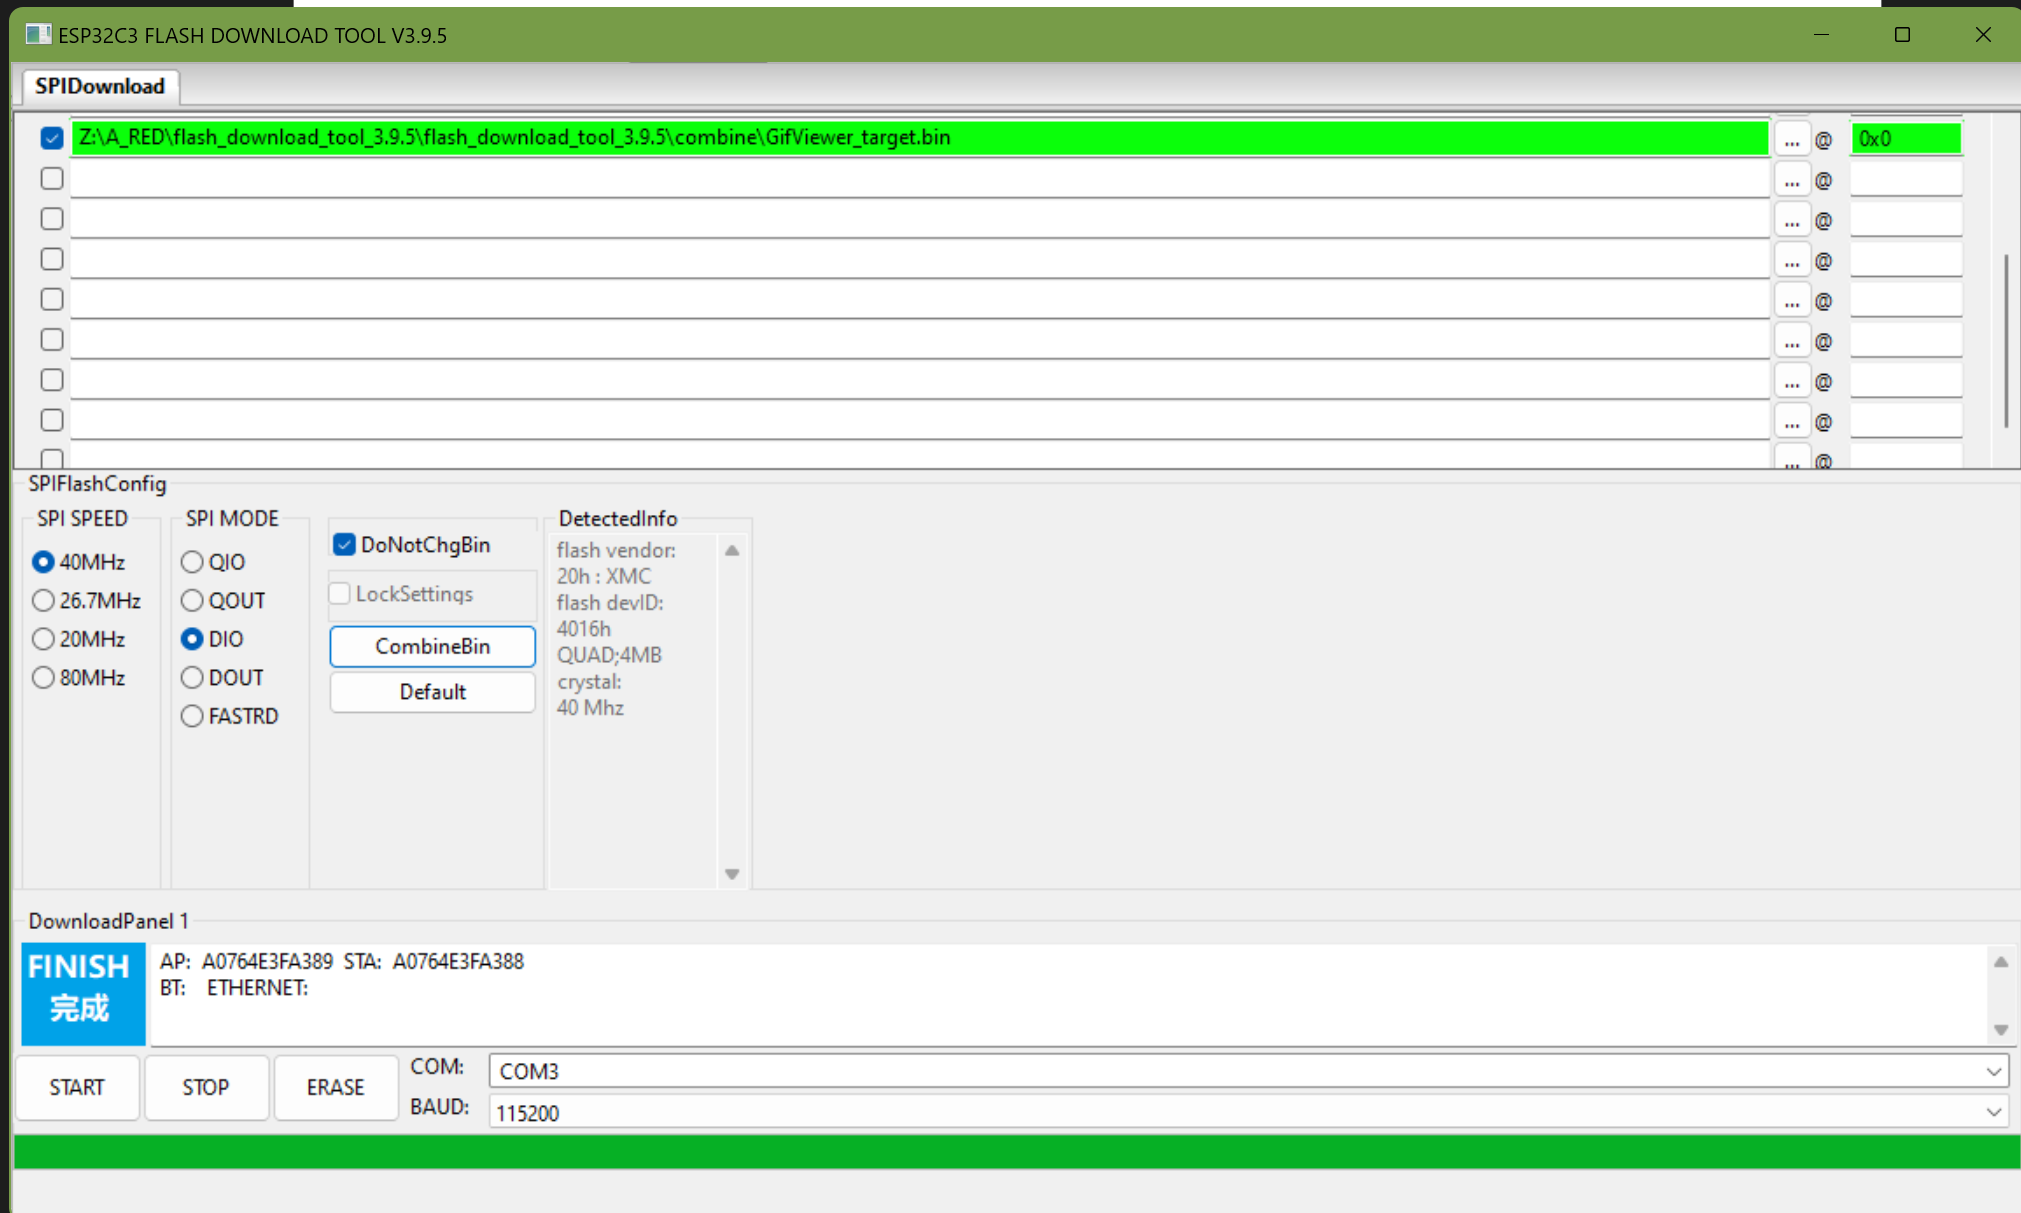
Open The Tool, Navigate to the folder with the GifVeiwerTarget.bin file and select it Like the picture.
set com port etc. Click (START)
after it uploads , press the reset button on the Xiao. Make sure you open the Serial monitor to the same com port AFTER you upload flash.
NOTE: The tool will complain about the com port if you have an IDE serial monitor connected to the port(they don’t share nice). FYI.
Should see the gif load.
HTH
LMK
GL  PJ
PJ
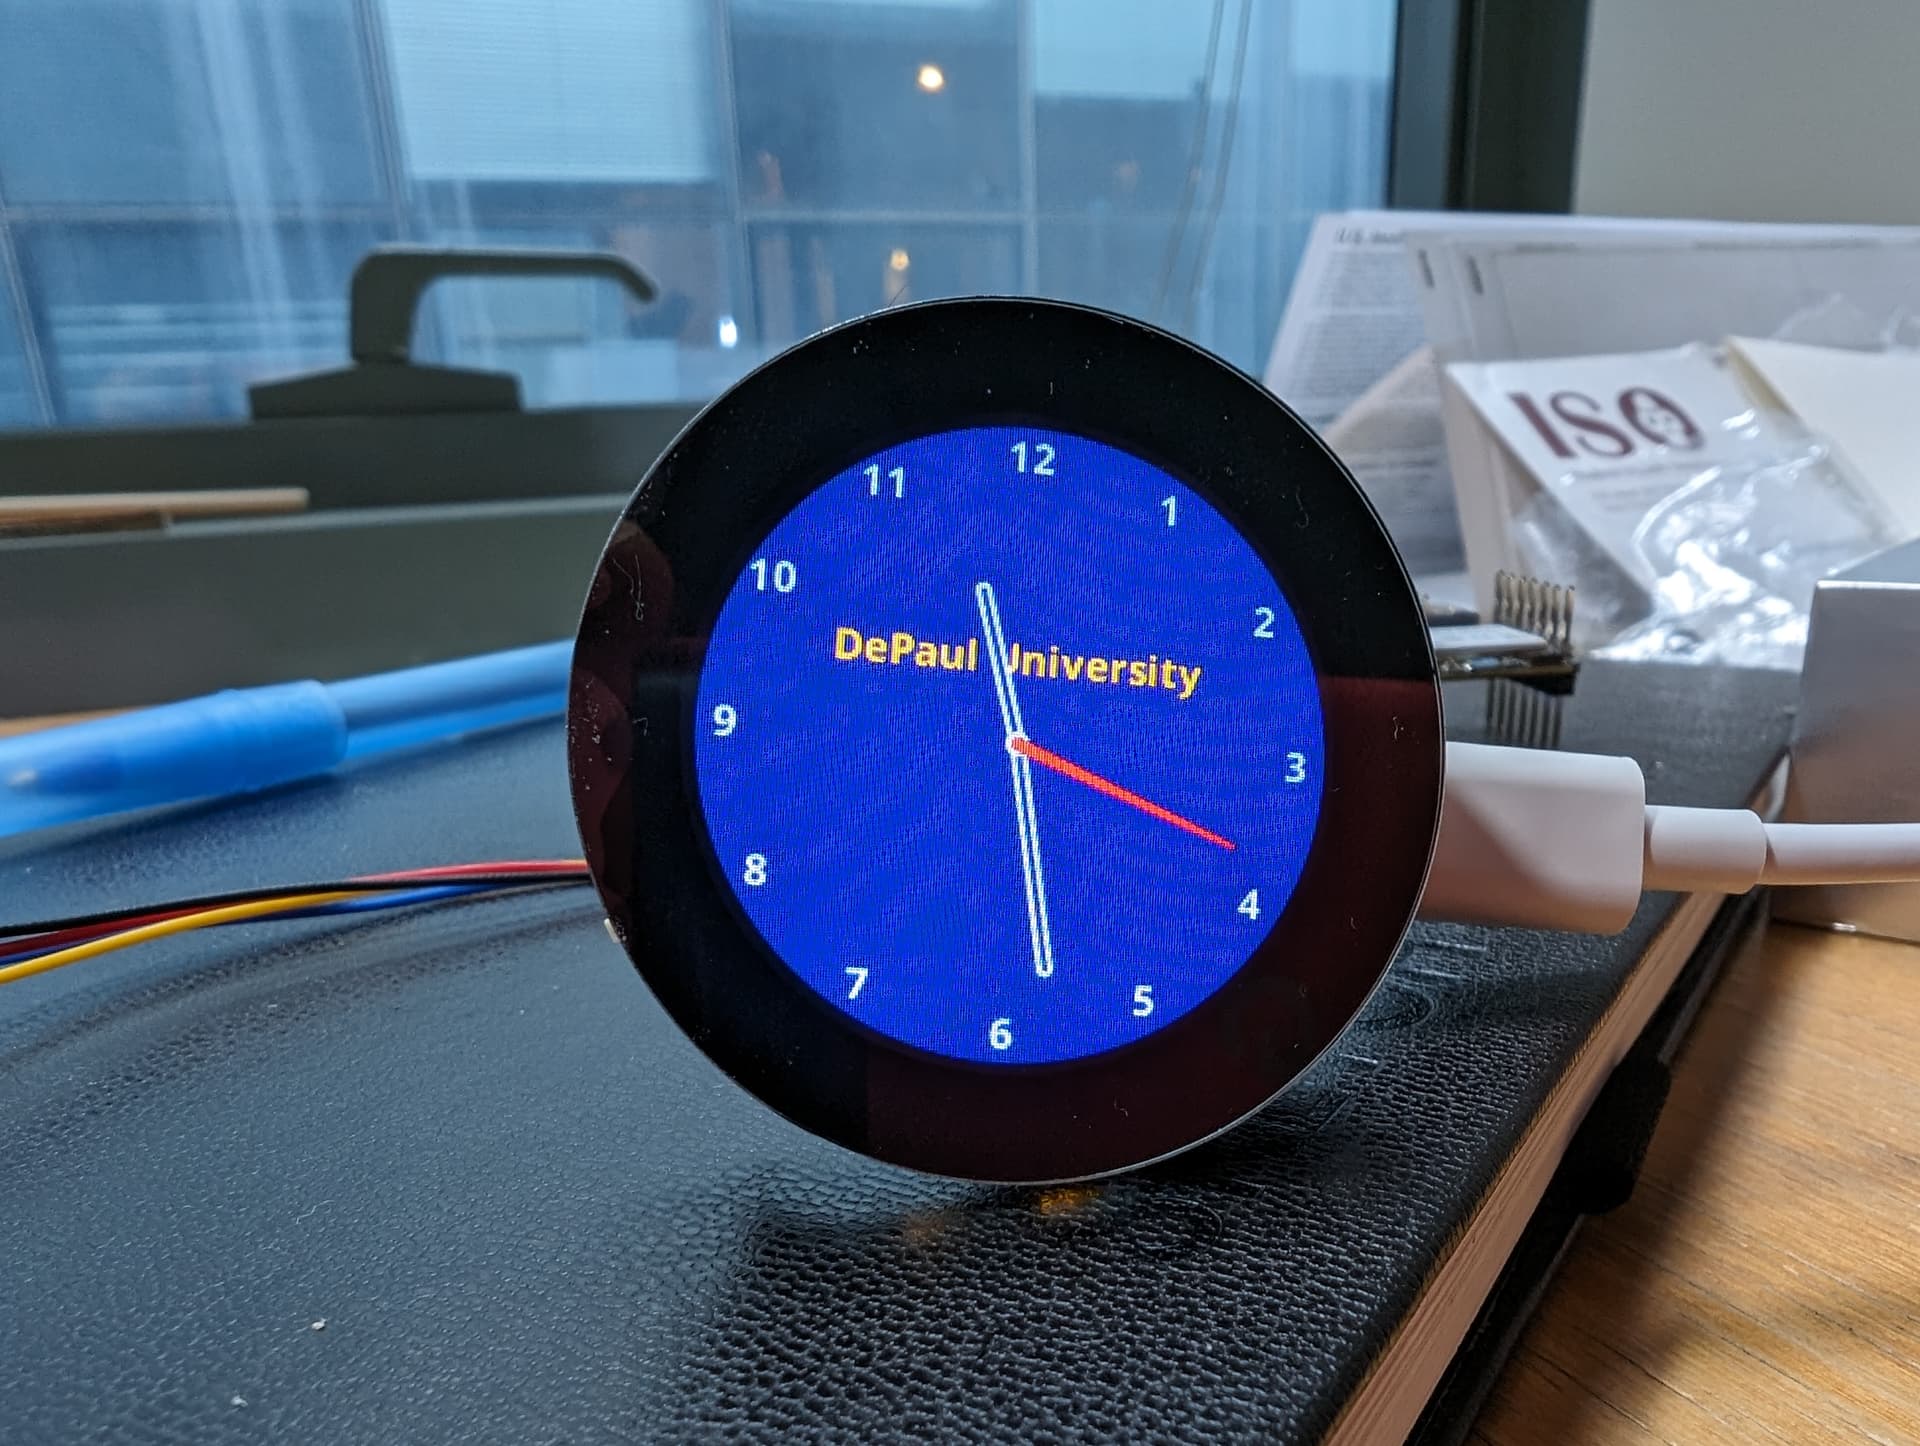
p.s. after the gif loads and it works, Repeat the file selection but pick the Depaul_target.bin Press (Start) note; you can leave the other file in there just uncheck the select only choosing the file you want to flash. after press Xiao Reset… Should get Clock face and act like the demo I posted above, serial output also. GO!
Do you know how to downlaod and run ESP32 RF Test tool for MacBook?
Hi there,
No I don’t know about MACBook at All.
should all be the same, you can use esptool.py also.
it’s more command line style
“esptool.exe” --chip esp32c3 --port “COM10” --baud 921600 --before default_reset --after hard_reset write_flash -z --flash_mode dio --flash_freq 80m --flash_size 4MB
0x0 “C:~\Target.bin” or something close to that.
any flash tool will work. just flashing the file to the mcu.
GL PJ
I see this though
Here are some steps to flash an ESP32-C3 with a MacBook:
- Download the ESP32 Flashing Tool
- Start the Flashing Tool and go to Developer Mode
- Load the files in the Download Tool
- Set the configurations
- Press START
I would find a PC and just install the flash tool only grab the bin and flash it. If it works, Then flash Your "depaulTarget.bin and done! Should work straight away.
LMK 
Also worth mentioning, You already have the commands (bash) to flash file from the IDE you have.
In your posted compiler output. It is showing the esptool.py string just look at that for a template.
subbing the correct BIN file names , GifVeiwerTarget /or DepaulTarget bins.
are you stuck ?
LMK
PJ
Yea, I havent improved anywhere. Still at the same place 
In the meantime, The reason your environment is broken is the Dependancies. When you loaded the Sensor or the Graphics is Breaks the TFT_eSPI file, It will ask if you want to install without them or with
I choose the Former(without) only because the wiki states
CAUTION
Note that the lv_conf.h file here is from Seeed_Arduino_RoundDisplay, not from the LVGL library
I saw a couple times it asked to install the LVGL lib which is the thing that breaks the TFT_eSPI but only overlapping the SD .LIB capabilities. OK so how do you fix it?
Starting over would be one way.
But uninstall the LIB’s you are using, go through the download ZIP’s from the GIT hub locations ONLY in the Wiki for round display “getting started”
Edit the User_Setup_Select.h to disable the user setups
//#include <User_Setup.h> // Default setup is root library folder
and enable the SEEED studio setup
#include <User_Setups/Setup66_Seeed_XIAO_Round.h> // Setup file for Seeed XIAO with GC9A01 240x240
copy the lv_conf.h file from the Seeed Round display master Zip or GIT location directly(no other place) to your arduino Libraries folder.
I was using BSP 2.0.8 but 2.0.11 also is working and is what’s in the target BIN’s
I also specifically used the older TFT_eSPI by bodmer @ 2.5.0, however the latest one works very well too 2.5.23
BME680 ver 2.0.4, adafruit Sensor 1.1.14, I2C_BM8563. 1.0.4
check you IDE LIB’s installed , only install what you need and no dependencies that mention graphics.
HTH
GL PJ
I have already done these modifications and I’m using the same lib versions. I’m able to get the watch work. That’s no issue. I’m just not able to store it in the SD card.
You getting any serial output?
is the Volume name of the SD card “SEEEDSD”
lmk
No errors.
Output:
Sketch uses 839188 bytes (64%) of program storage space. Maximum is 1310720 bytes.
Global variables use 39748 bytes (12%) of dynamic memory, leaving 287932 bytes for local variables. Maximum is 327680 bytes.
esptool.py v4.5.1
Serial port /dev/cu.usbmodem101
Connecting...
Chip is ESP32-C3 (revision v0.4)
Features: WiFi, BLE
Crystal is 40MHz
MAC: 64:e8:33:00:9b:08
Uploading stub...
Running stub...
Stub running...
Changing baud rate to 921600
Changed.
Configuring flash size...
Flash will be erased from 0x00000000 to 0x00003fff...
Flash will be erased from 0x00008000 to 0x00008fff...
Flash will be erased from 0x0000e000 to 0x0000ffff...
Flash will be erased from 0x00010000 to 0x000e3fff...
Compressed 13200 bytes to 9522...
Writing at 0x00000000... (100 %)
Wrote 13200 bytes (9522 compressed) at 0x00000000 in 0.2 seconds (effective 465.2 kbit/s)...
Hash of data verified.
Compressed 3072 bytes to 146...
Writing at 0x00008000... (100 %)
Wrote 3072 bytes (146 compressed) at 0x00008000 in 0.1 seconds (effective 396.3 kbit/s)...
Hash of data verified.
Compressed 8192 bytes to 47...
Writing at 0x0000e000... (100 %)
Wrote 8192 bytes (47 compressed) at 0x0000e000 in 0.1 seconds (effective 624.2 kbit/s)...
Hash of data verified.
Compressed 867152 bytes to 526802...
Writing at 0x00010000... (3 %)
Writing at 0x00018a73... (6 %)
Writing at 0x00024550... (9 %)
Writing at 0x0002d52e... (12 %)
Writing at 0x00036db4... (15 %)
Writing at 0x0003ca0c... (18 %)
Writing at 0x00042eb0... (21 %)
Writing at 0x0004959e... (24 %)
Writing at 0x0004f4bc... (27 %)
Writing at 0x00056696... (30 %)
Writing at 0x0005c994... (33 %)
Writing at 0x00062c00... (36 %)
Writing at 0x000688ad... (39 %)
Writing at 0x0006e44d... (42 %)
Writing at 0x00074658... (45 %)
Writing at 0x0007a574... (48 %)
Writing at 0x00080187... (51 %)
Writing at 0x00085bfc... (54 %)
Writing at 0x0008bc73... (57 %)
Writing at 0x000914a7... (60 %)
Writing at 0x00097434... (63 %)
Writing at 0x0009d60a... (66 %)
Writing at 0x000a3181... (69 %)
Writing at 0x000a91d1... (72 %)
Writing at 0x000af4b7... (75 %)
Writing at 0x000b5916... (78 %)
Writing at 0x000bbc90... (81 %)
Writing at 0x000c2166... (84 %)
Writing at 0x000c7fb0... (87 %)
Writing at 0x000ce1fe... (90 %)
Writing at 0x000d5d64... (93 %)
Writing at 0x000dca8b... (96 %)
Writing at 0x000e2a37... (100 %)
Wrote 867152 bytes (526802 compressed) at 0x00010000 in 6.3 seconds (effective 1105.3 kbit/s)...
Hash of data verified.

Leaving...
Hard resetting via RTS pin...
Serial Monitor:
Waiting for WiFi Connection...
Waiting for WiFi Connection...
Waiting for WiFi Connection...
Waiting for WiFi Connection...
Waiting for WiFi Connection...
WiFi Connection Failed
BME688 test
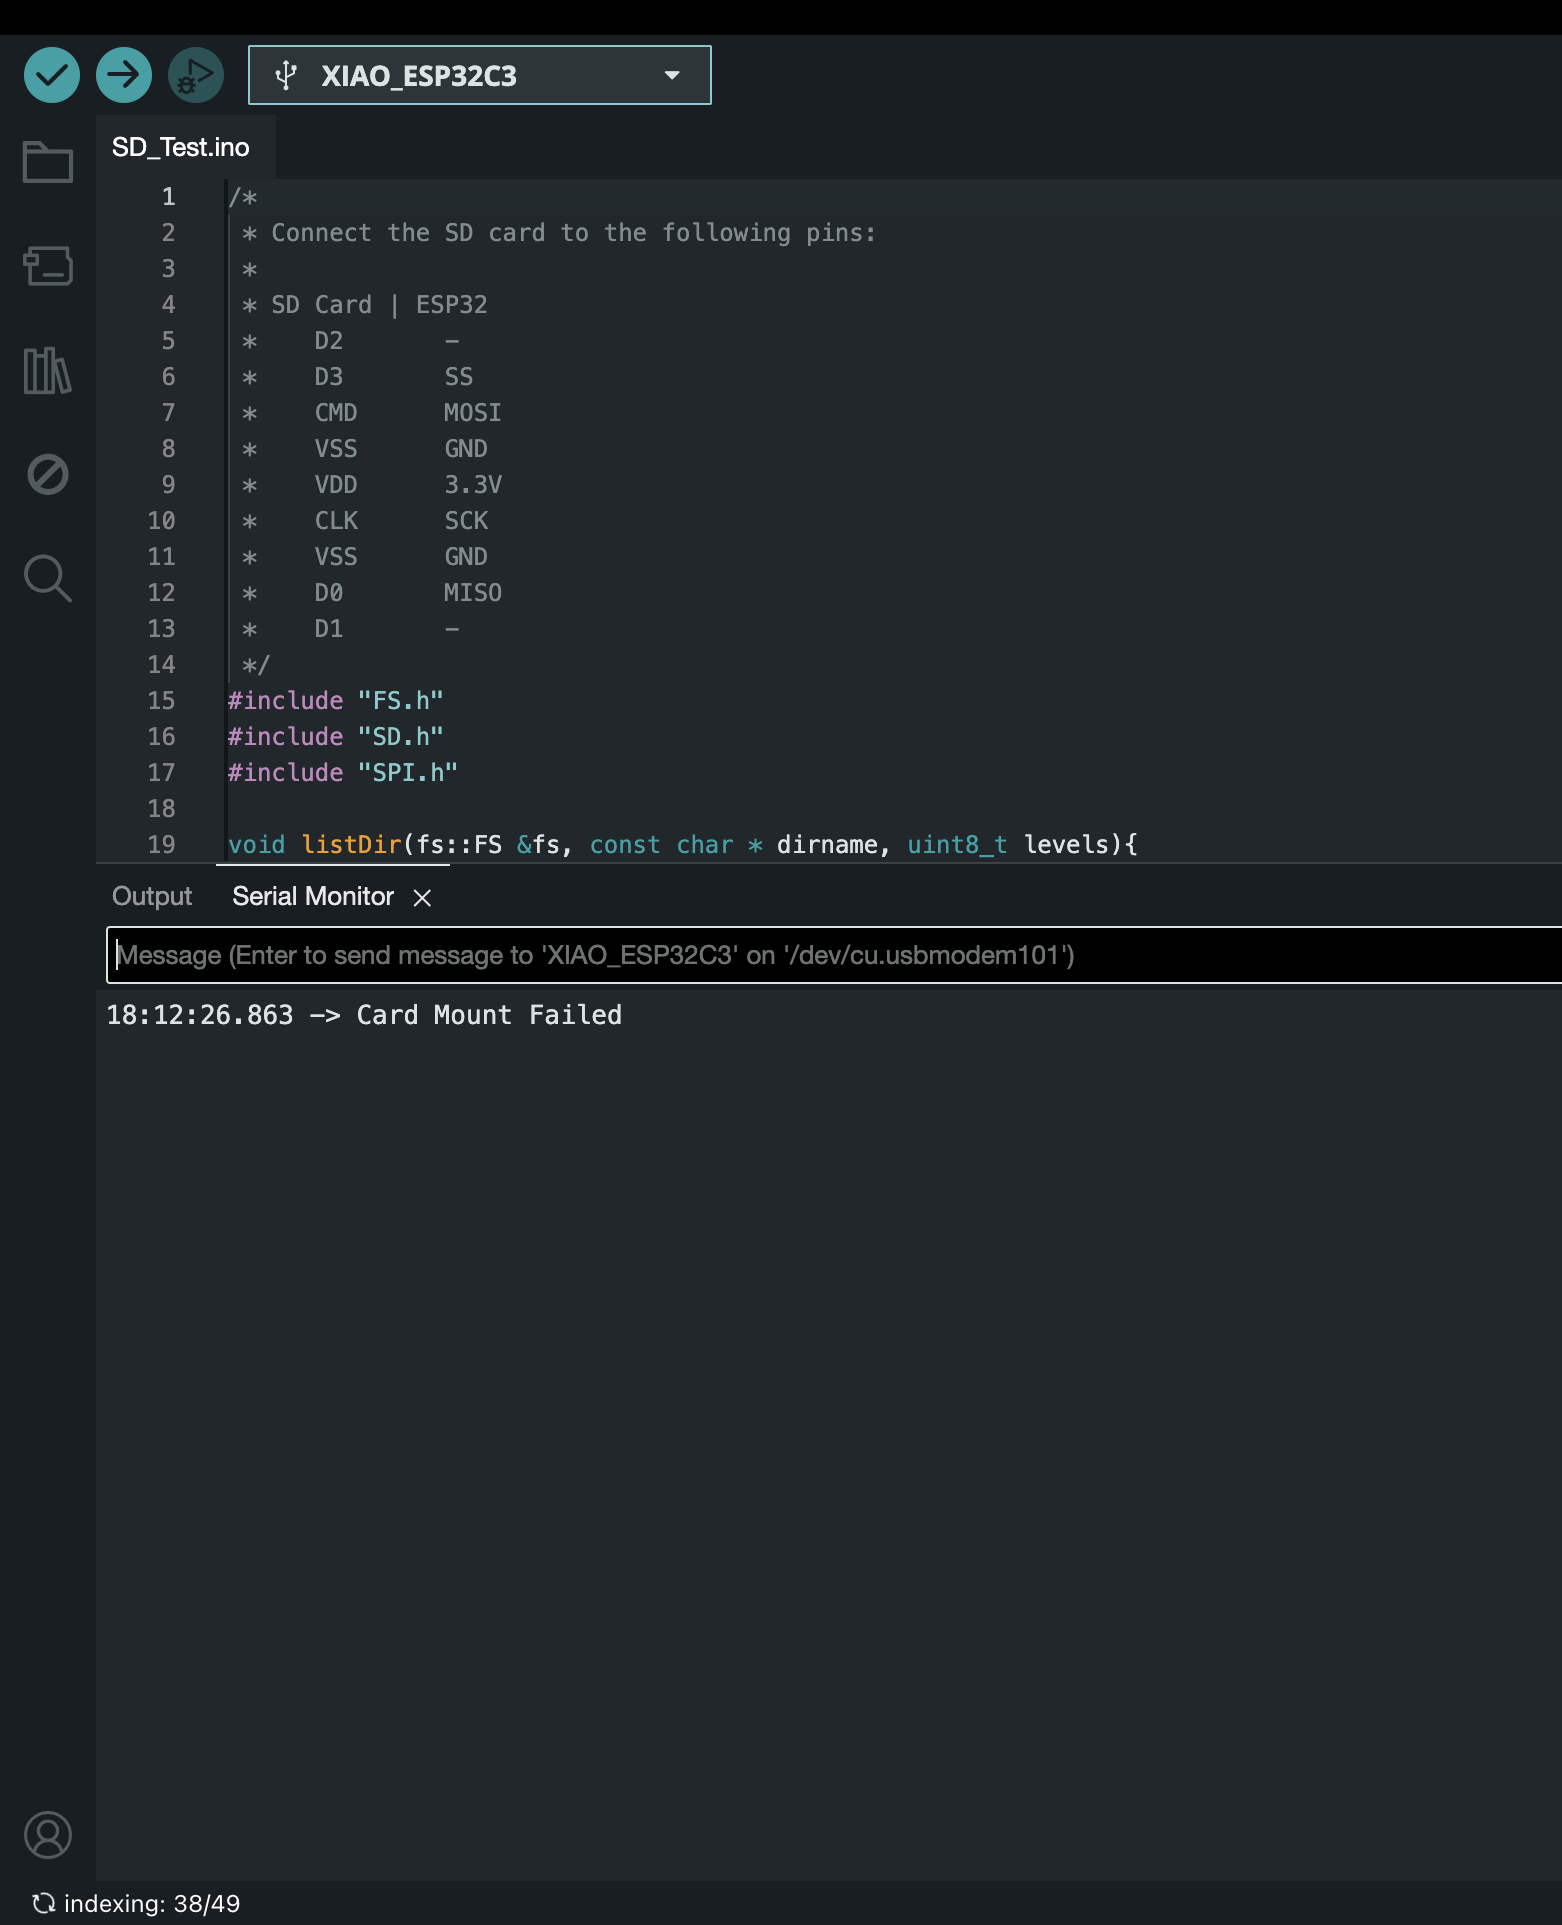
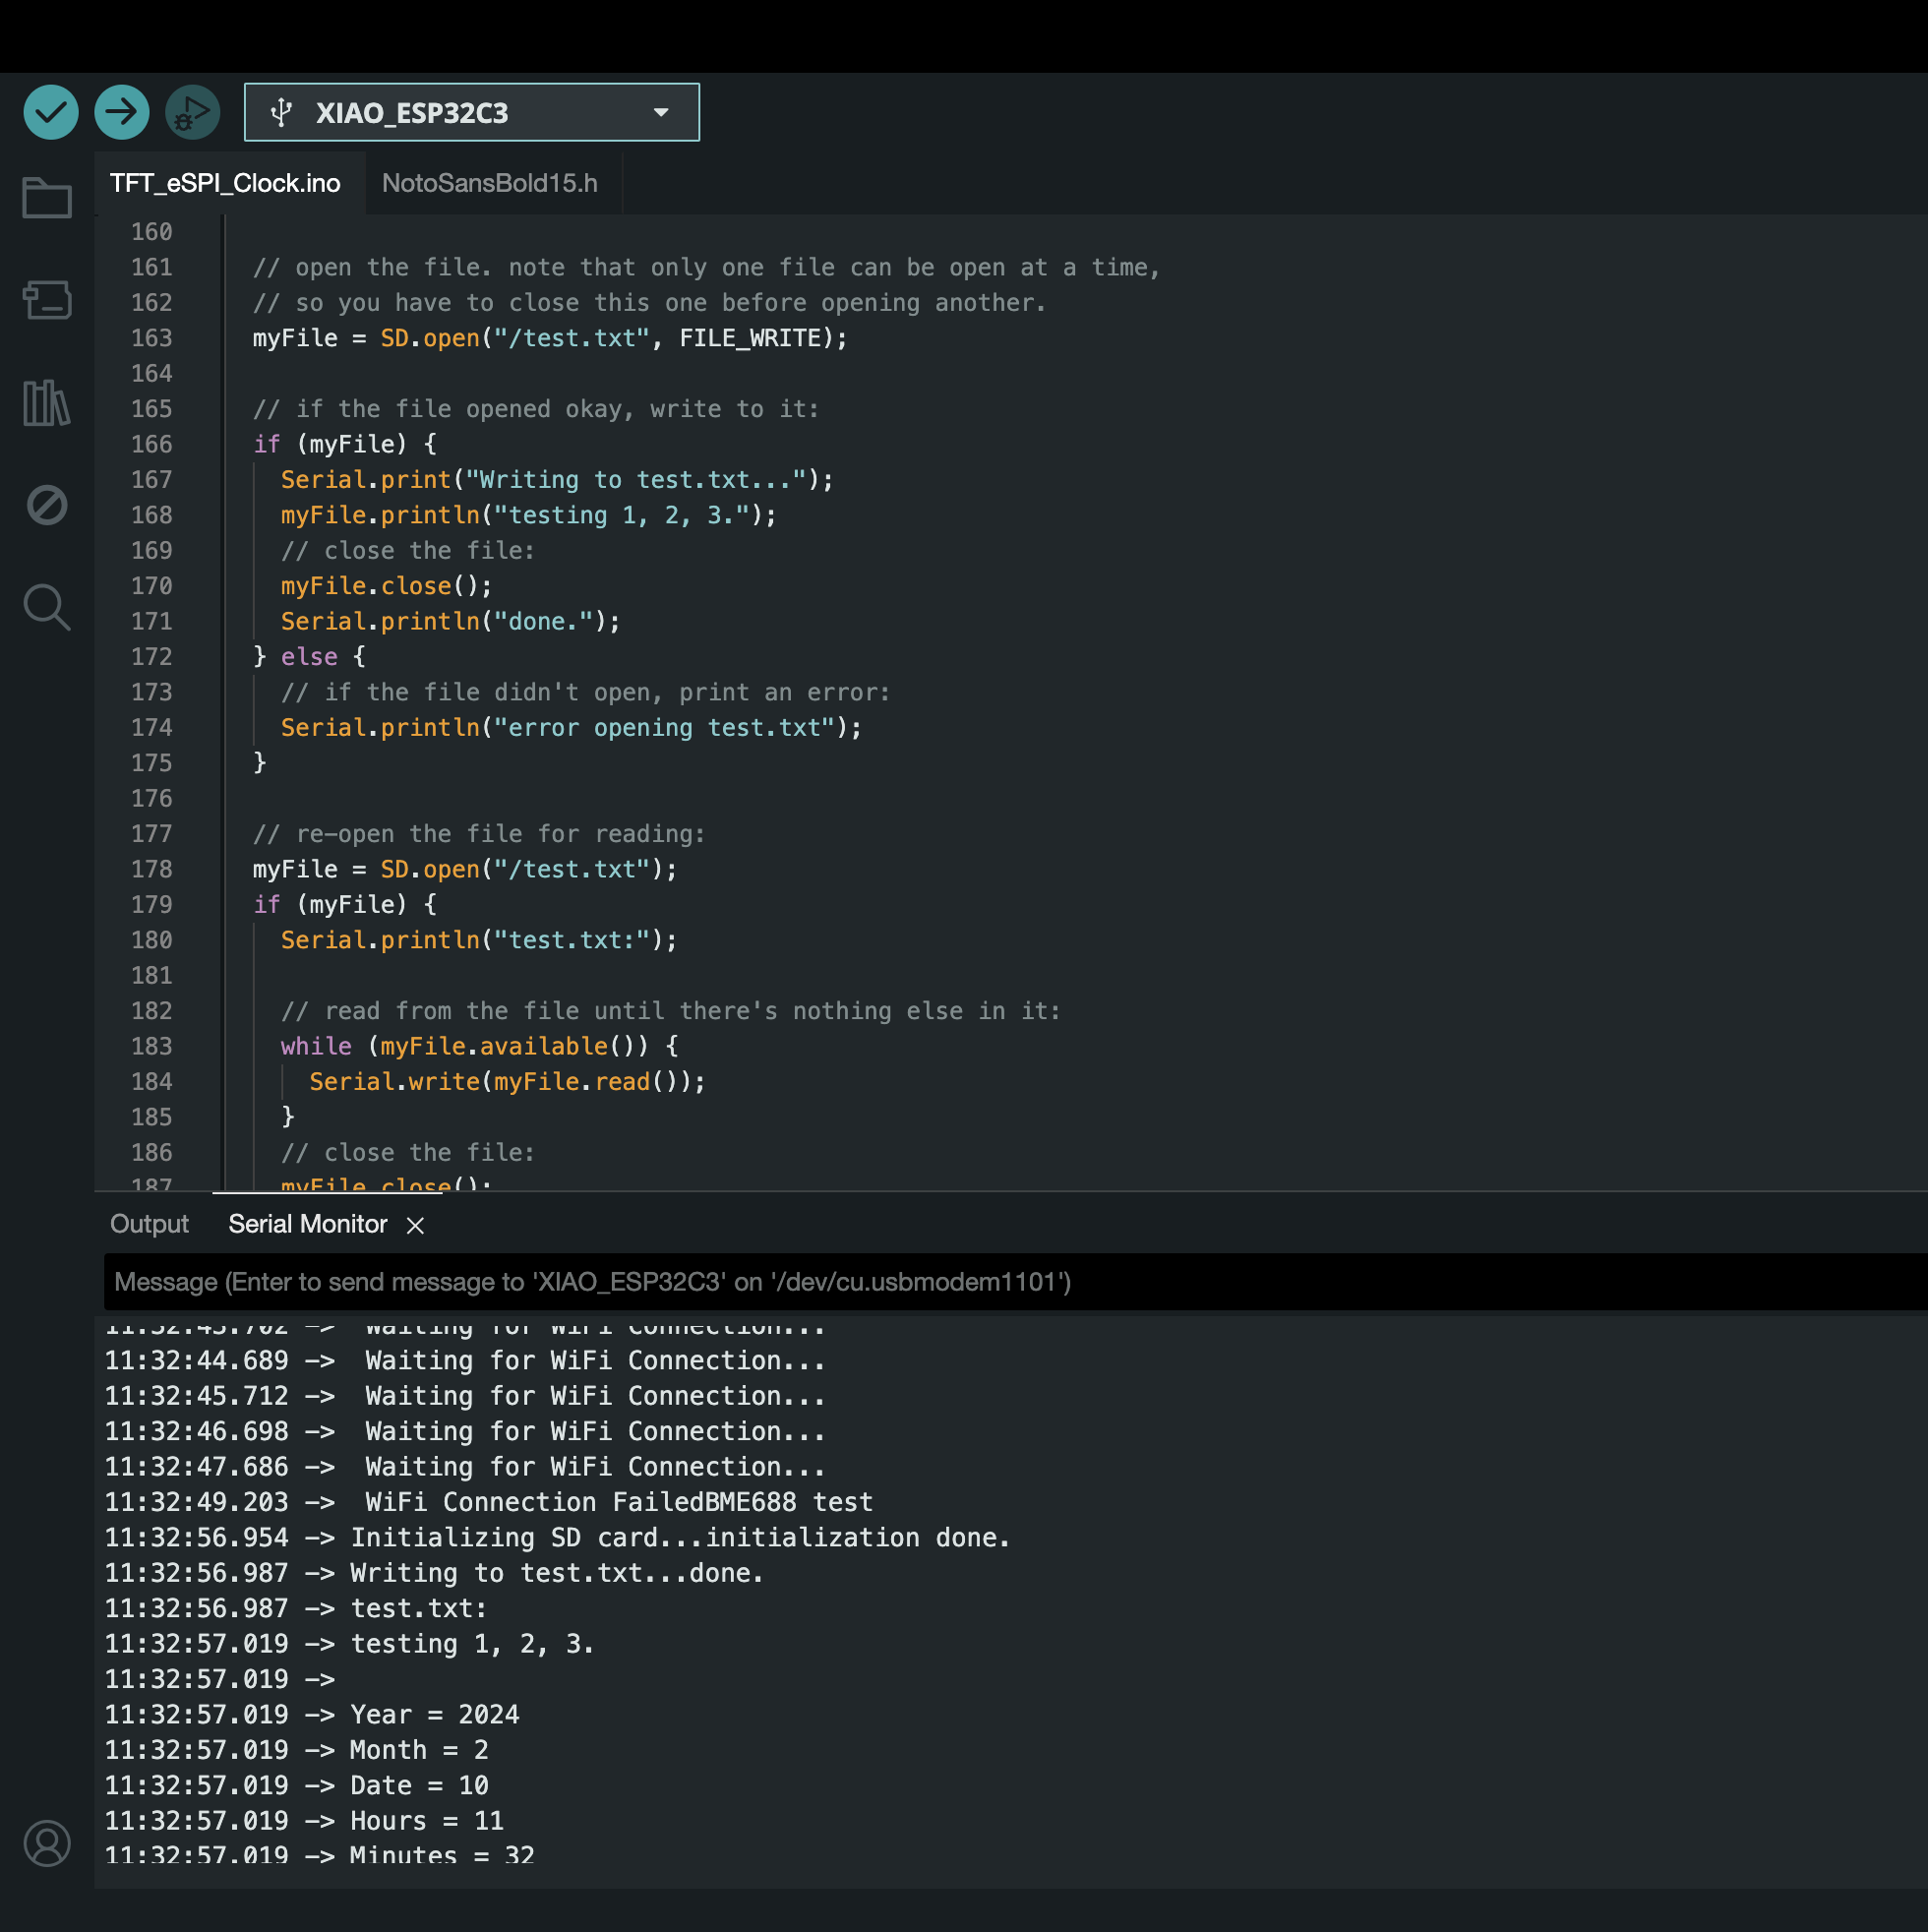
Initializing SD card...
initialization failed!
2024/02/11 18:02:35
Temperature = 25.08°C
Humidity = 26.30%
Gas = 139.85KOhms
SD Failed
2024/02/11 18:02:36
Temperature = 25.05°C
Humidity = 26.27%
Gas = 147.34KOhms
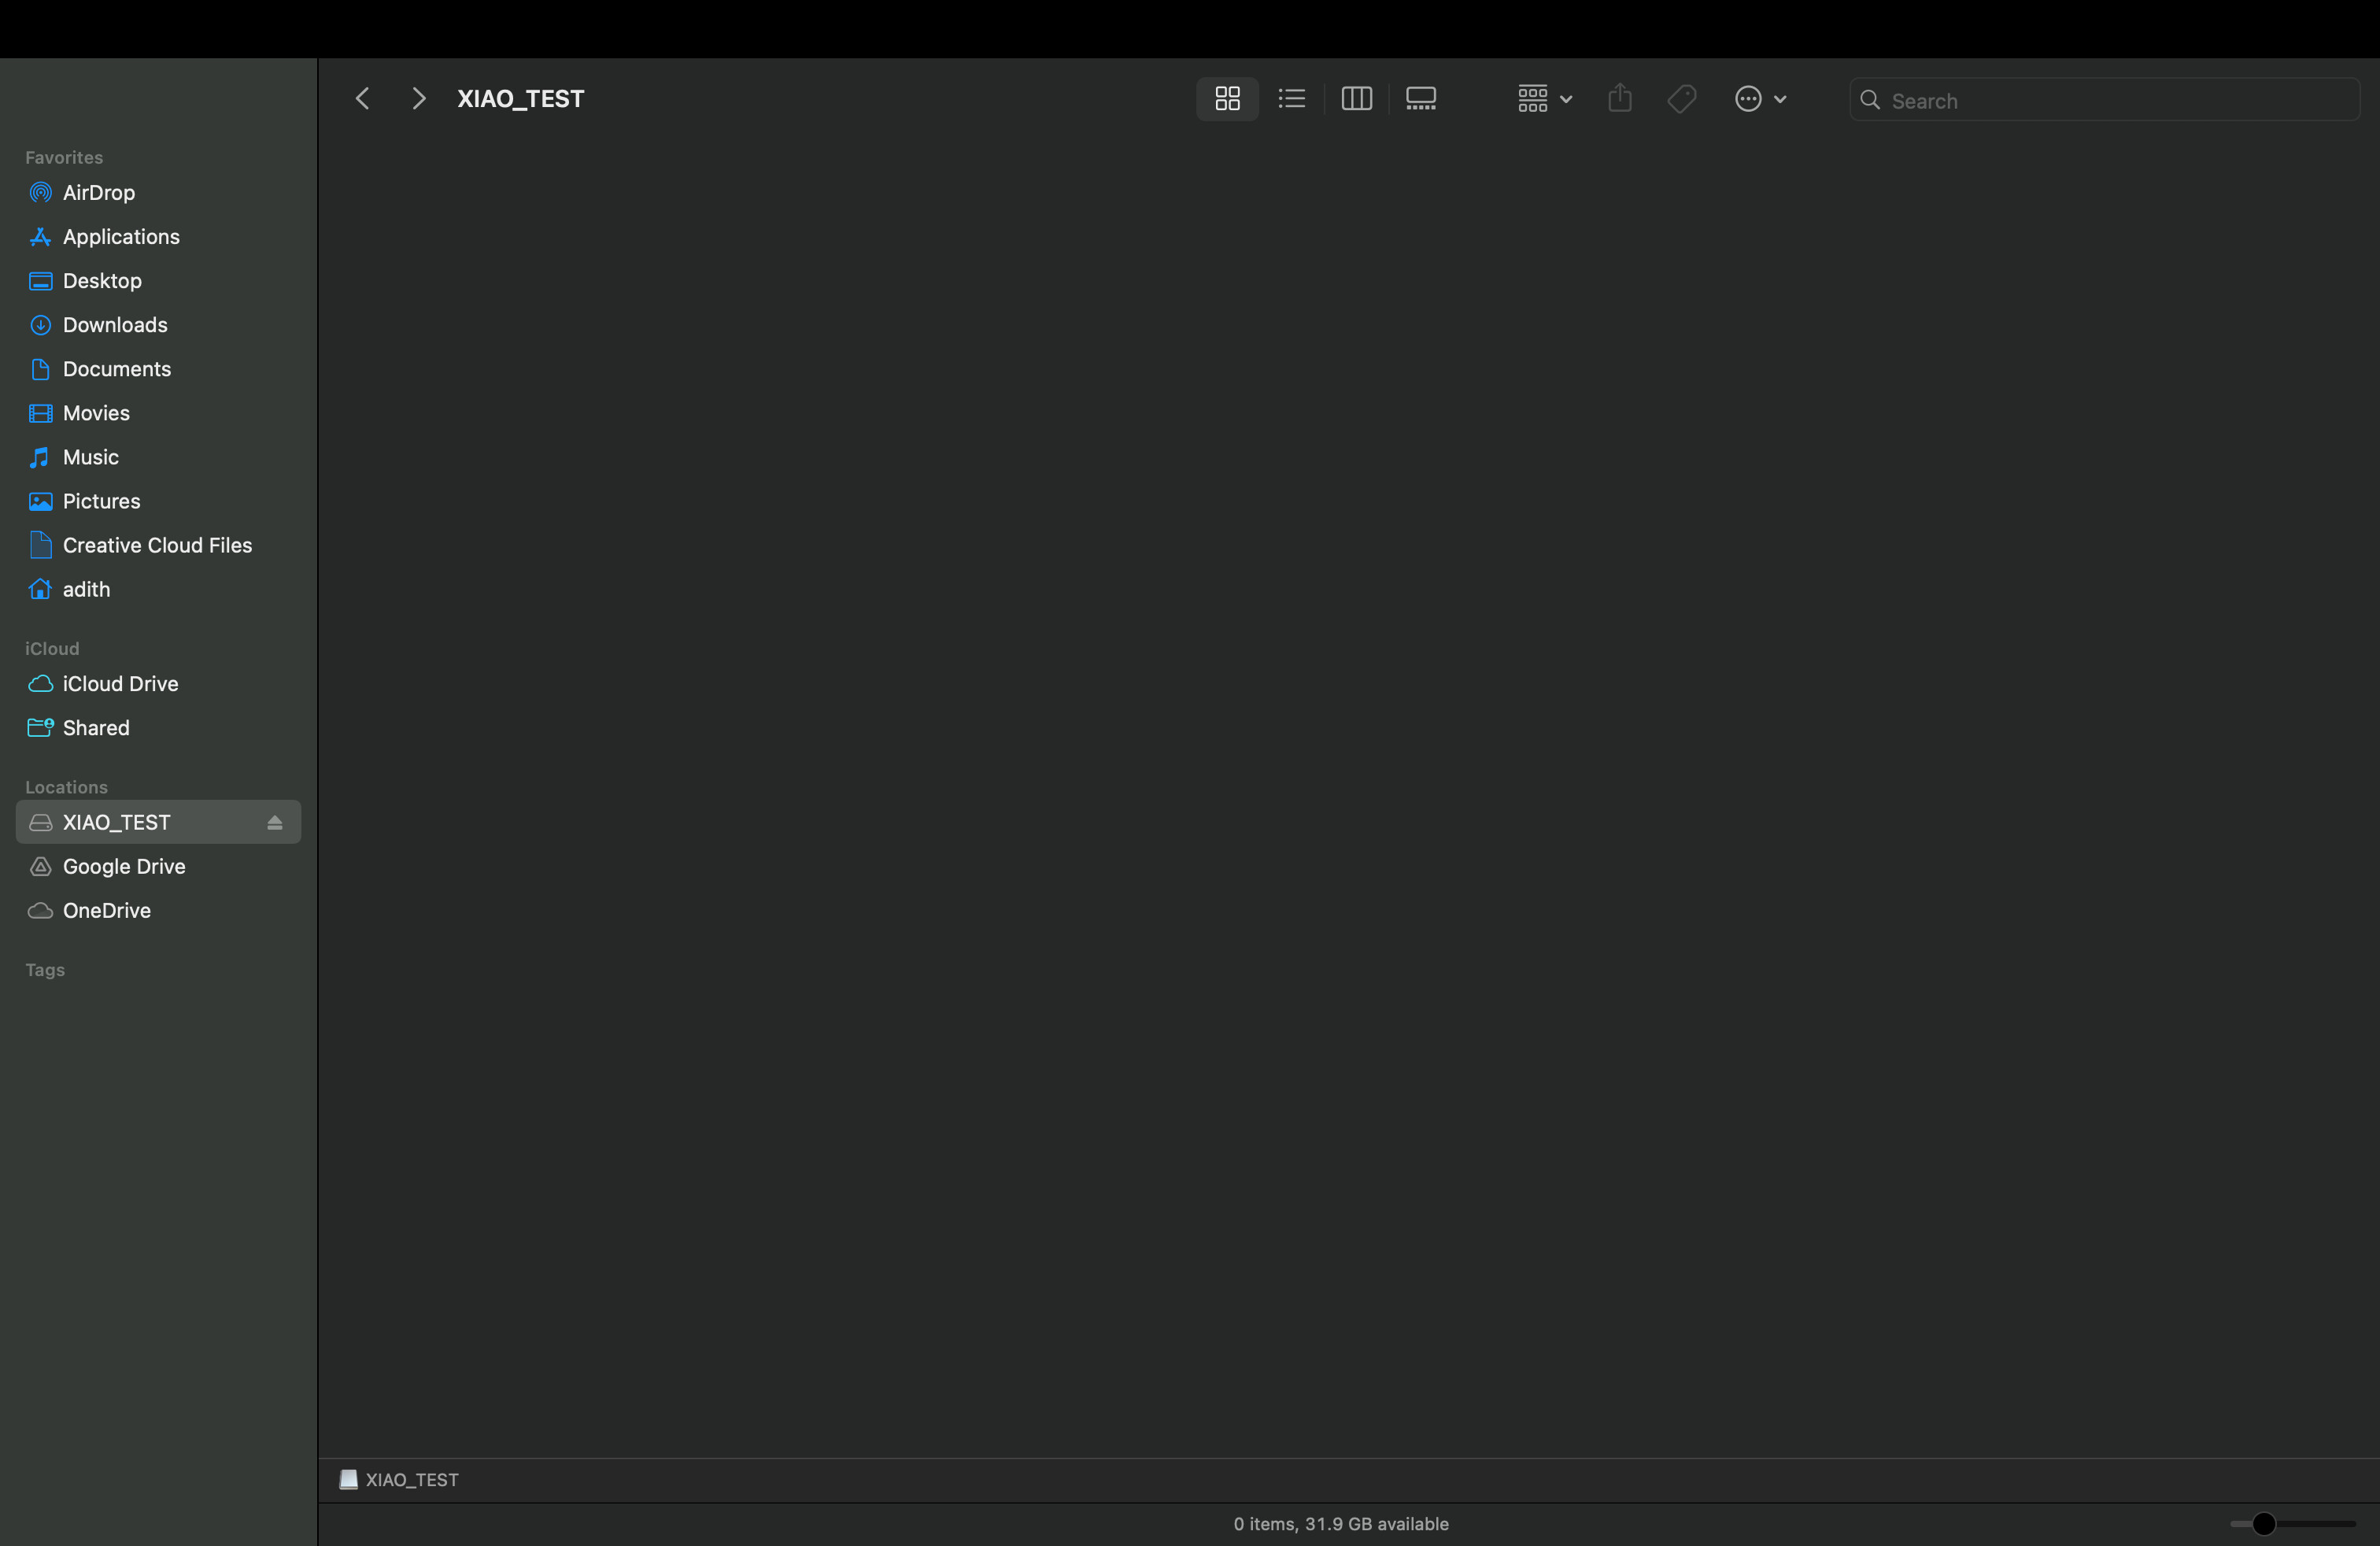
It’s XIAO_TEST. It doesn’t work if I change the name.
Man that’s too F’n close… Should work, I’m sure you are puzzled. I’am? 
You need to figure out how to drop my bin on it …Some how.
That will at least prove if the sd is bad or NOT. either bin.
my switches are off also? no ke switch on.
where you at? I’m in Hollywood,Florida.
mac book Pro or air?
GL PJ
I even tried it with SD_Test. It doesn’t work.
But it worked once yesterday and after that it doesn’t
I’m using MacBook Pro, and I’m at Chicago!
you tried remove the while serial statement in the setup function.
void setup() {
  Serial.begin(19200);
  //while (!Serial); // comment this out.
delay (2000); //add this
  Serial.println("Booting...");
Dam Rush Street comes to mind, fine times … got my first Ovation Guitar from a place there under the Train tracks. A very good friend worked in the County Tax appraisers’ office. I was in route to Turkey for a 3 year contract with DOD on a Radar base. as we say back in the DAY!
Did that now, still not Storing in SD, Failed.
ok , just a straw and it allows it to work without the serial port attached.
hmmm
magnifying glass and look in to the sd slot… if you can. does it look ok? all the pins flat and present?
you tried other SD cards right?
looks like the niner’s if you ask me… LOL 
now it looks like the chiefs… 
I will try with other SD card tomorrow.
Since it stored once for me yesterday, this SD card should be okay to use.
Hi there,
also can you try to build with
“Using library SD at version 1.2.4 in folder: C:\Users\Value Pawn\AppData\Local\Arduino15\libraries\SD”
PJ
Those pins are not correct, AFAIK.
D2 is the SS or CS for SD card from the Xiao , you have another chip?
lmk
WOW, So it did work once.? wth
same code now doesn’t run or that’s the output from the first run?
lmk
You have any other tools, like Visual Studio , or Platform io dev?
Yes, I made it store : testing 1, 2, 3.
in a test.txt file. Look at the serial moniter here!
I’m not any other tool now, but I can try setting it up and using it.
I have nRF52840 with me