Regarding the completion degree of your firmware, maybe there is a confusion because you write
[size=85]Todo list:
finish oscilloscope module - 92% done
calibration - 80% done
fft view - 80% done
signal generator - 90% done
connection with android tablet/phone - 90% done
optimize ROM usage (many bitmaps are stored as 8bits per pixel) - 0%
[/size]
… but to be honest, I didn’t notice anything not working…
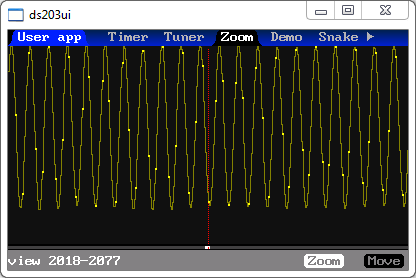
There is a function which I would love: the ability to display alle 4096 samples at once by default (i.e. a complete sweep) and to be able to zoom in (a factor 16 = 4096/256 shoud be possible). Of course, this would not work for the shortest time bases. Maybe this is what is called oversampling. Or is it already implemented and I didn’t find it?
Anyways, I congratulate for your fantastic work, thank you!
Patrick, it’s already there, User modules -> Zoom, it allows you to see whole 4096 sample buffer on single screen as well as zooming in to see few samples on screen.
I have played with this feature yesterday, but it is not very useful for me because:
I couldn’t stop sampling (as “zoom” it is not integrated in the oscilloscope, the usual commands do not apply)
triggering was not stable (the wave is stable in the oscilloscope, but not in the “zoom” mode)
… but your Alternative dso firmware is something fantastic and I don’t intend to use anything else in the future - with or without zoom!
Another question: is there something like an user documentation? The firmware is very user friendly but some informations about specific functions or the general philosophy would be helpful (e.g. the fact that the generator seems to be in a separate software block, but in reality it still works while the oscilloscope is running, or how to use the masks, the cursors, the PID controller…). Some informations about the compatibility with other applications (like jpa’s Pawn interpreter and alterbios) would be helpful too.
Patrick, I know that there are some issues… And the for now no documentation is available… But I have also good news, today I have finished the software (bitbanged) I2C interface, it uses the USART TX/RX pins for communication
The GPIO user application automatically identifies the attached device and display some report including decoded variables from sensors, so far these devices are supported:
If you are downloading from the github, check to see that you have selected the “Raw” option on the web interface. Then Right click and “save-as”. The hex file should be no larger than 1xx kb. I had this problem earlier and now know how to avoid it
Surprisingly the size of current HEX is about 500kB, 500kB is also the size of DFU drive. I noticed, when I was adding more features, the hex file became too large to upload it through DFU. But the file on github is small enough to fit the empty DFU drive. Please check whether the drive is empty (try showing also the hidden files), currently I am working on new bootloader, but I need some more time to finish it. It allows the user to upload HEX or ELF file and flash it & run directly from the user interface.
For the DCF77 module, you need to set the trigger to SCAN, timebase to lowest possible (200ns/div) and set the trigger to reasonable level. I tested it with old broken LCD clock, I put the CH1 probe to the output signal of DCF module and it worked well. So generally speaking - you need either standalone DCF module or disassembled digital clock. DCF modules usually have two digital signals - one as chip select and the second produces square signal - the pulse length is 100ms for ‘0’ or 200ms for ‘1’, single bit is transmitted each second, the pulse should have positive polarity (idle = low voltage, pulse = high). Set the trigger level in middle of these voltages.
galmiche, try downloading older revision of the HEX file. In the github, go to Bin folder and click on history button, there you can select any older revision and browse its repository. For example, select “browse code” for Jan 27, 2013 and then download HEX file from this version. The older revision, the smaller hex
Hi, I’d really like to try the app but each time I flash it the DSO comes back with .err file. I attempted older hex files that were slightly smaller (433k or so) with the same results. I have no issues loading the latest community edition though. Am I missing something? :?
I reinstalled the latest community edition files as well as FPGA firmware and now I was able to install gabonator’s app.
I’ve got to say I most definately looked like this after I run through the GUI. It is very well though out and very responsive. Even the candy look is there! :mrgreen:
I can confirm that this works in hw2.7, but the uploading of the hex file from git is currently problematic. I deleted the html headers and footers but the file was still secretly a txt file and not a hex.
No matter what I did, win7 would add a secret .txt after the .hex so even though you see APP_G251.hex, it is actually APP_G251.hex.txt. This causes an error when uploading the file. The error will be, “Item not found, the item is no longer in computer” which seems to be caused by the dso203 rejecting the txt file.
My workaround solution to this was to download the whole zipped repository from git hub and then upload the .hex file from the bin directory into the drive named DFU V3_11_C on the DSO203. Note that the hw2.7 drive name has changed but that it doesn’t matter.
Upload was successful and now that I’ve contributed my little bit I’m off to play with my new toy. Thanks all. We’re standing on the shoulders of giants.
If you like to experiment, try latest version. In the user modules there is a file browser that can flash HEX files, FPGA images and ELF files (only experimental) directly without restarting into DFU mode. When flashing any image keep in mind that it must be built for slot 2, 3, or 4. Slot 1 is used by my firmware. I tested it with the tetris, jpa’s logic analyser & pawn, and it seems working pretty well.
Well, I followed the instructions with a Win7 system and 2.70 hardware and it bricked the scope. Every time I try to copy the hex file over it fails (which the github page says I should ignore) and it boots the scope to a black screen. Ideas?
ETA: I should add I am looking for ideas on how to make this work or if anyone had any experience like this. I can reflash the unit I suppose (I hope…) but if there is something I can do short of that, I would be appreciative. One thing that may be of interest is the time it took to copy the file. I have only USB 2.0 on this windows 7 machine. Would a faster copy get the file over there properly?
A little update. I am back to 1.07. It’s something with the copy of that file that is causing the issue it appears. After one of those copy attempts, there was an RDY file so that may be the source of the “bricking”, however temporary that was. It must have tried to process a partial file. I am going to find a more modern PC (mac and linux user here, yeah, I admit it :? ) and try this again. It will be monday. I wonder if the USB speed is the culprit.


 after I run through the GUI. It is very well though out and very responsive. Even the candy look is there! :mrgreen: